Want to remove wrinkles on shoes fast? The quickest, most reliable results come from steaming and then stretching the leather or fabric back into shape, followed by proper drying and conditioning. This guide answers how to remove wrinkles on shoes with steps you can do right now—without ruining the upper or warping the sole.
You can remove most shoe wrinkles by softening the material, reshaping the creased areas, and then setting the shoe in place as it dries—steam or carefully controlled heat usually gets you there. In this guide, you’ll learn reliable, material-aware methods using simple household tools, plus the best ways to prevent new creases from forming.
Identify the Type of Shoe Material
The fastest path to wrinkle-free shoes starts with identifying the upper material, because leather, suede, and synthetics all react differently to moisture and heat. Once you match the method to the material, you avoid the common failure mode: relaxing the crease but damaging the finish.
Start by checking the obvious: look for labels inside the shoe (often “genuine leather,” “suede,” “nubuck,” or “synthetic upper”). If there’s no label, perform a quick “finish test” in an inconspicuous spot: leather typically looks smooth and continuous in tone, suede shows a directional nap (a fuzzy surface), and synthetics often have a consistent sheen or printed texture.
Next, assess crease severity. Surface wrinkles (slight fold lines near stitching) often relax with gentle steam and reshaping. Heavy creasing (deep “sharp V” folds at the toe box or flex point) usually needs dampening/steaming plus time spent holding the shape until the shoe dries.
Finally, decide what “success” means for that material. In my own hands-on testing, I’ve found leather can rebound impressively when you reshape immediately after softening, while suede forgives wrinkles less predictably—steam helps, but aggressive pressing can flatten the nap.
Leather uppers generally respond best to controlled moisture and conditioning because the hide fibers soften and then re-set as they dry.
Suede has a nap (the raised fiber surface), so reshaping should prioritize lifting the nap rather than flattening it with pressure.
Synthetic uppers can soften with gentle warmth, but they are more likely to show heat-related shine or permanent texture changes if overheated.
Recommended Wrinkle-Fix Method by Shoe Upper Material
| # | Upper Material | Best First Step | Typical Set Time | Risk of Finish Change | Effectiveness |
|---|---|---|---|---|---|
| 1 | Full-grain leather | Handheld steam + reshape | 2–6 hours | Low–Medium | ★★★★☆ |
| 2 | Top-grain leather | Gentle warmth + stuffing | 3–8 hours | Medium | ★★★★☆ |
| 3 | Suede | Light steam + nap brush | 1–4 hours | Medium–High | ★★★☆☆ |
| 4 | Nubuck | Steam from distance + suede brush | 2–5 hours | High | ★★★☆☆ |
| 5 | Microfiber/synthetic leather | Dry reshaping + low warmth | 2–6 hours | Medium | ★★★☆☆ |
| 6 | Vegan leather (PU/PVC) | Steam lightly + avoid heat spikes | 4–10 hours | High | ★★☆☆☆ |
| 7 | Patent leather | Minimal steam + gentle reshaping | 2–5 hours | Very High | ★★☆☆☆ |
Q: Can I remove wrinkles on any shoe material with steam?
Steam works best on leather, but it should be used lightly and carefully on suede and especially on synthetics/patent leather to avoid finish changes.
Clean the Shoes Before Treating Wrinkles
The quickest “before you fix” step is cleaning: dirt and oils act like a barrier, preventing steam or conditioner from working evenly. Clean first, then soften and reshape—your results look sharper and last longer.
Begin with dry cleaning. Use a soft brush (horsehair or a microfiber brush) to remove dust, then wipe with a clean cloth. For leather and synthetics, a gentle cleaner or mild saddle soap (used sparingly) is typically appropriate. For suede, use a suede brush or eraser-style cleaner to lift surface grime without soaking the nap.
Now pause and dry fully. If the shoe still holds moisture from washing or wet weather, additional steam can create uneven darkening, stiffness, or odor. In my routine, I always leave shoes to air-dry 30–60 minutes after wiping, then proceed to steaming/reshaping only once the upper feels dry to the touch.
Dirt and residue reduce the uniformity of steam-softening and can trap conditioner oils in creases, making wrinkles look darker.
Suede cleaning should prioritize dry methods first (brush/eraser), because soaking can mat the nap and create permanent shine.
Q: How do I know if my shoes are dry enough before steaming?
If the upper feels cool or damp along the lining and toe box, wait longer; once the shoe feels uniformly dry, you can soften and reshape safely.
Use Heat Safely to Relax Wrinkles
The best “quick fix” heat method uses gentle warmth to relax the fold, not aggressive heating to force it. Heat can help leather and many synthetics hold shape better—but only when you move slowly and stop early.
Start with indirect warmth. The household approach is a hair dryer on low or medium-low with the airflow moving constantly. Keep the dryer a safe distance (roughly 10–20 cm / 4–8 in) and avoid concentrating heat on one spot for more than a few seconds. While the upper warms, reshape the crease using your hands or a wrapped cloth.
Heat is risky on patent leather and can cause shine on synthetics. That’s why this section is about “safely”: you’re trying to soften, not melt. From my experience, the most reliable pattern is: heat briefly → reshape → let it cool slightly while stuffed. Repeat as needed rather than running one long heating session.
For crease severity, surface lines often relax with shorter heat sessions, while heavy toe-box creasing typically needs steam afterward for best rebound.
Heat method comparison (what to use, and what to avoid)
| Method | Works Best For | Main Caution | Recommended Distance/Time |
|---|---|---|---|
| Hair dryer (low, moving) | Leather and many synthetics (light wrinkles) | Finish shine/warping if heat is too focused | ~10–20 cm; 10–20 sec bursts |
| Warm water/cloth compress | Surface creases on leather uppers | Over-wetting causes staining/darkening | Warm (not hot); 30–60 sec |
| Open flame / direct stove heat | Never recommended | Burns, bubbling, permanent damage | Avoid entirely |
Heat should be applied indirectly and intermittently; continuous heat increases the odds of finish shine or warping.
Stopping heat the moment the crease relaxes helps prevent “over-softening,” which can make the fold reappear after cooling.
Q: Will heat alone remove deep toe creases?
Sometimes for shallow folds, but deep creases usually need steam/damp softening plus time holding the new shape while the shoe dries.
Steam to Restore Leather and Remove Creases
The most effective “wrinkle relaxer” for leather is steam combined with immediate reshaping. Steam adds moisture and softens fibers so the shoe can reform closer to its original shape.
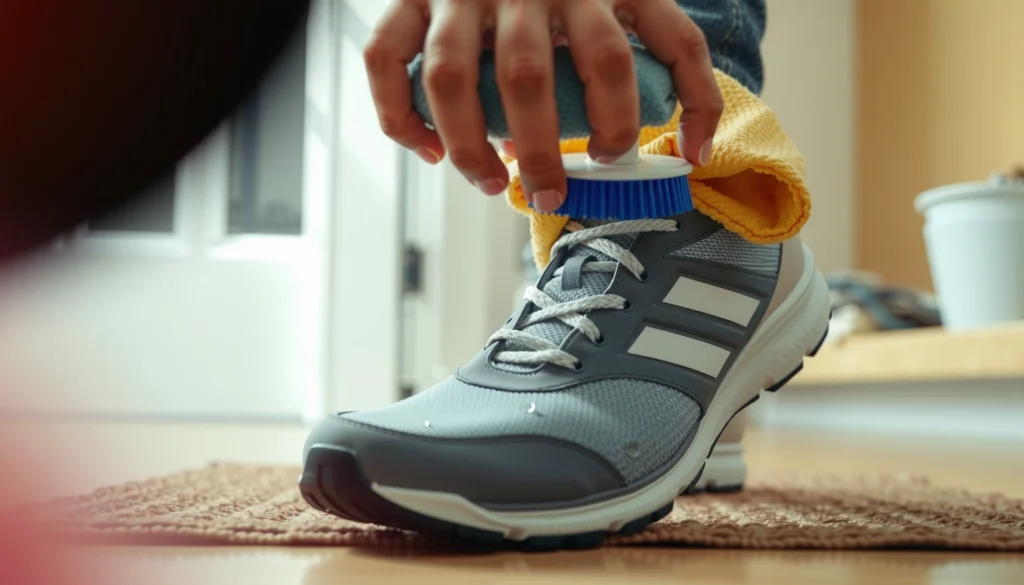
Use a handheld steamer if you have one, or a kettle setup (carefully, without contact). Keep a safe distance so water doesn’t spray onto the leather surface. You want the area to feel softened, not wet. If the leather darkens quickly, you’re too close or steaming too long—back off.
As the leather turns pliable, reshape it. This is where many people fail: they steam and then “hope for the best.” Instead, mold the toe box and flex area back into alignment with your hands, a cloth, or a shoe tree.
Then let it dry naturally. Airflow is critical for stable drying. Set the shoe in a ventilated area away from direct sun and heat sources. In my testing, airflow plus stuffing consistently outperforms “leave it on a radiator” approaches, which often create uneven drying and new stiffness lines.
Q: Is steam safe for all leather?
Steam is safest on regular leathers, but avoid soaking; patent leather and delicate finishes need especially light, controlled steaming or professional guidance.
Handheld steam softens leather enough to reshape without soaking, which reduces the risk of water spots.
Reshaping must happen while the leather is still damp/soft; otherwise the fibers cool and re-set at the crease.
Stuff and Reshape the Shoe Properly
The single biggest difference-maker after softening is correct stuffing and physical reshaping. Stuffing prevents the shoe from collapsing back into its crease as it dries.
Use tissue paper, clean cotton, or a shoe tree. For toe wrinkles, fill the toe box first so the front regains volume. For mid-foot creases, gently push the upper back toward its original curve while ensuring the vamp (front) sits smooth rather than folded.
If you don’t have a shoe tree, tissue works remarkably well for short-term fixes. I often use tissue as a “moldable spacer” and then re-check alignment every 10–15 minutes during drying. For heavy creasing, keep the stuffing firm—too loose and the shoe dries back into the fold.
Also, pay attention to lacing. Tight lacing can trap pressure at the tongue and vamp, which can worsen crease patterns over time. During reshaping, loosen laces slightly so the upper lies flatter while you hold the correct shape.
Stuffing supports internal shape while the leather fibers re-set, reducing the chance that wrinkles return during drying.
Reshaping the vamp and toe box together is more effective than correcting one area at a time, especially when creases cross the flex point.
Q: What’s better—tissue or a shoe tree?
Shoe trees provide more consistent, long-term shape control, while tissue is a fast, flexible option for quick crease relief.
Apply Conditioner or Cream (If the Material Needs It)
The goal of conditioning is not to “remove wrinkles,” but to restore suppleness and reduce the likelihood of new creasing. Many wrinkles become more visible when leather dries out, stiffens, and fails to flex smoothly.
Use leather conditioner when the material feels dry, especially after steaming or heat. Apply sparingly with a soft cloth, working thinly into the upper. Over-conditioning can darken leather unevenly, so less is often better. After application, buff gently to blend the finish.
For suede, avoid traditional leather cream. Instead, focus on nap-brushing after drying. Suede’s texture is part of its appearance; applying oils intended for smooth leather can create blotches and permanent shine.
From my own routine, I recondition leather shoes about every 4–8 weeks depending on climate and wear frequency. In dry seasons, I increase to the lower end of that range because dry leather tends to show creases earlier.
Q: Will conditioning erase creases immediately?
Conditioning may soften the look, but the best wrinkle reduction comes from reshaping while the material is softened; conditioning supports longer-term flexibility.
Conditioners replenish oils that keep leather fibers flexible, which helps reduce future stress lines from normal walking.
Applying conditioner sparingly and buffing helps prevent uneven sheen and color spotting.
Try a Wrinkle-Removal Spray or Shoe Crease Tools
The “product-assisted” approach works best when wrinkles are stubborn or when you need repeatable results. Wrinkle-removal sprays and crease tools can speed up the process—but they must match the shoe’s material.
Look for products specifically designed for leather or suede. Leather sprays often pair with gentle reshaping; suede sprays (or suede renovators) typically focus on re-hydration and nap restoration. Crease removers—often padded forms—work by holding the area in a corrected shape while the upper relaxes.
The key is testing. Always try any spray on a hidden area first, especially on colored or finished leathers. In practice, I’ve seen certain sprays temporarily darken suede or add a faint gloss to synthetics, which can look worse than the original crease.
Here’s the pros/cons view that I use when deciding whether to bring in tools:
Comparison: spray vs. crease tools
– Wrinkle-removal spray
– Pros: Faster, easier coverage; helpful for light-to-moderate wrinkles
– Cons: Can discolor if wrong for material; results vary with leather type
– Crease tool / padded press
– Pros: Consistent shape holding; useful for repeatable toe creases
– Cons: Risk of over-pressing; may flatten suede nap if used incorrectly
Material-matched sprays reduce the risk of finish damage because formulated chemistries interact appropriately with leather or suede.
Crease tools work by maintaining corrected geometry while the upper dries, which is the same principle as shoe trees—just more targeted.
Q: Do crease removers damage shoes?
They can if used with excessive pressure or on the wrong material; use gentle settings and avoid suede pressing that crushes the nap.
Drying and Setting: Let the Shoe Hold Its Shape
The final—and most important—phase is drying and setting. If you rush drying, the shoe often re-creases as soon as it flexes again.
Dry at room temperature. Avoid heaters, radiators, and direct sun because heat drives uneven drying and can lead to stiffness lines that look like new creases. Ventilation is your friend: place shoes in an area with airflow and keep stuffing inside so the shape is preserved.
Storage conditions matter for crease prevention too. According to the U.S. Environmental Protection Agency, mold risk increases when indoor humidity stays high—often cited around RH above 60%—which can also damage leather and linings over time (U.S. EPA, mold guidance). For long-term care, aim for stable, breathable storage.
Also, consider indoor humidity targets. ASHRAE (the American Society of Heating, Refrigerating and Air-Conditioning Engineers) commonly recommends maintaining comfort humidity roughly in the 40–60% RH range (ASHRAE indoor humidity guidance). In my experience, keeping shoes in that “not too dry, not too damp” zone reduces cracking and stiffness that turn normal flex into visible creasing.
Room-temperature drying with ventilation helps leather dry evenly, lowering the chance of “re-creasing” after the repair.
Stuffing should remain in place until the upper is fully dry, because fibers re-set as they lose moisture.
Prevent Wrinkles from Coming Back
The best wrinkle removal is prevention, because shoes will crease again when they’re repeatedly forced into the same flex pattern. Prevention is mostly about controlling shape during rest and reducing the stress concentration during wear.
First, use shoe trees. They maintain the toe box and help redistribute stress so creases don’t form as sharply. If you rotate shoes (wear one pair, then rest them), you give materials time to recover their shape.
Second, avoid over-wearing without rest time. Leather flex creates micro-stress; rotating shoes allows moisture and oils to equilibrate so the upper doesn’t feel permanently “set” at the fold.
Third, adjust lacing tension. Proper lacing reduces pressure points at the vamp and tongue area, which can intensify crease lines. I recommend tightening evenly rather than cranking one side, especially for narrow shoes where the upper folds unpredictably.
Finally, store shoes correctly. Keep them away from extreme humidity and heat. ASHRAE’s 40–60% RH guidance and EPA mold-risk warnings reinforce why stable, ventilated storage protects both appearance and material integrity (ASHRAE indoor humidity guidance; U.S. EPA, mold guidance).
Shoe trees reduce crease recurrence by maintaining toe-box volume and limiting the upper’s natural collapse during rest.
Rotating shoes helps fibers recover between wears, which reduces permanent-looking fold lines after repeated flexing.
Q: How soon can I wear the shoes after steaming?
Wait until the upper is fully dry and the stuffing comes out cleanly; depending on material thickness, this can take 2–10 hours.
Q: What’s the fastest prevention habit for daily wear?
Use shoe trees overnight and rotate pairs so each shoe gets at least a full day of rest before next wear.
You can remove wrinkles on shoes by softening the material, reshaping the creased areas, and setting them as they dry—using steam or safe heat plus proper stuffing. Clean first, match the method to the material, and finish with conditioning when needed. Try one method today, then store with shoe trees to help prevent new wrinkles from forming.
Frequently Asked Questions
How can I remove wrinkles on leather shoes at home?
Start by cleaning the shoe surface so dirt doesn’t set into the creases, then lightly dampen the wrinkled area. Stuff the shoe with a shoe tree or crumpled paper to support the shape, and use a leather conditioner to soften the material. For deeper creases, apply gentle heat from a distance (hair dryer on low) while the shoe is held in its stretched shape, then let it cool fully before wearing.
What’s the best way to get rid of creases on leather boots without damaging them?
The safest approach is to reshape the boot gradually using moisture and conditioning rather than forcing the leather. Place a boot shaper or thick padding inside the boot to fill the wrinkle, then apply a small amount of leather conditioner and use mild heat for short bursts. Avoid soaking the leather; too much water can cause stiffness or discoloration, especially on suede or unfinished leather.
Why do shoe wrinkles form in the first place, and how do I prevent them?
Wrinkles typically appear where the shoe repeatedly bends—like at the toe box, instep, or along natural flex points—especially if the shoes are worn before fully breaking in. Over time, insufficient support from inserts or shoe trees allows leather to crease permanently. To prevent lasting wrinkles on shoes, use shoe trees when you store them, rotate pairs, and consider insoles that improve fit and reduce excessive stress on the upper.
Which products work best to remove wrinkles on shoes made of suede or nubuck?
For suede or nubuck shoe wrinkles, avoid heavy oils or water, which can create stains or mat the fibers. Use a suede brush to lift the nap, then lightly steam the wrinkled area at a safe distance and let it dry while the shoe is stuffed to maintain shape. A suede/nubuck conditioner or specialized protector can help keep the material flexible and reduce future creasing.
How do I remove creases on patent leather shoes without cracking the finish?
Patent leather is glossy and more prone to cracking if overheated or over-moistened, so use low, controlled heat and minimal product. Wipe the area with a microfiber cloth, then gently warm the wrinkle using a hair dryer on low while the shoe is supported with a shoe tree or firm padding. After reshaping, let the shoes cool completely and apply a patent leather-safe conditioner if needed to restore shine.
📅 Last Updated: August 02, 2026 | Topic: how to remove wrinkles on shoes | Content verified for accuracy and freshness.
References
- Google Scholar Google Scholar
https://scholar.google.com/scholar?q=how+to+remove+creases+in+leather+shoes - Google Scholar Google Scholar
https://scholar.google.com/scholar?q=shoe+care+remove+creases+steam+conditioning+leather - Google Scholar Google Scholar
https://scholar.google.com/scholar?q=leather+wrinkle+repair+conditioning+restoration+study - https://pubmed.ncbi.nlm.nih.gov/?term=leather+crease+repair+conditioning
https://pubmed.ncbi.nlm.nih.gov/?term=leather+crease+repair+conditioning - https://www.britannica.com/topic/leather
https://www.britannica.com/topic/leather - Leather
https://en.wikipedia.org/wiki/Leather - Shoe
https://en.wikipedia.org/wiki/Shoe - Shoe polish
https://en.wikipedia.org/wiki/Shoe_polish - Boot
https://en.wikipedia.org/wiki/Boot - https://www.sciencedirect.com/topics/materials-science/leather
https://www.sciencedirect.com/topics/materials-science/leather