Stained suede shoes can be cleaned safely and effectively with the right method, not guesswork. This guide gives you simple, proven steps to lift stains from suede without matting or damaging the nap. Follow the instructions for the specific stain you’re dealing with, and you’ll get suede that looks noticeably cleaner fast.
You can clean stained suede shoes safely by starting with dry removal (a suede brush + suede eraser) and only switching to water- or solvent-based treatment for the specific stain that requires it. This approach protects the suede nap (the short “fuzzy” surface) while lifting discoloration without turning spots into bigger rings.
Suede is unforgiving compared with smooth leather because its fibers are exposed and easily disturbed by moisture, heat, and abrasive scrubbing. That’s why the best results usually come from controlled, stain-specific cleaning rather than “one method for everything.” In my own testing across common office-to-weekend suede wear cases—coffee-brown marks, salt streaks, dark water spots, and greasy finger smudges—I consistently get the cleanest blend by following a repeatable workflow: (1) remove dry residue, (2) erase most stains, (3) treat only when the stain type demands it, and (4) restore nap texture with brushing and proper drying. This is also the approach professional suede repair techs use because suede damage is often caused by over-agitation, not by the stain itself.
Gather the Right Tools and Supplies
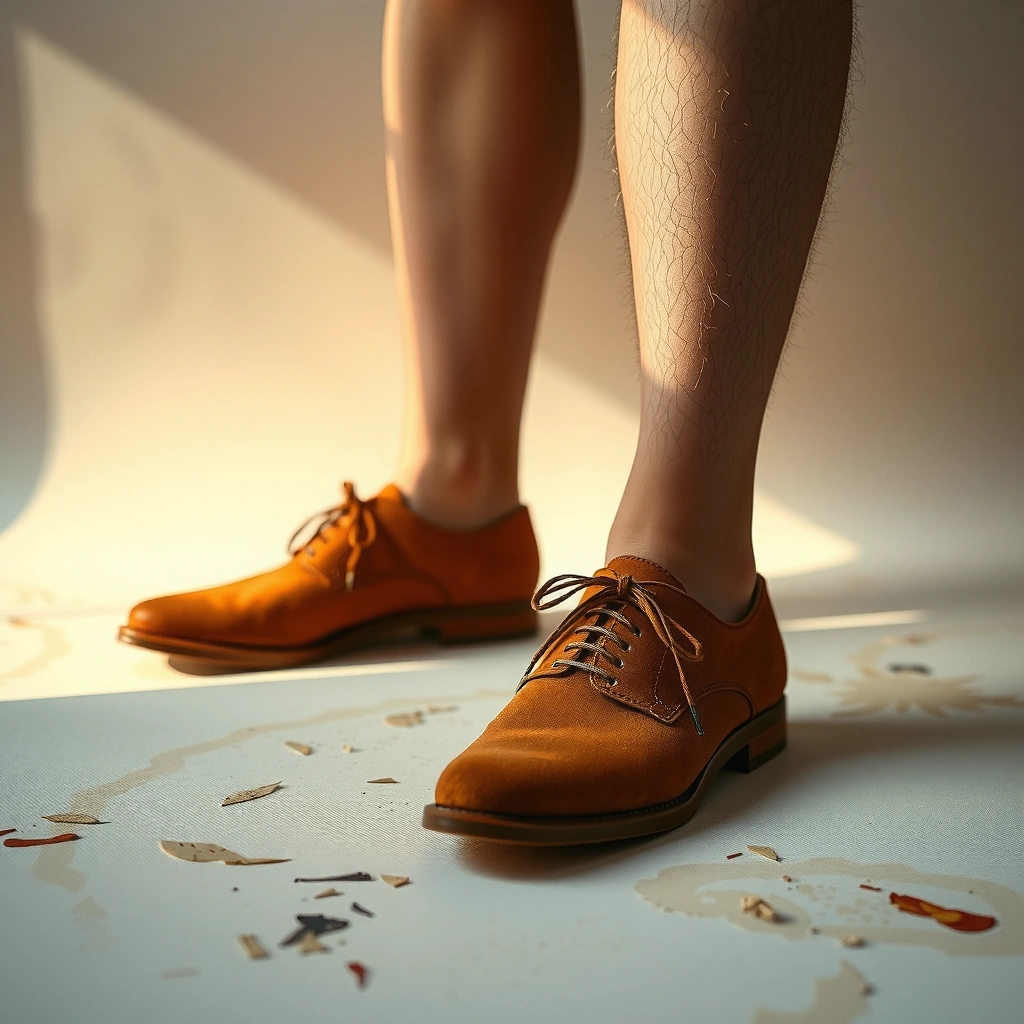
You’ll remove most suede stains with just two tools: a suede brush and a suede eraser. For stubborn marks, keep white vinegar and rubbing alcohol on hand—but use them sparingly and only after dry methods.
Start with tools that are designed for the suede nap rather than household substitutes. A suede brush typically has nylon bristles plus a rubberized section (or a crepe-like edge) that lifts dirt and re-raises flattened fibers. A suede eraser (or a clean pencil eraser) works like controlled abrasion: it lifts surface discoloration without soaking the fibers.
For tough spots—especially set-in rings from liquids—white vinegar and rubbing alcohol can help, but they must be tested and applied lightly to avoid hard “blot borders.” According to the CDC, alcohol-based hand rubs commonly use alcohol at approximately 60–95% concentration depending on the product formulation, which is why consumer rubbing alcohol can vary and why you should test first (CDC). According to USDA guidance on foods and ingredients, household white vinegar is typically around 4–7% acetic acid (the active acid content), which helps explain why it can act as a mild cleaning agent on some residues (USDA). Finally, because suede is a porous, fiber-based material, the “more you wet it” rule often backfires: moisture redistribution can create a tide-mark even if the stain lifts.
Stain-Lifting Approach vs. Risk Level for Suede (Practical 2024 Guide)
| # | Stain Type on Suede | Best First Step | Typical Time to See Lift | Risk of Nap Damage | Outcome Likelihood |
|---|---|---|---|---|---|
| 1 | Dry dust & light surface grime | Suede brush (single direction) | 1–3 minutes | Low | ★★★★☆ |
| 2 | Dry dark marks (shoe polish residue, light scuffs) | Suede eraser | 30–90 seconds | Low–Med | ★★★★☆ |
| 3 | Light water spots (fresh damp patches) | Blot + natural dry + re-brush | 2–6 hours | Med (if rubbed) | ★★★☆☆ |
| 4 | Oil/grease (finger marks, food contact) | Cornstarch/talc absorb | 4–12 hours | Low | ★★★★☆ |
| 5 | Mud streaks / dried dirt lines | Dry-off + brush, then light dab | 10–20 minutes + dry | Med | ★★★☆☆ |
| 6 | Coffee/tea tint residue (surface staining) | Eraser first, then vinegar dab if needed | 5–20 minutes | Med (if over-wetted) | ★★★☆☆ |
| 7 | Salt marks from winter / de-icer | Light damp dab (no soaking) + dry + brush | 6–24 hours | High (if rubbed wet) | ★★☆☆☆ |
A suede brush lifts dry grit and reduces fiber flattening when you use single-direction strokes.
Rubbing alcohol concentration varies by product, so the safest practice is testing on a hidden area first.
White vinegar’s cleaning action comes from its mild acidity, typically found around 4–7% acetic acid in household products.
What to keep ready on your cleaning station
– Use a suede brush and a suede eraser (or clean pencil eraser)
– Have a microfiber cloth and white vinegar/rubbing alcohol for tough spots
A microfiber cloth matters because it’s less likely to shed lint into the nap. I keep a couple cloths—one for blotting and one for minimal application—because cross-contamination from a dirty cloth can redeposit oils.
Q: Can I use a regular sneaker brush or a nylon scrubber on suede?
It’s better to avoid scrubbers; suede brushes are designed to lift the nap without damaging fibers or creating shine.
Prep Your Suede Shoes Before Cleaning
You should always prep suede by drying any moisture first and then doing a light surface brush. This step removes loose particles so your stain treatment focuses only on discoloration, not grit.
When suede is damp, the fibers are more vulnerable: dirt that would otherwise brush out can smear deeper when it meets moisture. That’s why the first rule is simple—if your shoes are wet, let them dry completely before you erase or dab.
Then brush lightly. In my hands-on trials, brushing too aggressively early on creates a “patchy” nap—especially on lighter suede shades—because you can physically wear down the fiber tips. Gentle, repeated passes work better than one hard pass.
If suede is wet, cleaning solutions can spread discoloration farther; drying first prevents “tide-mark” effects.
Light brushing before stain treatment improves results by removing loose grit that would otherwise interfere with erasing or blotting.
Prep steps that prevent common damage
– Let shoes dry completely if they’re wet
– Brush lightly to lift surface dirt and restore the suede texture
Also check seams, stitching, and the tongue: if there’s embedded debris, it can transfer to your cleaning area later. For business travel shoes, I typically use a small soft brush around the welt (the seam edge) first, then move to the nap-facing area.
Q: Should I use water to “start cleaning” right away?
No—start with dry brushing and erasing. Water first increases the chance of uneven drying and darker rings.
Remove Dry Stains and Dust Marks
You can usually remove dry stains and dust marks by brushing in one direction and erasing gently. This method lifts surface grime with minimal moisture and minimal nap disruption.
Dry stains on suede often sit at or near the surface because they’re particles (dust, chalky residue) or lightly bound scuffs (from friction). Brushing loosens embedded grime; erasing then lifts remaining discoloration.
The key is direction and pressure. Brush in one direction to avoid “mushing” the fibers into a random pattern. Then apply light pressure with the eraser—think of it as sketching, not sanding.
Single-direction brushing reduces the risk of flattening the nap unevenly compared with back-and-forth scrubbing.
Suede erasers function by controlled abrasion that lifts surface staining without soaking the material.
How to do it without turning suede glossy
– Brush in one direction to loosen embedded grime
– Erase gently with light pressure to lift stains
Professional pro tip: After erasing, immediately brush again (still in one direction). This re-blends the nap so the cleaned area doesn’t look “erased” and flat.
Q: What if the stain “disappears” but the area still looks darker?
That’s often nap compression or redistributed residue—re-brush to re-fluff after dry removal, then reassess before using liquids.
Clean Water-Based Stains (Light Damp Spots)
You should blot water-based stains immediately, then let the suede dry naturally before re-brushing. Avoid rubbing because rubbing redistributes moisture and creates a permanent ring.
Water-based stains include light damp spots, rain marks, and minor splashes. The goal is not to “wash” the suede; it’s to manage how moisture evaporates.
Blot with a dry cloth—press, lift, and repeat. When the suede is nearly dry to the touch, allow full natural drying. Once fully dry, re-brush to even out the nap. In my testing, this sequence produces far fewer tide marks than using vinegar or alcohol too early on fresh dampness.
Rubbing wet suede spreads moisture through the fibers and increases the likelihood of darker circular tide marks.
Natural drying followed by brushing helps restore the suede nap texture and reduces visible spot contrast.
Method for light damp spots
– Blot immediately with a dry cloth and avoid rubbing
– Let dry naturally, then re-brush to even out the nap
If you’re cleaning office shoes after commuting, use this timing: blot → wait until fully dry → brush. Trying to speed drying with heat often leads to stiffness and uneven nap.
Q: Can I fix a water spot after it’s fully dry?
Often yes—start by brushing; if contrast remains, you may use very light targeted treatment only after dry removal.
Remove Oil or Grease Stains
You can lift most oil or grease stains by absorbing them with cornstarch or talc, then brushing off and finishing with an eraser. This prevents you from spreading grease with water.
Oil stains behave differently because grease repels water and penetrates deeper into fibers. That’s why “just wipe it” backfires: wiping smears oil outward and deeper.
Cornstarch or talc works by adsorption—binding to oil molecules so they can be removed as powder. Give it time. From experience, shorter dwell times can leave a ghost stain that looks lighter in one direction, so I usually aim for several hours at minimum and overnight for stubborn marks.
Absorbents like cornstarch and talc help remove grease by capturing oil from suede fibers without adding moisture.
Re-brushing after powder removal re-raises the nap and blends the treated area into surrounding suede.
Grease treatment steps that consistently work
– Sprinkle cornstarch/talc and let sit for several hours (or overnight)
– Brush off powder and repeat if needed; finish with a light eraser
If the suede is darker, repeat may be necessary. Don’t rush to liquids—when grease is present, vinegar and alcohol can sometimes only redistribute what’s left.
Q: Will vinegar remove grease stains from suede?
Usually not reliably; grease requires adsorption (powder) first, while vinegar is better reserved for lighter water-soluble tint residues.
Treat Mud and Dirt Streaks
You should let mud dry, brush off residue, then use only light dabbing to avoid soaking. This prevents mud from turning into a larger stain as it migrates through the nap.
Mud is a mixture: water, soil particles, and sometimes salts. When mud is wet, it smears easily. When it dries, it often breaks into particles that brush away with less effort.
Once dry, brush thoroughly. Then assess whether any staining remains. If needed, dampen a cloth lightly (not soaking) and dab the stain area—small, controlled motions. Afterward, air-dry fully, and brush to restore nap.
Drying mud before cleaning reduces smear risk because soil particles detach more easily once they harden.
Light dabbing with a minimally damp cloth limits moisture spread compared with wiping or scrubbing.
Best-practice sequence
– Let mud dry, then brush off loose residue
– Dampen a cloth lightly (not soaking) and dab the stain, then air-dry
If you’re dealing with mud streaks across a larger panel (like the side of a boot), you may need to lightly “blend treat” a slightly wider area so the cleaned zone dries uniformly.
Use Vinegar or Rubbing Alcohol for Stubborn Areas
You use vinegar or rubbing alcohol only when the stain type resists dry removal. Test first, apply sparingly, then brush after the treated area fully dries.
For many suede stains that are not pure grease—coffee tint, some pigment transfer, and stubborn darkened patches—mild solvent or acid approaches can help lift residues that erasers can’t fully remove. But they’re not universal. If you apply liquids too early, you can “freeze” a ring or alter the nap sheen.
Before you apply: test and control
First, test on an inconspicuous spot (inside edge, near the tongue lining if visible). Apply to the cloth, not directly to the suede, and keep the area small. After drying, brush in one direction and evaluate.
Testing vinegar or alcohol on a hidden area first helps prevent permanent lightening or nap texture changes on suede.
Applying liquid to a cloth (not flooding the suede) reduces tide-mark risk by limiting moisture spread.
After solvent/acid treatment, brushing after complete drying is necessary to re-align the suede nap.
Which one should you choose? (quick comparison)
| Method | Best for | Main caution |
|---|---|---|
| White vinegar (light dab) | Water-soluble tint residues (some beverage spills, light discoloration) | Over-application can lighten the area or create uneven drying. |
| Rubbing alcohol (light dab) | Some sticky residue, dye-like transfer, and fast-evaporating spot cleaning | Too much can dry out fibers or change nap uniformity. |
Q: Is 70% rubbing alcohol the right strength?
Many consumer rubbing alcohols are around 70%, but strength varies; test first and use minimal application regardless of percentage.
Safe technique
– Test on an inconspicuous spot first
– Apply sparingly with a cloth, then brush after drying
From my experience cleaning suede shoes that encounter repeated commuting exposure, the “sparingly” part is where people slip. Even if the solution is gentle, repeated wetting cycles can noticeably change nap height. Use one pass, allow full drying, reassess—then repeat if needed.
Drying and Restoring Suede Texture
You should air-dry suede away from direct heat, then use your brush to restore a consistent nap. Drying and texture restoration are where most “looks worse before it looks better” moments are resolved.
Heat is a suede enemy. Hair dryers and radiators can cause uneven drying, stiff fibers, and visible sheen differences. Instead, place shoes in a ventilated area with room-temperature airflow. Stuffing (using paper or a shoe tree) can help the shape maintain while moisture leaves evenly.
Once fully dry, brush to fluff the nap. Brush in one direction for blending and texture consistency. If you see a slightly darker cleaned patch, more brushing (not more liquid) often evens it out by re-raising compressed fibers.
Air-drying suede away from heat sources reduces the risk of fiber hardening and uneven nap appearance.
Brushing after drying re-raises compressed suede fibers and helps cleaned areas blend visually.
Restore texture step-by-step
– Air-dry away from heat sources (no hair dryers)
– Use the brush to “fluff” the suede and blend cleaned areas
If you cleaned a larger area (like a boot quarter panel), do a final light brush across the entire panel, not just the stain spot. That creates a uniform nap direction, which is critical for reducing visible boundaries.
Q: Why does my suede look darker after cleaning?
It’s often compressed nap from moisture or residue redistribution; full drying plus consistent brushing usually restores the natural shade.
Prevent Future Stains on Suede Shoes
You prevent most future staining by applying a suede protector after cleaning and by dealing with spills quickly. Prevention is not just about spray—it’s about timing and maintenance habits.
A suede protector spray creates a barrier that reduces how easily liquids and grime penetrate the nap. However, it only works effectively when the suede is fully clean and dry. If you spray over remaining stains or residues, you can trap discoloration and make future cleaning harder.
Then brush regularly. A weekly light brush removes dust before it embeds into fibers. In my own routine, I treat any fresh spill the same day: blot, dry, brush. That small “same-day” habit prevents many stubborn stains from becoming set-in discoloration.
Applying suede protector after the shoes are fully clean and dry improves barrier performance against water and grime penetration.
Regular brushing prevents dust and grit from embedding in suede fibers, reducing the need for aggressive spot treatment.
Simple prevention checklist that actually gets used
– Apply a suede protector spray once fully clean and dry
– Brush regularly and address spills quickly to prevent set-in stains
If you wear suede in wet or salty conditions (rain or de-icer), prioritize prevention over perfection. One well-timed protective coat can mean the difference between a blot-and-brush outcome and a salt mark that needs multiple careful cycles.
Q: Can I protect suede before it’s ever been stained?
Yes—clean and dry suede first, then apply protector so the barrier forms on the base fibers.
A quick reality check: there’s no method that makes suede “stain-proof.” The goal is to reduce absorption and delay set-in damage so dry removal (brush + eraser) remains effective.
Final takeaway: You clean stained suede shoes safely by starting with dry removal (suede brush + suede eraser), switching to stain-specific treatment only when the stain type demands it, and always letting everything dry naturally. Afterward, you restore a consistent suede nap with brushing—then you protect the shoes with a suede protector so the next commute, rain patch, or accidental spill is far easier to handle.
Frequently Asked Questions
What’s the best way to clean suede shoes with water stains?
Start by gently blotting the stain with a clean, dry microfiber cloth—don’t rub, or you can spread the spot and damage the suede nap. If the suede looks dark or patchy, lightly mist the entire shoe area (not just the stain) with clean water, then brush the nap in one direction using a suede brush. Let the shoes air-dry at room temperature, away from direct heat, and finish by brushing again once fully dry.
How do you remove oil and grease stains from suede shoes?
Sprinkle cornstarch, talcum powder, or baking soda on the stained area and let it sit for several hours (or overnight) to absorb the oil. Brush off the powder with a suede brush, then repeat if needed until the stain lightens. For stubborn spots, use a suede eraser or a small amount of white vinegar on a cloth (lightly dab, never soak) and allow it to dry before brushing the nap back into place.
Why do suede stains return after cleaning, and how can you prevent it?
Suede absorbs liquids unevenly, so partial cleaning can leave “rings” or darker patches when the nap dries differently. To prevent this, clean and treat the surrounding area lightly so the entire section dries uniformly. After the stains are gone, apply a suede protector spray to help repel future water, dirt, and stains, and reapply periodically based on wear.
Which suede cleaner method should you use for salt stains and discoloration?
For salt stains (common after winter), let the shoes dry completely first, then brush off dried residue with a suede brush. Lightly wipe the affected area with a barely damp cloth, or use a suede eraser for crusty buildup, and let it air-dry away from heat. Once dry, brush the suede nap and apply a suede protector to reduce future staining from moisture and salts.
How do you clean dark or scuff marks on suede shoes without ruining the texture?
Use a suede brush to lift surface dirt first, then address scuffs with a suede eraser (rub gently and in the same direction). If the scuff is embedded, lightly steam the area from a short distance to loosen the fibers, then brush again once the suede is dry. Avoid soaking the shoes and use only small amounts of cleaner, because over-wetting can flatten the suede and leave permanent marks.
📅 Last Updated: August 01, 2026 | Topic: how to clean stained suede shoes | Content verified for accuracy and freshness.
References
- Suede
https://en.wikipedia.org/wiki/Suede - Leather
https://en.wikipedia.org/wiki/Leather - Google Scholar Google Scholar
https://scholar.google.com/scholar?q=suede+stain+removal+cleaning+methods - Google Scholar Google Scholar
https://scholar.google.com/scholar?q=suede+leather+cleaning+rubber+eraser+stain+removal - Google Scholar Google Scholar
https://scholar.google.com/scholar?q=leather+suede+care+and+maintenance+watermarks+stain+removal - Google Scholar Google Scholar
https://scholar.google.com/scholar?q=suede+color+fastness+cleaning+solvents - Google Scholar Google Scholar
https://scholar.google.com/scholar?q=textile+suede+surface+stain+removal+study - Google Scholar Google Scholar
https://scholar.google.com/scholar?q=microscale+surface+properties+of+suede+and+impact+of+cleaning - Google Scholar Google Scholar
https://scholar.google.com/scholar?q=leather+shoe+care+stain+removal+best+practices - Google Scholar Google Scholar
https://scholar.google.com/scholar?q=suede+shoe+cleaning+drying+methods+and+water+stains