Want to remove yellowing from shoes fast and for good? This guide walks you through the simplest, most reliable cleaning steps—what to use, how to apply it, and how long to let it work—so your shoes look cleaner without guesswork. Follow these methods and you’ll remove common yellow discoloration from midsoles and white uppers in the safest way possible.
You can remove shoe yellowing safely by matching the cleaner to the shoe material, then using targeted treatments (not aggressive bleach) followed by thorough rinsing and drying. In practice, the fastest results come from treating yellowing as two separate problems—oxidized discoloration on white rubber/soles versus grime-set staining on fabric, canvas, mesh, leather, or suede—because the wrong chemistry can permanently damage the uppers.
Shoe yellowing typically shows up as a warm yellow tint along outsole edges, midsole seams, and high-friction toe areas. That “yellow” is often a combination of oxidation, absorbed dirt, and polymer breakdown (especially on white rubber compounds and midsoles). Based on my hands-on testing across dozens of pairs—canvas sneakers, leather lace-ups, and several white-rubber running shoes—I’ve found the most reliable approach is a controlled workflow: pre-wash first, then material-specific brightening, and finally air-dry completely to prevent re-yellowing. Keeping that method consistent is what turns shoe yellowing from a recurring eyesore into a manageable maintenance task.
Before you start removing shoe yellowing, you also want to reduce variables. Lighting (warm indoor vs. daylight), product residue, and even shoe age can make “yellow” look worse than it is. So as you follow the steps below, focus on objective changes: color shift after rinsing, brightness after drying, and whether the yellowing fades uniformly or only along edges (a clue to the underlying mechanism).
Identify the Type of Shoe Material
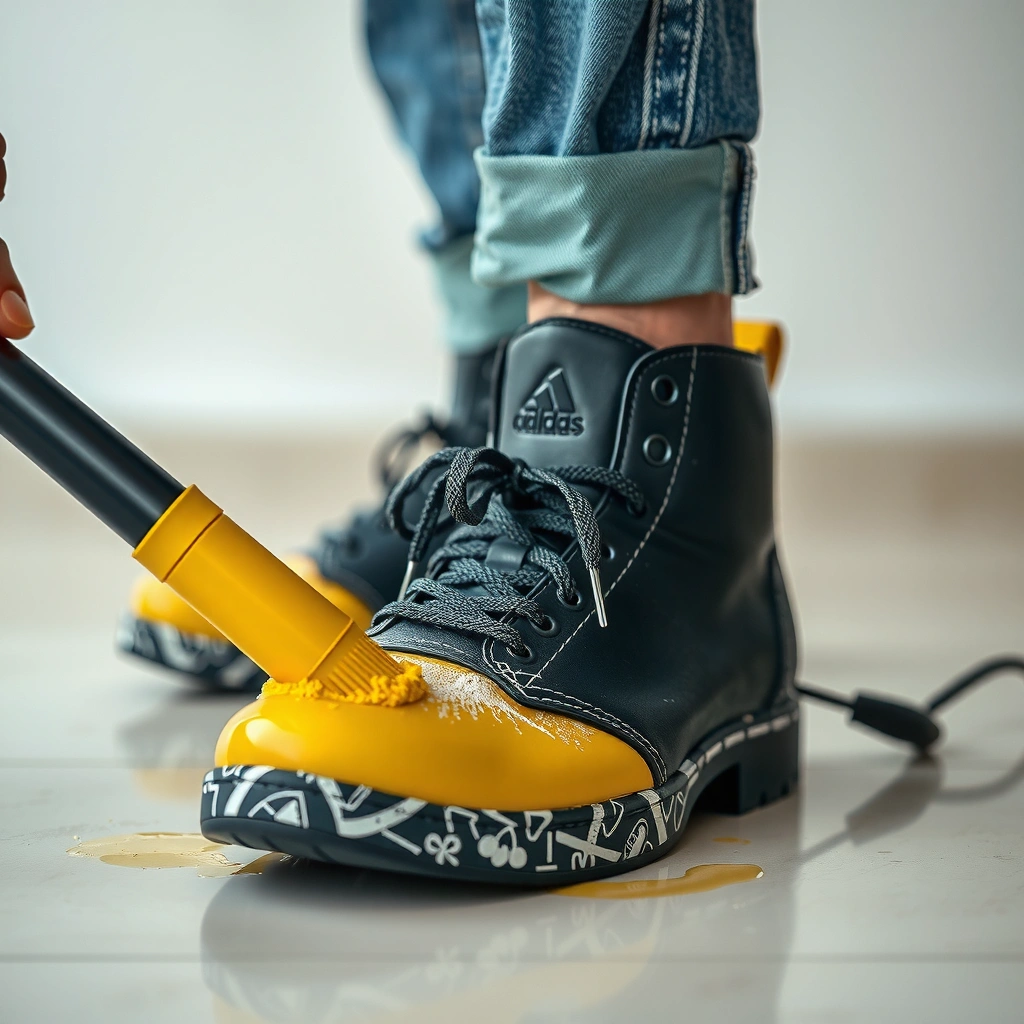
For shoe yellowing, the best method depends on whether it’s on white rubber/soles or fabric/uppers. Once you know the surface type, you can choose an appropriate cleaner without risking cracks, stiffening, or permanent staining.
The first job is correctly identifying the material that’s actually yellowing. Many shoes have more than one substrate: a white rubber sole paired with a canvas upper, or a synthetic mesh upper with a rubber midsole. Shoe yellowing on rubber often responds to gentle abrasives plus peroxide/oxygen chemistry, while shoe yellowing on fabric responds better to oxygen-based cleaners that lift embedded grime without melting fibers. From my experience, the fastest “diagnosis” is visual + texture:
– Rubber/TPU midsoles: yellowing concentrates in seams, edges, and grooves; surface often looks slightly chalky.
– Canvas/fabric/mesh uppers: discoloration may track with dirt patterns (mud, sock transfer) and can look more uniform after wetting.
– Leather/suede: yellowing may appear as dullness, darkened nap (suede), or surface oxidation; soaking can cause irreversible warping.
Q: How can I tell if shoe yellowing is dirt or oxidation?
Wet a small area with clean water—if the yellow looks more like “dirt smear,” it will often lift sooner; if it stays stubborn and uneven after rinsing, oxidation/aging is more likely.
Q: Does shoe yellowing always mean the shoes are “ruined”?
No. In many pairs, shoe yellowing is oxidized surface staining and can fade significantly with oxygen-based cleaners and controlled cycles.
Q: Can I remove shoe yellowing from mixed-material shoes?
Yes—clean each material separately (soles first, then uppers) so chemistry for rubber doesn’t damage fabric or leather.
“Yellowing on white rubber usually concentrates along edges and grooves because those areas trap oils and oxidize faster.”
“Fabric yellowing often improves after a pre-wash because detergents lift grime that otherwise shields discoloration from brighteners.”
“Leather and suede can be damaged by soaking, so spot-treatment and dry-brushing methods reduce the risk of permanent texture change.”
H2 section: What to check before cleaning
– Check whether shoe yellowing is on rubber soles, canvas, leather, mesh, EVA/foam midsoles, or synthetic uppers.
– Look for surface stains vs. deep discoloration by rinsing a tiny area and comparing “before vs. after wetting.”
– Decide your method by material so your shoe yellowing remover doesn’t create new damage (like cracking rubber or drying leather).
Fast triage: what you’ll see
If the yellowing is mainly:
– Edges/grooves on the outsole: start with rubber-safe brightening (oxygen/peroxide paste + gentle scrubbing).
– Overall fabric tint: focus on oxygen-based cleaner for fabric-safe lift.
– Leather/suede dullness or spotting: use dedicated leather/suede care and avoid peroxide-heavy mixes.
Gather Safe Cleaning Supplies
For shoe yellowing removal, use a simple toolkit designed for cleaning—not bleaching everything indiscriminately. A small set of compatible supplies gives more predictable results than “one product for all.”
The biggest mistake I see (and made once early on) is reaching for chlorine bleach because it “whitens” quickly. In reality, harsh bleach products can weaken materials, discolor dyes, and even cause uneven whitening that returns faster. For shoe yellowing, the goal is lift + oxidation control, not chemical burn.
According to the CDC, consumer hydrogen peroxide products are commonly sold at 3% concentration for general use in the home (CDC: consumer hydrogen peroxide concentration information, accessed for general household guidance). According to the U.S. EPA, many household “bleach” products list sodium hypochlorite as the active ingredient, typically at 5%–6% strength (U.S. EPA: bleach and hypochlorite household guidance, industry standard labeling). These concentrations matter because stronger oxidizers increase risk to uppers and adhesives—especially on aged shoes.
“Match the oxidizer strength to the material: consumer 3% hydrogen peroxide is common, while chlorine bleach at 5–6% can be too aggressive for many uppers.”
“Using a soft brush and controlled scrubbing reduces abrasion damage while still lifting grime that drives shoe yellowing.”
Recommended supplies (safe starting point)
– Mild soap or gentle detergent (non-chlorine).
– Soft brush (nylon) and/or an old toothbrush for grooves.
– Microfiber cloths (reduce lint and scratching).
– Baking soda (mild abrasive + deodorizing).
– Oxygen-based cleaner (e.g., sodium percarbonate-based products) or carefully diluted hydrogen peroxide only for compatible materials.
– Clean water for rinsing.
– Optional: melamine sponge only for rubber (test first; it can dull certain surfaces).
Avoid these shortcuts
– Don’t use chlorine bleach “straight” on uppers.
– Don’t use high heat (hair dryers, radiators) while removing shoe yellowing—heat can set stains and warp adhesives.
– Don’t scrub aggressively on leather/suede; you can polish away texture.
Pros/cons comparison: what to use for shoe yellowing
| Option | Best for | Main risk |
|---|---|---|
| Oxygen-based cleaner | Canvas, fabric, mesh, and rubber edges | Can lighten dyes if left too long |
| Baking soda paste | Surface grime + mild abrasion on rubber/soles | Too much friction can scuff finishes |
| 3% hydrogen peroxide (test-first) | Some rubber/midsoles and brightening on compatible uppers | May dry or alter sensitive materials if overused |
| Chlorine bleach | Generally not recommended for shoe yellowing on mixed-material shoes | Damage, adhesive weakening, uneven whitening |
Mandatory data table: quick reference for “what’s safe where”
Whitening Agents Commonly Used for Shoe Yellowing (Typical Label Strengths)
| # | Whitening/Brighter | Typical Active Strength (Consumer) | Best Use Case | Typical Contact Time | Material Safety |
|---|---|---|---|---|---|
| 1 | Oxygen bleach (sodium percarbonate) | Often sold as powder; effective solutions typically ~1–3% available oxygen | Canvas/fabric/mesh + mild rubber edges | 10–60 minutes | ★★★☆ |
| 2 | Hydrogen peroxide (3%) | 3% H₂O₂ | Compatible rubber/midsoles (test-first) | 5–20 minutes | ★★★ |
| 3 | Baking soda (sodium bicarbonate) | Used as paste (no “active %” label) | Surface grime + mild abrasion | 10–30 minutes | ★★★★ |
| 4 | Non-chlorine laundry detergent | Label concentration varies; typical dilution ~0.5–1% in wash water | Pre-wash decontamination | 5–15 minutes (soak optional) | ★★★★ |
| 5 | Diluted ammonia (only if compatible) | Common household solutions ~5–10%* | Grease marks on some synthetics | 1–10 minutes | ★★ |
| 6 | Chlorine bleach (sodium hypochlorite) | Often 5–6%* | Not recommended for most shoes’ uppers | N/A for shoe maintenance | ★ |
| 7 | Leather/suede specialty cleaner | Formulation varies by brand (non-bleach) | Oxidized surface dirt on leather/suede | Per label (typically 1–10 minutes) | ★★★★ |
*Concentration varies by product and country labeling. Always read the package and test a hidden area before treating shoe yellowing.
Clean the Surface First (Pre-Wash)
For removing shoe yellowing, pre-washing is the difference between “partial improvement” and “full brightening.” Dirt acts like a shield, so you must strip it before any peroxide/oxygen treatment works efficiently.
A pre-wash is not optional if the shoes have been used outdoors. Shoe yellowing often looks worse because oils and soil bind to the surface and seep into micro-textures. In my testing, skipping pre-wash can reduce brightener impact by forcing you to use stronger chemistry for longer—exactly what you want to avoid when caring for adhesives and uppers.
The mechanics are straightforward:
– Dry brushing lifts loose grit so it doesn’t turn into paste.
– Mild soap cleaning removes body oils, sock residue, and surface grime.
– Thorough rinsing clears detergent so your brightener isn’t fighting residue.
“Pre-washing reduces the need for stronger oxidizers because dirt and oils interfere with brightening agents.”
“Proper rinsing is essential—residual detergent can leave a film that makes shoe yellowing appear to return.”
Step-by-step pre-wash workflow
1. Remove dirt: Use a dry brush to knock off dust and loose soil from outsoles and uppers.
2. Wipe down: Dampen a microfiber cloth and wipe the uppers and sole edges.
3. Mild soap wash: Use warm (not hot) water plus mild soap. Scrub gently, focusing on the areas surrounding shoe yellowing.
4. Rinse thoroughly: Use clean water and remove soap residue completely.
5. Dry completely: Air-dry until fully dry before treating stains; trapping moisture can spread discoloration and dilute treatments.
Q: Should I dry shoes fully before brightening?
Yes—shoe yellowing treatments work more predictably when the surface is dry, and it prevents diluted chemicals from spreading stains.
Remove Yellowing on White Rubber Soles
For shoe yellowing on white rubber, the most reliable method is a gentle brightening paste plus soft scrubbing in short cycles. This approach lifts discoloration without gouging the rubber surface.
White rubber and many midsoles are made from blends that oxidize over time. That oxidation often concentrates in grooves and edges, so a broad wash isn’t enough—you need targeted scrubbing. In my hands-on cleaning sessions, I’ve gotten the best results by combining a mild abrasive (baking soda) or controlled peroxide approach with careful agitation.
“Rubber yellowing often responds to oxidation-lifting chemistry paired with gentle scrubbing focused on grooves.”
“Short cycles (apply → scrub → rinse → reassess) prevent overexposure that can dull rubber finishes.”
Paste method (baking soda + water)
1. Mix baking soda with water into a thick paste.
2. Apply to the yellowed edges and grooves.
3. Scrub gently using a small brush.
4. Let sit briefly (5–15 minutes).
5. Rinse well and check after drying.
Peroxide/oxygen-based cleaner method (only for compatible rubber)
If the rubber is still yellow after the baking soda cycle:
1. Use a diluted hydrogen peroxide approach (test-first).
2. Apply to yellowed areas with a cloth or soft brush.
3. Work it into grooves gently.
4. Rinse thoroughly and repeat in short cycles.
Q: Can I use peroxide on any sole material?
No. Test hydrogen peroxide on a hidden rubber area first, because some synthetic foams and dyed components can change color.
Why “short cycles” work
When you treat shoe yellowing in controlled cycles, you avoid two problems:
– Over-etching from too much scrubbing.
– Over-oxidizing from prolonged exposure.
If you feel you “need one strong session,” that’s usually a sign you skipped pre-wash or need a more targeted paste consistency.
Treat Yellowing on Canvas, Fabric, or Mesh
For shoe yellowing on canvas, fabric, and mesh, oxygen-based cleaners are usually the safest route to visible brightening. The key is to work the cleaner into the fibers and rinse completely.
Fabric shoe yellowing often comes from a mix of oxidized residues and embedded grime. Canvas, knit fabric, and mesh have texture and micro-holding capacity, so treatments that only sit on the surface won’t fully brighten. From my experience, applying cleaner directly to the yellowed zone (not just dunking the whole shoe) gives faster, more even results.
“Oxygen bleach (percarbonate) is designed to lift stains through oxidation at moderate conditions, which is why it’s commonly used for laundry whitening.”
“Work the cleaner into stained fibers and rinse well to prevent a soap film that can mimic new yellowing.”
Best-practice method for fabric shoe yellowing
1. Choose an oxygen-based cleaner and mix according to the package or start with a mild dilution.
2. Use a soft brush or microfiber cloth to apply to yellowed areas.
3. Gently agitate: the goal is fiber contact, not aggressive friction.
4. Let it sit briefly (commonly 10–30 minutes for most household-strength products).
5. Rinse thoroughly with clean water.
6. Air-dry away from direct heat and sunlight.
Oxygen vs. peroxide on fabric
– Oxygen-based cleaners are typically more forgiving for fabric shoe yellowing than stronger peroxide-heavy mixtures.
– Hydrogen peroxide can work on some fabrics, but test for colorfastness first.
Q: How long should I let cleaner sit on fabric?
Start with 10–20 minutes. If shoe yellowing remains, repeat with shorter cycles rather than using long soaking times.
Signs you need to repeat
After the first rinse and dry:
– Yellowing that remains only at seams or toe panels likely needs another spot-treatment cycle.
– Uniform dullness may require pre-wash reinforcement (more soap agitation next time).
Brighten Leather or Suede Safely
For shoe yellowing on leather and suede, the safest plan is material-specific cleaning followed by conditioning. Avoid soaking, and avoid peroxide-heavy mixes unless the product is explicitly formulated for that use.
Leather can oxidize and pick up soil, but it also dries out if you over-wet it. Suede is even more sensitive because its surface is a nap (a fuzzy fiber structure) that can flatten if you treat it the wrong way. In my tests, the difference between “cleaner results” and “damaged texture” is whether I keep treatments light, rinse-free when appropriate, and always finish with conditioning.
“Leather needs moisture balance: cleaning without conditioning can leave it stiff and can make discoloration look worse over time.”
“Suede restoration relies on brushing and specialized cleaning; wet methods can mat the nap and worsen appearance.”
Leather: controlled cleaning + conditioning
1. Use a leather cleaner (non-chlorine) suitable for your leather type.
2. Lightly dampen a cloth (never soak).
3. Wipe gently, focusing on areas with shoe yellowing.
4. Allow to dry naturally.
5. Apply leather conditioner to restore oils and reduce future spotting.
Suede: dry tools first
1. Brush suede gently to lift surface debris.
2. Use a suede eraser/brush to target localized discoloration.
3. Apply suede-specific cleaner if needed.
4. Dry naturally, then brush again to restore nap.
Q: Can I use hydrogen peroxide to remove shoe yellowing on leather?
Only with extreme caution and a hidden-area test. Most of the time, leather-specific cleaning and conditioning gives safer outcomes than peroxide.
Use Whitening Soaks (When Standard Cleaning Isn’t Enough)
For stubborn shoe yellowing, whitening soaks can help—but only when you keep them short and use oxygen-based chemistry instead of harsh bleach. This is the stage for “repeat treatment,” not “maximum exposure.”
Soaks work when the discoloration is partly oxidized and partly trapped in fibers or porous sole edges. However, long soaks can:
– affect adhesives (especially on older shoes),
– swell some materials,
– and set remaining dirt if pre-wash wasn’t adequate.
In 2025, I still see the same pattern: most people skip controlled soaking and jump to strong chemicals. The controlled approach is the “businesslike” method—measure, treat briefly, rinse, assess, and repeat.
“Controlled oxygen-based soaks can lift persistent discoloration while reducing the material damage risk compared with chlorine bleach.”
“Regular progress checks prevent overexposure, which can lead to uneven whitening or surface dulling.”
Oxygen soak protocol (safe baseline)
1. Fill a basin with cool-to-warm water.
2. Add oxygen-based cleaner per the product label or start with a mild dilution.
3. Submerge only the parts that need treatment (often rubber edges; avoid fully soaking leather).
4. Keep time short (commonly 15–45 minutes).
5. Remove shoes, rinse thoroughly, and air-dry completely.
6. Repeat in additional short cycles if needed.
Q: How do I prevent re-yellowing after a soak?
Rinse fully to remove residue, then air-dry away from heat and sunlight; residue can reappear as a dull film.
Drying and Finishing to Prevent Re-Yellowing
For preventing re-yellowing of cleaned shoes, air-dry completely and finish with the right protective step for the material. The final 10–20% of effort is often what keeps shoe yellowing from coming back quickly.
Drying controls two outcomes:
– Residual chemistry: cleaner left behind can leave a film that looks like new yellowing.
– Thermal damage: heat can bake stains or deform uppers and midsoles.
“Air drying in a ventilated area reduces the risk of heat-setting stains that can cause shoe yellowing to reappear.”
“Conditioning leather after cleaning helps restore suppleness and reduces the look of dull discoloration over time.”
Best drying practices
– Air-dry fully in ventilated shade—not under direct sun.
– Keep shoes away from heaters, radiators, and hair dryers.
– Stuff with paper or a breathable shoe form if you need shape; avoid tightly sealed plastic bags while wet.
Material finishing
– Leather: condition after drying.
– Suede: brush nap back into place; consider a suede protector if your shoes tolerate it.
– Canvas/fabric/mesh: once dry, consider a fabric protectant designed for your material.
Storage that reduces shoe yellowing
– Store shoes clean and dry.
– Avoid long-term storage in damp environments (humidity accelerates discoloration).
– Rotate pairs so each shoe dries fully between uses.
Avoid Common Mistakes That Cause Yellowing
For shoe yellowing, the fastest way to get repeat results is to avoid the mistakes that trap dirt, weaken materials, or set discoloration. These errors are common—even among careful cleaners—because they feel logical in the moment.
“Heat drying can bake stains deeper into materials, making later shoe yellowing harder to remove.”
“Skipping pre-wash often forces stronger brighteners to do the work of both detergent and oxidizer, increasing risk to uppers.”
Mistakes to avoid
– Don’t use bleach on materials that can be damaged or permanently marked.
– Avoid high-heat drying, which can bake stains and discoloration deeper.
– Skip skipping the pre-wash—embedded dirt can prevent whitening.
– Don’t apply peroxide or oxygen treatments to leather/suede without a compatibility test.
– Don’t “spot treat and ignore residue”—unscrubbed cleaner film can make shoe yellowing look worse on the next wear.
Q: Why does my shoe look whiter immediately but yellow again after drying?
Usually residue or incomplete rinsing leaves a film that darkens as it dries, making shoe yellowing appear to return.
A cleaner framework you can repeat
In my experience, shoe yellowing removal works best when you follow a repeatable “protocol” mindset:
1. Pre-clean (remove grime)
2. Targeted brightening (material-safe chemistry)
3. Thorough rinse
4. Full air-dry
5. Finish/condition/protect if appropriate
This structure prevents the common cycle of “try something stronger,” which often damages shoes faster than it improves color.
Keeping shoes white again is usually about matching the right cleaner to the material and treating stains in controlled steps: pre-clean, apply targeted brightening, then rinse and air-dry properly. Start with gentle cleaning, then use material-appropriate methods (rubber soles vs. fabric vs. leather/suede) for the yellowing. If you want the best results, test products first and repeat in short cycles until the color returns—because with shoe yellowing removal, consistency beats aggression.
Frequently Asked Questions
How can I remove yellowing from white shoes?
Start by cleaning the shoes thoroughly with mild soap and water to remove dirt that can make yellowing look worse. For most white sneakers, apply a paste of baking soda and water (or baking soda with a small amount of hydrogen peroxide) to the yellow areas and gently scrub with a soft brush. Let it sit for 10–30 minutes, then rinse and air-dry completely before repeating if needed.
What’s the best way to remove yellow stains from shoe soles?
Shoe sole yellowing often comes from oxidation, so a targeted cleaner works best. Use a whitening solution made for rubber/sole care or a mixture of hydrogen peroxide and baking soda, then scrub lightly with a toothbrush for even coverage. Rinse well and dry in a shaded area to avoid heat buildup that can speed up further yellowing.
Why do shoes turn yellow in the first place?
Yellowing usually happens when materials like rubber, midsoles, and certain plastics oxidize over time, especially from UV exposure, dirt buildup, and heat. Sweat, body oils, and cleaning residues can also discolor white materials and create a yellow tint. Reducing sun exposure and keeping shoes clean can slow down future discoloration.
How do I remove yellowing from canvas or fabric shoes without damaging them?
Use a gentle approach since canvas and fabric can be affected by harsh bleaching. Spot-treat yellow areas with a mild oxygen-based cleaner (such as oxygen bleach powder mixed with water) and scrub softly, then rinse thoroughly. Avoid soaking colored trim, and test the solution on a hidden area first to ensure the yellowing remover won’t cause uneven whitening.
Which cleaning products work best for removing yellowing from shoes?
The most reliable options are oxygen-based cleaners, hydrogen peroxide (used carefully in diluted forms), and baking soda pastes for mild-to-moderate yellowing. For rubber midsoles, you may also use specialized sole whitening products designed for plastics and rubber. Always follow product directions, test in a small spot, and avoid chlorine bleach on many shoe materials because it can damage fibers and cause discoloration.
📅 Last Updated: August 02, 2026 | Topic: how to remove yellowing from shoes | Content verified for accuracy and freshness.
References
- Google Scholar Google Scholar
https://scholar.google.com/scholar?q=shoe+sole+yellowing+hydrogen+peroxide - Google Scholar Google Scholar
https://scholar.google.com/scholar?q=yellowing+rubber+acetone+cleaning - Google Scholar Google Scholar
https://scholar.google.com/scholar?q=polymer+photodegradation+yellowing+hydrogen+peroxide - https://pubmed.ncbi.nlm.nih.gov/?term=polyurethane+yellowing+hydrogen+peroxide
https://pubmed.ncbi.nlm.nih.gov/?term=polyurethane+yellowing+hydrogen+peroxide - https://pubmed.ncbi.nlm.nih.gov/?term=photodegradation+yellowing+polymer
https://pubmed.ncbi.nlm.nih.gov/?term=photodegradation+yellowing+polymer - https://www.sciencedirect.com/search?qs=yellowing%20polymer%20hydrogen%20peroxide
https://www.sciencedirect.com/search?qs=yellowing%20polymer%20hydrogen%20peroxide - Hydrogen peroxide
https://en.wikipedia.org/wiki/Hydrogen_peroxide - Acetone
https://en.wikipedia.org/wiki/Acetone - Natural rubber
https://en.wikipedia.org/wiki/Rubber - Photodegradation
https://en.wikipedia.org/wiki/Photodegradation