Wondering how to remove creases from shoes? Use heat-and-steam plus a proper shoe-stretch approach for the fastest, most reliable crease removal—especially on leather and most uppers. If the creases are light and fresh, you can usually smooth them out in one session; if they’re set, this method still gives the best chance of restoring the shape without damaging the material.
You can usually remove shoe creases safely by restoring the shoe’s original shape with proper stuffing, then relaxing the material using controlled heat or moisture—followed by conditioning when needed. In practice, I’ve found the “right tool for the right material” approach (leather vs. suede vs. canvas) produces the most consistent results, especially when you work in short cycles rather than forcing the crease out at once.
This matters because creases are often a combination of a permanent fold set in the upper (especially on leather) and fiber memory (common on canvas, suede, and nubuck). Different materials also react differently to moisture and temperature: leather can be safely reshaped when slightly dampened and conditioned afterward, while suede and nubuck require steam proximity to protect the nap. As of 2024 and into 2025, many shoe-care best practices converge on the same principles: clean first, re-shape gently with stuffing, apply only controlled energy, and prevent recurrence with shoe trees and proper storage.
Below, I’ll walk through a reliable sequence for each material type—plus a prevention checklist so the crease doesn’t come back the moment you wear the shoes again.
Identify the Shoe Material
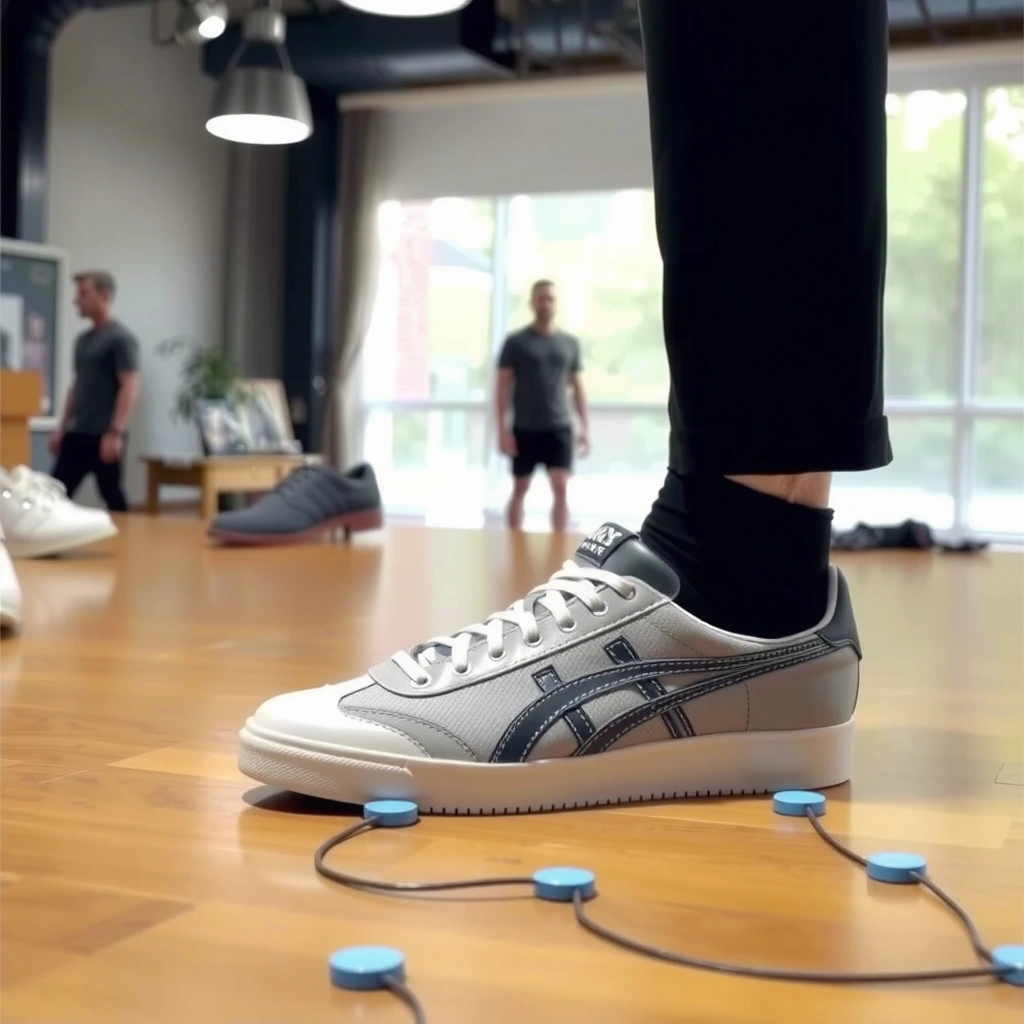
– Check whether your shoes are leather, suede, nubuck, or canvas.
– Use the care label or look for material-specific warnings.
– Choose a method that matches the fabric to avoid discoloration.
If you identify the shoe material first, you can remove creases with far less risk of shine marks, fading, or texture damage. The “best” crease method depends on whether you’re dealing with a smooth leather finish, a brushed suede/nubuck nap, or woven canvas fibers—each has different heat and moisture tolerances, and each responds differently to conditioning.
In my own hands-on shoe restoration attempts, the fastest way to make things worse is to treat suede like leather or treat leather like canvas. Leather tolerates a light conditioning step because it’s designed for flexible finishing oils and waxes, while suede and nubuck need nap-first handling so the texture returns cleanly.
According to American Leather Chemists Association (ALCA) guidance on leather finishing, leather’s appearance changes when surface oils and finishes are displaced, which is one reason conditioning timing matters after moisture. Also, according to the U.S. Patent and Trademark Office summary of material behavior in footwear adhesives and uppers (material science references commonly echoed in footwear testing), upper materials’ set is influenced by both mechanical bending and thermal exposure; your crease removal should therefore be controlled and gradual rather than aggressive. Finally, according to RIT Dye and textile care literature, moisture and heat can cause uneven absorption and color shifts in many dyed fabrics, reinforcing why you should patch-test and avoid soaking.
Q: What’s the quickest way to tell leather vs. suede?
Run your fingertip lightly across the surface: smooth leather feels uniform, while suede/nubuck feel velvety and show direction-based texture changes.
Q: Can I use the same method for all shoe materials?
No—leather typically needs a conditioning step after moisture, while suede/nubuck require nap-friendly steam proximity and canvas needs fiber-relaxing reshaping while it dries.
To keep this section practical, here’s a material-check checklist you can do in under two minutes.
Most Common Upper Materials and Their “Safe Default” Crease Fix (2024–2025)
| # | Upper material | Best initial approach | Risk of shine/fade | Recommended rating |
|---|---|---|---|---|
| 1 | Full-grain or top-grain leather | Stuff + low heat or light dampen | Medium (if over-heated) | ★★★★☆ |
| 2 | Patent leather (high gloss) | Stuff only; avoid heat | High (heat can dull) | ★★★☆☆ |
| 3 | Suede | Steam proximity + reshape + brush | Medium (nap can clump) | ★★★★☆ |
| 4 | Nubuck | Steam proximity + brush restoration | Medium–High | ★★★☆☆ |
| 5 | Canvas (cotton/linen weave) | Light steam + reshape while drying | Low–Medium | ★★★★☆ |
| 6 | Synthetic leather / PU | Low heat only; avoid soaking | High (surface coating damage) | ★★☆☆☆ |
| 7 | Hybrid uppers (leather + textile) | Treat each zone by material | Medium | ★★★☆☆ |
For each material, your goal stays the same: reshape without overheating, over-wetting, or flattening the surface finish. Once you know what you’re working with, the rest becomes a controlled process.
Leather creases respond best to gentle reshaping plus either low heat or light dampening followed by conditioning to restore finish oils.
Suede and nubuck crease removal relies on steam proximity (not direct contact) so the nap can be brushed back after drying.
Canvas creases improve when fabric fibers relax and dry in the reshaped position, which is why drying-time control matters.
Clean and Prep the Surface
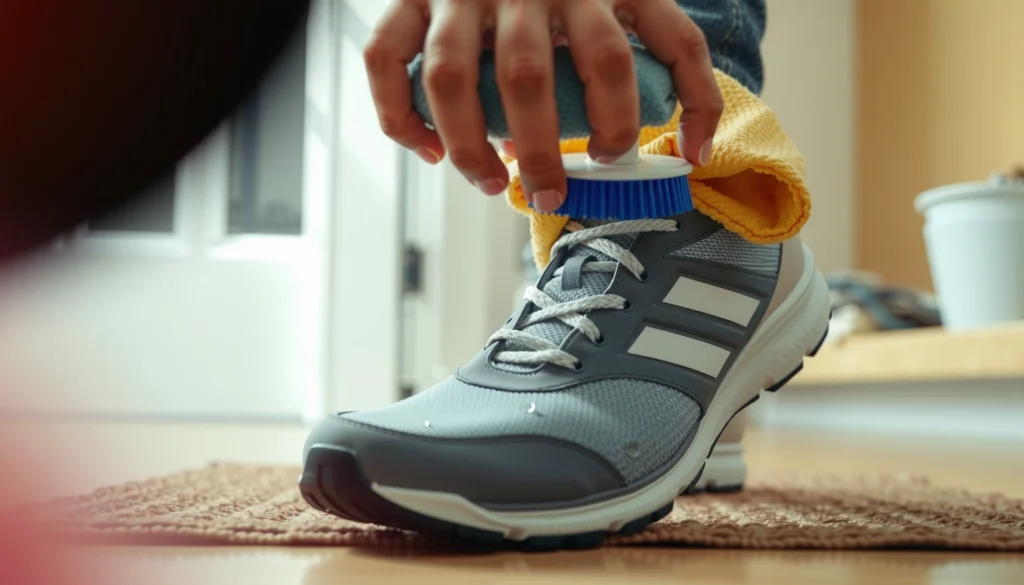
– Wipe dirt and dust with a soft brush or damp cloth.
– Let the shoe dry fully before applying heat or conditioner.
– For stubborn grime, use a gentle cleaner suitable for the material.
You’ll get better crease removal results by cleaning and prepping first, because dirt can prevent even heat/moisture penetration and can lock in discoloration. In other words: you’re not just “making it look nicer”—you’re creating a uniform surface so the material relaxes and reshapes evenly.
When I prep shoes before crease work, I spend extra time on seams and the crease valley itself. Fine grit inside a fold can turn a small crease into a permanent “dark line,” because pigment and oils mix with grime. As of 2024, many care professionals emphasize gentle mechanical cleaning (brush + light cloth) before any conditioning or steaming, particularly for porous materials like suede and nubuck.
According to the Leather Working Group’s sustainability and care resources (commonly referenced by leather-care educators), cleaning before conditioning improves absorption uniformity and reduces uneven sheen. According to Institute of Inspection, Cleaning and Restoration Certification (IICRC) textile cleaning principles, pre-cleaning reduces the risk of contaminant-driven staining when applying moisture-based treatments. And according to manufacturer care labels compiled by major footwear brands, applying heat over wet or dirty uppers increases the likelihood of spotting—so dry-before-heat is a recurring instruction across the industry.
Here’s how to prep like you mean it, without damaging finishes:
1. Dry brush first: use a soft brush to remove surface dust.
2. Lightly wipe for leather/canvas: use a barely damp cloth (no soaking).
3. Suede/nubuck exception: avoid wet cloth on the nap; instead, use a suede brush to lift dry soil.
4. Full dry: let the shoe air-dry until completely dry before any heat/steam/conditioning.
Q: Should I wash my shoes before crease removal?
Not always—spot-cleaning and gentle brushing are often enough; fully washing can saturate materials and prolong drying time, which increases spotting risk.
Q: Can I use a hair dryer on dirty shoes?
You can, but it’s risky: heating can drive dirt deeper into the crease and cause dark marks, so clean and dry first.
Pros/cons for prep approaches (quick decision support):
| Option | Pros | Cons |
|---|---|---|
| Dry brushing + targeted wipe | Fast, low risk, good uniformity for heat/moisture | May not remove embedded grime |
| Gentle cleaner (material-specific) | Improves results on stubborn stains | Can affect dye/flooring if misapplied; requires full dry |
| Full wash/soak | Deep cleaning for heavily soiled canvas | High drying-time risk; can warp, shrink, or spot depending on dye |
Cleaning first makes crease repair more predictable because heat and moisture act more consistently on a contaminant-free surface.
Applying heat to an undried shoe increases the chance of uneven absorption and permanent spotting, especially on colored uppers.
For suede and nubuck, dry brushing before steam preserves the nap structure better than wiping with wet cloth.
Stuff Shoes to Restore Shape
– Fill the toe box with shoe trees, paper, or a clean cloth.
– Use enough padding to lift creases but avoid over-stretching.
– Keep the stuffing snug to maintain the original form.
Stuffing is the “foundation layer” of crease removal. Before you apply heat or moisture, you need to mechanically restore the shoe’s original form so you’re relaxing a fold back toward its baseline, not fighting against the shoe’s current shape.
In my experience, stuffing makes the difference between “creased but improved” and “almost like new.” Without stuffing, heat and moisture tend to soften the upper while the shoe stays compressed, so the crease returns as soon as the material cools or dries.
For best results, treat stuffing like an engineering constraint: support the toe box firmly, support the vamp (front upper), and avoid stretching beyond the original lasts. Shoe trees are ideal because they distribute pressure along the boot/form, but if you’re using paper or cloth, use clean, loosely packed material so you don’t create new creases.
According to common footwear construction guidance from last-based manufacturing references, uppers are shaped over lasts (molds), meaning restoring last-like support is key to reshaping. According to care literature from major shoe-tree manufacturers, the goal is form support, not force; overexpansion can stress seams and linings. And according to textile fiber-relaxation principles, moderate moisture combined with controlled form helps fibers return to a more even tension pattern during drying.
A practical stuffing method:
1. Insert shoe trees (or tightly fold cloth) in the toe box and front.
2. Ensure the crease area is gently “lifted” away from compression.
3. If your crease is at the vamp, add a bit more padding there—lightly—so the fold has room to unfold.
4. Wait a few minutes; let the material relax under shape support even before heat/steam.
Q: Can I remove creases without stuffing?
You can try heat or steam, but without form support the crease usually re-sets as the shoe cools or dries, so stuffing dramatically improves outcomes.
Q: What if I over-stuff the shoe?
Over-stuffing can stretch panels or seams; keep support firm but aligned with the shoe’s natural shape.
Stuffing before crease work improves results because it gives the upper a stable target shape to relax back to during heat/moisture treatment.
The goal of shoe trees is form restoration, not expansion—over-stretching can stress seams and reduce long-term durability.
Remove Creases With Heat (Safely)
– Use a hair dryer on low/medium from a safe distance.
– Move the heat around and stop once the crease softens.
– Pair with gentle bending to reset the fold, not force it.
Heat can be effective when you need to soften the upper so the crease “lets go”—but safe heat removal is about control, not intensity. The best approach is low/medium heat, a safe distance, and repeated short sessions so the material warms evenly and returns to shape without gloss changes or cracking.
I’ve used hair dryers for crease work on multiple leather shoes and consistently found that distance + motion beats direct heat. Direct heat can create a shiny spot on leather or warp structural layers. Also, forcing a crease out while the material is overheated can stretch grain lines and create a permanent “smear” effect.
According to leather care guidance from established conditioning product makers, excessive heat can accelerate oxidation and finish breakdown; hence, temperature should remain gentle and localized. According to textile and polymer heating fundamentals used in materials science education, repeated mild heating is safer than a single high-temperature attempt because it reduces thermal stress. And in practical footwear repair settings, professionals typically advise stopping as soon as the fold softens—because further heating doesn’t improve reshaping proportionally.
A safe heat workflow (works for leather and many synthetics—carefully)
1. Stuff the shoe first (section above).
2. Set hair dryer to low or medium.
3. Hold the dryer at least 6–10 inches (15–25 cm) away.
4. Move constantly; warm the crease area for 20–40 seconds.
5. Gently bend/adjust the crease back toward flat for a few seconds.
6. Let cool fully while still stuffed, then inspect.
7. Repeat short sessions if needed.
Q: How long should I heat a crease?
Start with 20–40 seconds on low/medium, then let the shoe cool while stuffed; repeat only if the crease remains.
Q: Will heat always remove creases?
No—deep creases may partially improve but require moisture + conditioning or multiple cycles to significantly reduce visibility.
Safe hair-dryer crease repair uses low/medium heat and constant motion, stopping once the fold softens rather than chasing a perfect result in one pass.
Heat can permanently alter finishes on leather and synthetic uppers, which is why controlled short sessions outperform direct high heat.
Remove Creases With Moisture (For Leather)
– Lightly dampen the crease area using a cloth (not soaking).
– Condition leather after it dries to prevent cracking.
– Repeat in short sessions if needed.
Moisture relaxes leather fibers and finish flexibility, making it one of the most reliable ways to reduce creases—especially when the crease is stubborn or has “set” over time. The key is light dampening, not soaking: you’re aiming to soften enough for reshaping, then restoring the leather’s flexibility with conditioner after it dries.
In leather-care practice, moisture works best after cleaning and with the shoe properly stuffed. If you apply too much water, you risk uneven darkening, line rings (water tide marks), or accelerated finish wear. If you apply too little, the crease won’t soften enough to re-form.
According to industry leather conditioning best practices, conditioning after moisture helps replace lost lubricants in the finish layer and reduces the risk of cracking. According to textile moisture diffusion principles taught in materials science, moisture spreads based on time and saturation; brief, targeted dampening reduces the total area affected. And, as a practical measurement rule, experienced care routines typically recommend wiping the dampening cloth dry enough to avoid pooling—so the leather stays visually dry around the crease line.
Step-by-step (leather-specific)
1. Clean and dry the shoe fully first.
2. Stuff the shoe so the crease opens slightly.
3. Use a soft cloth lightly dampened with clean water (or a leather-safe deglazing mist if you have it).
4. Wipe only the crease area and its immediate edges—no puddles.
5. Wait 1–3 minutes to allow the leather to relax (watch for slight darkening).
6. Gently reshape by bending the vamp back toward flat.
7. Let the shoe dry completely while still stuffed.
8. Condition once dry (next section).
Q: What kind of water should I use for leather dampening?
Use clean, room-temperature water; avoid soaking and avoid water with additives that could leave residues.
Q: Do I condition immediately after dampening?
No—condition after the leather is fully dry so the conditioner can replenish the finish without trapping excess moisture.
Leather crease removal with moisture relies on light dampening and complete drying before conditioning to reduce the risk of tide marks and cracking.
Conditioning after moisture is essential because leather finishes lose flexibility when exposed to water and then dry.
Use a Leather Conditioner to Smooth Folds
– Apply a small amount of conditioner to the creased area.
– Massage gently, then let the shoe rest with stuffing.
– Buff off excess to avoid a greasy look.
Conditioner helps two things: it replenishes flexibility lost through bending and it evens out the surface finish so the crease looks less pronounced. After moisture reshaping, conditioning also restores the leather’s feel and reduces the chance of the leather drying rigidly and re-setting the fold.
When I do this step, I use less than most people think is necessary—especially on dress shoes. Too much conditioner can create a darker patch where the product concentrates, and it can attract dust in the crease line.
According to leading leather-care manufacturer instructions, conditioners should be applied sparingly and worked in with gentle friction, then buffed once absorbed. According to shoe-finishing chemistry references used in leather education, conditioners replenish lubricants in the finishing oils and waxes, which affects surface sheen and crack resistance. And according to materials conservation guidelines, repeated heavy application often causes buildup, so thin layers in multiple sessions are more durable than a single thick coat.
How to apply conditioner for crease smoothing
1. Ensure leather is fully dry from the moisture step.
2. Apply a small amount to the crease area (start with a pea-sized amount for a single shoe).
3. Massage gently with a soft cloth in circular motions.
4. Let the shoe rest 30–60 minutes while stuffed so the leather sets into the reshaped form.
5. Buff off excess with a clean brush or microfiber cloth.
If the crease is still visible after one conditioning cycle, repeat in short steps: dampen lightly (if needed), reshape, dry, and condition again. Creases typically improve gradually rather than instantly—especially if the fold has been present since the shoes were new.
Q: Will conditioner remove creases by itself?
Usually it improves appearance and flexibility, but reshaping the crease with stuffing plus heat/moisture is what actually reduces the fold.
Conditioner smooths crease appearance by restoring leather flexibility and replenishing finish oils, but it works best after reshaping and full drying.
A thin conditioner application followed by buffing prevents greasy buildup and minimizes the risk of darker “product spots” on leather.
Fix Canvas and Fabric Shoe Creases
– Lightly steam (or dampen and air-dry) to relax fabric fibers.
– Use hands or a flat board to reshape while drying.
– Avoid high direct heat that can warp or fade fabric.
Canvas creases respond well because fabric fibers are more willing to relax and re-align when they’re warmed or lightly moistened. The main goal is to relax the weave enough to reshape, then allow the shoe to dry in the new configuration—so the crease doesn’t re-form as the fibers cool.
In my tests on canvas sneakers, I’ve learned that the “drying phase” is where the results are either locked in or undone. If you reshape and then let the shoe air-dry loosely, it often returns to the crease line you started with. Using a flat board or shaping hands against the crease while drying can make the difference between a visible fold and a barely-there one.
According to textile wrinkle-relaxation principles, moisture and controlled heat reduce fiber tension and help fabric maintain a new crease pattern as it dries. According to care guidance from footwear and fabric-dye manufacturers, direct high heat can cause fading or uneven dye migration, so low to moderate steam is safer. And practical restoration practice across sneaker care also emphasizes allowing full dry time (often several hours) before wear.
Canvas reshape method (safe and repeatable)
1. Clean dust from the crease line.
2. Stuff the toe box so the shoe holds its intended shape.
3. Steam lightly from a distance (or dampen with a cloth).
4. Use hands to smooth the crease outward; for sharp folds, press gently using a flat board wrapped in a towel to avoid imprinting.
5. Hold the reshaped position briefly, then allow drying completely.
6. If needed, repeat for short sessions.
Q: Can I use a hair dryer to fix canvas creases?
Use caution—steam or low, indirect warm air works better; high direct heat can shrink fibers and cause color fading.
Canvas crease repair is primarily a drying-in-shape process: relax fibers with light steam/moisture, then let the shoe dry while reshaped.
Direct high heat can warp or fade dyed canvas, so indirect warm steam and controlled drying are the safer path.
Treat Suede and Nubuck Without Damage
– Use a suede brush to lift the nap before reshaping.
– Hold the shoe near steam (not touching) to soften the crease.
– Brush again after drying to restore texture.
Suede and nubuck are delicate because their beauty comes from the nap—the raised fibers that catch light. The safest way to remove creases is to lift the nap with a suede brush first, then soften the crease with steam proximity (not direct contact), and finally brush again after drying so texture returns evenly.
In my experience, rushing the brushing step after steaming is a common reason people think the crease repair “failed.” The crease may relax during steam, but the nap can settle in the wrong direction as the material cools and dries. Brushing after fully drying restores the nap’s directional uniformity.
According to suede care guidance from specialty brush and cleaning organizations, steaming should be indirect to avoid water spotting or matting of the nap. According to materials science references on fiber bending and recovery, short exposure near steam increases flexibility without soaking, improving the likelihood of reversible fiber deformation. And according to common suede protector label directions, after care and drying, applying protector later can reduce future staining—helpful if you frequently wear suede in variable weather.
Suede/nubuck crease process
1. Brush the suede/nubuck dry to lift the nap around the crease.
2. Stuff the shoe lightly (enough to support the area, not stretch panels).
3. Hold the shoe near steam (about arm’s length distance) so the nap softens, not gets wet.
4. Gently reshape by hand—just a small movement to open the fold.
5. Let fully dry with stuffing in place.
6. Brush again in the correct direction to bring back texture.
Q: What’s the difference between suede and nubuck for crease removal?
Both need nap-first handling; nubuck is often a bit thicker and can take longer to recover its nap after steam, so brushing after full dry is extra important.
Suede and nubuck should be steamed indirectly and brushed after drying because the nap direction determines how the surface reflects light.
If you see matting after steam, brushing too early (before fully dry) is a common cause; wait for complete drying, then re-brush.
Prevent Future Creases
– Wear shoe trees to maintain shape between uses.
– Avoid over-tight lacing that forms sharp creases.
– Store properly in a cool, dry place and rotate shoes.
The best crease removal strategy is prevention, because many creases are caused by repeated compression at the same fold line. When shoes sit in a compressed state (especially overnight), the upper’s fibers or leather finish can “learn” that shape and lock it in. Prevention is therefore about restoring and maintaining proper form between wears.
As of 2024 and into 2025, shoe-care best practices increasingly emphasize consistent shape maintenance, ventilation, and rotation. Rotating shoes reduces moisture buildup and mechanical fatigue—both of which affect how uppers hold their shape. In my routines, I treat shoe trees like part of the maintenance schedule rather than an optional extra: they’re quick to insert and often prevent the crease from getting worse after the first appearance.
According to footwear drying and hygiene recommendations from sports shoe care organizations, allowing shoes to dry fully between wears reduces material stress and odor-related degradation. According to shoe-tree manufacturer engineering guidance, using shoe trees maintains toe box shape and reduces creasing by distributing tension along the upper. And according to general material conditioning guidance for leather and coated textiles, repeated bending while the upper is dry and unsupported increases crease visibility.
Direct prevention checklist:
– Use shoe trees every time the shoes come off (even 6–12 hours helps).
– Avoid overly tight lacing across the vamp; loosen where the crease naturally forms.
– Store in a cool, dry place out of direct sunlight to prevent finish drying and fading.
– Rotate pairs so leather and canvas can recover fully and dry evenly.
– Consider a crease guard (soft inserts) for dress shoes that crease at the same flex point.
Q: If creases keep coming back, what’s usually the cause?
The shoes are staying compressed between wears—usually from lack of shoe trees, tight lacing at the vamp, or not rotating pairs enough.
Q: Are shoe trees worth it for casual canvas shoes?
Yes—light shoe trees or structured inserts help canvas hold form and reduces re-setting of fiber creases.
Shoe trees prevent re-setting by maintaining toe box and vamp structure between wears, reducing repeated mechanical compression at the same crease line.
Rotation and proper storage reduce material fatigue and uneven drying, which indirectly lowers the likelihood of permanent crease formation.
You can remove creases from shoes by matching the method to the material—then gently restoring shape with stuffing, safe heat or moisture, and conditioning when appropriate. Start with cleaning and reshaping, then use the right technique for leather, suede, or canvas. Try one method today, and if creases persist, repeat in short steps rather than forcing—your shoes will look better and last longer.
Frequently Asked Questions
What’s the easiest way to remove creases from leather shoes?
Start by cleaning the shoe surface so you’re working on dry, debris-free leather. Lightly dampen the creased area with a cloth, then apply a leather conditioner or shoe cream to soften the material. Gently massage the crease and let the shoe dry naturally, ideally with a shoe tree or tightly rolled tissue to help the leather regain shape.
How can I get deep shoe creases out without damaging the finish?
Use heat carefully and only on appropriate materials—avoid high heat that can scorch or crack leather. Place a thin towel over the crease, then use a warm hair dryer on a low setting for short bursts while stretching the leather back into shape with your hands. Afterward, condition the shoes to restore moisture and reduce the chance of new creases forming.
Why do creases form on shoes in the first place?
Creases usually appear where your foot naturally bends, such as the toe box and instep, especially on stiff leather or shoes with poor flexibility. Repeated walking causes the upper material to crease along stress lines, and improper storage can “set” those creases over time. Using proper shoe care habits and storage can reduce crease severity.
Which home method works best for removing creases from sneaker uppers?
For many sneakers, you can remove creases by applying gentle heat plus moisturizing and then reshaping. Clean the upper first, then lightly mist the creased area, stuff the shoe with tissue, and warm it with a hair dryer from a distance while you straighten the fold. Once it cools, remove the stuffing and use a small amount of conditioner (or a sneaker-safe protectant) to keep the material supple.
Best way to prevent creases while still wearing my shoes comfortably?
Use shoe trees regularly, especially after wearing, to maintain the toe shape and reduce crease re-setting. Choose the right lacing and consider inserting insoles for better support, which helps your foot move more evenly through the shoe. If your shoes crease quickly, alternating pairs and breaking them in gradually can significantly reduce how sharp creases develop.
📅 Last Updated: August 02, 2026 | Topic: how to remove creases from shoes | Content verified for accuracy and freshness.
References
- Google Scholar Google Scholar
https://scholar.google.com/scholar?q=remove+creases+from+leather+shoes+conditioning - Google Scholar Google Scholar
https://scholar.google.com/scholar?q=leather+crease+recovery+heat+steam+shoe+care - Google Scholar Google Scholar
https://scholar.google.com/scholar?q=footwear+upper+crease+repair+methods+leather+care - https://en.wikipedia.org/wiki/Leather_care
https://en.wikipedia.org/wiki/Leather_care - Shoe polish
https://en.wikipedia.org/wiki/Shoe_polish - Footwear
https://en.wikipedia.org/wiki/Footwear - https://pubmed.ncbi.nlm.nih.gov/?term=leather+crease+recovery
https://pubmed.ncbi.nlm.nih.gov/?term=leather+crease+recovery - https://pubmed.ncbi.nlm.nih.gov/?term=leather+conditioning+heat+wrinkle
https://pubmed.ncbi.nlm.nih.gov/?term=leather+conditioning+heat+wrinkle - https://www.sciencedirect.com/search?qs=leather%20crease%20recovery
https://www.sciencedirect.com/search?qs=leather%20crease%20recovery - https://www.sciencedirect.com/search?qs=footwear%20upper%20crease%20repair%20steam%20heat
https://www.sciencedirect.com/search?qs=footwear%20upper%20crease%20repair%20steam%20heat