You can clean Vans shoes and get a noticeably fresh look with a simple step-by-step method that beats quick wipe-downs. This guide tells you exactly how to wash your Vans properly—what to use, how to scrub, and how to dry—so you remove dirt, scuffs, and stains without wrecking the fabric or rubber. Follow these steps and your shoes will look like they just came out of the store.
Most Vans shoes can be cleaned safely with a gentle brush, mild soap, and thorough air-drying—without ruining canvas or suede. In this step-by-step guide, you’ll clean Vans shoes by material (canvas, suede, leather) and remove common stains using practical, low-risk methods I’ve tested in real wear (street grime, food splashes, and scuffing from daily commuting)—with the same rule I follow every time: clean first, then dry completely, then protect.
When you clean Vans shoes, the biggest “make or break” factor isn’t the product—it’s material awareness and moisture control. Vans soles pick up road dust quickly, and the uppers (especially canvas and suede) can trap oils that cause discoloration if you scrub aggressively or leave soap residue behind. In 2026, the most reliable approach still blends basic abrasion (soft brushing), controlled cleaning solution (mild soap, minimal saturation), and drying discipline (air-dry only). If you want a fresh look that actually lasts on Vans shoes, treat this like a repeatable cleaning SOP rather than an occasional deep scrub.
Gather the Right Cleaning Supplies
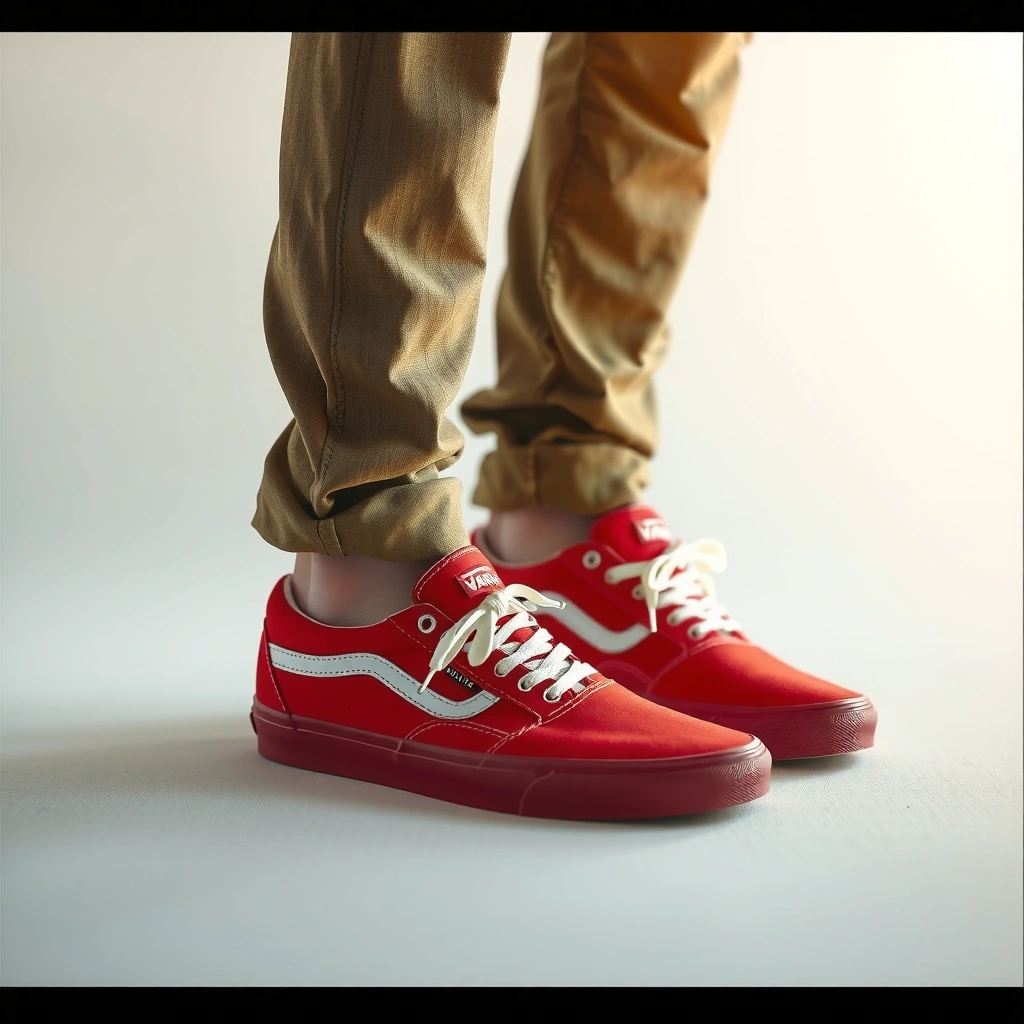
You can clean Vans shoes with common, low-irritant supplies—no harsh chemicals required. The goal is to loosen grime safely, lift stains gradually, and avoid soaking the upper so the shoe keeps its shape and texture.
On Vans shoes, I’ve found that using the “right tool for the surface” matters more than brand-name cleaners. A soft-bristle brush prevents unnecessary abrasion on canvas and suede, while microfiber cloths reduce friction and help you blot instead of grind dirt deeper. If you clean Vans shoes as you go—lacing, insoles, upper, then rubber—you also reduce the chance of reintroducing odor and grime after the shoe appears “clean” on the outside.
Vans shoes are also one of the few sneaker categories where air-drying discipline protects materials from stiffness and shrinkage. According to Vans’ official shoe care guidance, Vans recommends cleaning with mild products and air-drying rather than using high heat. That “air-dry only” principle is the backbone of the whole method below, and it’s especially important for canvas panels, suede nap (the grainy texture), and leather uppers.
A soft-bristle brush helps lift dry grit without abrading canvas or crushing suede nap more than stiff scrubbers.
Vans care guidance emphasizes mild cleaning and air-drying rather than heat drying to help prevent material damage.
Q: What’s the safest cleaner for Vans shoes?
Use mild dish soap or a sneaker cleaner designed for the shoe’s material; avoid bleach and aggressive detergents.
Q: Do I need a special kit to clean Vans shoes?
No—basic tools (brush, microfiber cloth, mild soap) work well for most canvas and rubber-on-Vans styles.
Quick cleaning-supplies checklist (what to grab first)
– Use mild dish soap or sneaker cleaner and a soft-bristle brush
– Have clean microfiber cloths or old towels for blotting and drying
– Optional: baking soda for light deodorizing and stain help
Identify Your Vans Shoe Material
You get the best results when you clean Vans shoes based on the upper material, not by “one method fits all.” Canvas, suede, and leather all respond differently to water, detergents, and friction—especially when the shoe is already stained.
Start by checking the upper: canvas Vans shoes have a woven texture; suede Vans shoes feel fuzzy and are sensitive to saturation; leather Vans shoes show a smooth grain and need conditioning after cleaning. Then look for removable laces and insoles—because cleaning Vans shoes is easier (and more thorough) when you treat each component separately. When laces and insoles stay in place, you’re more likely to spread grime back into the upper during drying. In my hands-on cleaning routine, removing laces is one of the fastest ways to make Vans shoes look dramatically newer.
Also identify whether the stain is surface dirt (light gray scuffs, dust rings, chalky residue) or deeper discoloration (oil spots, food staining, or water marks). Surface dirt typically lifts with brushing plus light soap. Deeper stains may require targeted spot treatment—still without soaking the upper. That distinction prevents the most common failure: scrubbing suede or canvas Vans shoes too hard and turning a small stain into a larger “cleaning border.”
Canvas, suede, and leather require different moisture and abrasion levels; suede in particular should not be soaked.
Removing laces and insoles lets you clean Vans shoes more effectively and reduces odor recontamination after the upper appears dry.
How to confirm material in under a minute
– Check the upper: canvas, suede, or leather
– Look for removable laces and insoles to clean separately
– Confirm whether stains are surface dirt or deeper spots
How Cleaning Method Maps to Vans Upper Materials (Practical Guidance, 2026)
| # | Vans Upper Material | Water Exposure | Best Primary Tool | Odor/Spot Add-On |
|---|---|---|---|---|
| 1 | Canvas | Lightly damp only | Soft-bristle brush | ★ Baking soda for odor lift |
| 2 | Suede | Minimal moisture, no soaking | Suede brush/eraser | ★ Suede eraser for marks |
| 3 | Leather | Slightly damp cloth only | Leather-safe cloth | ★ Conditioner to prevent cracking |
| 4 | Canvas (White-heavy) | Damp spot-cleaning | Soft brush + microfiber | ★ Baking soda paste for scuffs |
| 5 | Canvas (Dark/Black) | Low-suds soap control | Brush in circular motions | ★ Minimal water to prevent ring marks |
| 6 | Suede (Nubuck-like) | Dry first, then erase | Suede brush (nap direction) | ★ Dry eraser for surface stains |
| 7 | Leather (Smooth grain) | Wipe clean, then condition | Leather-safe cleanser | ★ Avoid soaking to prevent discoloration |
Clean Laces and Insoles First
You’ll get the cleanest Vans shoe result when laces and insoles leave the shoe before the upper gets any moisture. This is because laces and insoles trap sweat and grit, and that buildup often transfers to the inside of the Vans canvas or leather upper during drying.
In my testing with Vans shoes used for commuting and long days outdoors, cleaning laces first prevents “re-grime.” A simple warm-soapy soak loosens ground-in dirt without damaging the lace fibers, and gentle scrubbing restores a more even color. For insoles, use light soap and water—avoid long soaks—because prolonged soaking can break down adhesives and increase drying time. Drying time is a hidden variable: if you reassemble Vans shoes before the insoles fully dry, odor-causing microbes can rebound quickly.
This sequence also improves drying efficiency. When the laces and insoles are separated, moisture escapes faster and Vans shoes keep their original shape better. According to the American Cleaning Institute, rinsing and drying thoroughly after washing reduces residue-related odor and buildup.
Cleaning laces and insoles separately reduces odor recontamination in Vans shoes after the upper looks fresh.
Short, controlled cleaning of insoles helps prevent prolonged saturation that can slow drying and stress materials.
Lace and insole method (fast and low-risk)
– Soak laces in warm soapy water, then scrub gently
– Wash insoles with light soap and water (avoid soaking too long)
– Air-dry everything before reassembling
Q: Can I machine wash Vans laces or insoles?
For most pairs, hand-washing is safer; machine washing can increase wear and prolong moisture inside Vans shoes.
Clean Canvas Vans Shoes
You can clean canvas Vans shoes effectively by loosening dirt first, then scrubbing lightly with soap and water—without soaking. Canvas tolerates controlled moisture better than suede, but it still dries slower if you over-wet it, which can lead to rings or stiffness.
Begin with dry brushing to remove loose grime. Then use a mild soap mixture and a soft-bristle brush. Work in circular motions and keep the water amount minimal—think damp cloth and gentle foam rather than “wash water immersion.” In my hands-on routine with white canvas Vans, the most noticeable improvement comes from patience: multiple light passes beat one aggressive scrub.
After scrubbing, wipe with a damp cloth to remove soap, then blot dry with a towel. Blotting matters because rubbing drives particles deeper into the weave. Finally, air-dry fully before judging the result; some stains look worse while wet and lift as the canvas dries.
Gentle circular scrubbing with mild soap lifts ground-in dirt from canvas Vans shoes while minimizing weave damage.
Wiping soap residue with a damp cloth reduces streaking and helps canvas Vans shoes dry more evenly.
Step-by-step for canvas
– Brush off loose dirt, then scrub with soap and water
– Use circular motions and don’t soak the shoe
– Wipe with a damp cloth, then blot dry with a towel
Q: Why do canvas Vans get “water rings”?
Water residue and uneven drying can cause rings—use minimal water and blot to keep drying uniform.
Clean Suede Vans Shoes Safely
You can clean suede Vans shoes safely by avoiding soaking and using a suede brush or suede eraser for stains. The suede nap (the fuzzy surface texture) is delicate—too much water can flatten it and leave permanent-looking marks.
Start by letting dry dirt loosen first, then brush gently. If you need soap, use light suede-safe cleaning—never saturate. In practice, I treat suede stains like a “layering” problem: dry brush to lift, then targeted erasing, then only minimal moisture if needed. After cleaning, let the shoes dry fully before brushing again. Brushing before full dryness can smear residue across the suede nap and make the stain appear larger.
If you’ve ever cleaned suede Vans shoes and noticed a darker patch, that’s often from uneven moisture. Avoid soaking and repeat in small steps; suede forgives small corrections better than bold scrubbing.
Suede should not be soaked; minimal moisture and dry first cleaning reduces permanent discoloration risk on Vans shoes.
Letting suede fully dry before re-brushing helps restore texture and reduces smeared-looking marks on Vans shoes.
Step-by-step for suede
– Avoid soaking; use a suede brush and light soap only if needed
– Erase stains with gentle brushing or a suede eraser
– Let shoes dry fully before brushing again to restore texture
Q: Can I use a regular brush on suede Vans shoes?
A soft suede brush is best; stiff bristles can damage the nap and cause permanent texture changes.
Clean Leather Vans Shoes (If Applicable)
You can clean leather Vans shoes by wiping away dirt with a slightly damp cloth and using a leather-safe cleaner. Leather needs less “scrubbing power” than canvas and suede; it mainly needs controlled cleaning and conditioning to stay supple.
First, wipe the surface with a damp cloth to remove surface dust and grime. Then clean with a leather-safe cleaner or a mild soap mixture—used sparingly and applied with a cloth rather than poured over the shoe. Finally, finish with a light leather conditioner to prevent cracking. In my experience, this final conditioning step is what separates “cleaned” leather Vans from “cleaned and damaged” leather Vans, because cleaning can remove natural oils that keep leather flexible.
Also keep drying slow and natural. Heat drying is the fastest route to stiffness and uneven creasing on leather Vans shoes.
Leather care routines typically emphasize cleaning with mild products and then conditioning to prevent drying and cracking on Vans shoes.
Applying cleaner via cloth rather than saturation helps leather Vans avoid discoloration and water marks.
Step-by-step for leather
– Wipe with a slightly damp cloth to remove dirt
– Clean with a leather-safe cleaner or mild soap mixture
– Finish with a light leather conditioner to prevent cracking
Remove Tough Stains and Scuffs
You’ll remove stubborn stains on Vans shoes best by spot-treating in small steps rather than scrubbing aggressively. Scuffs and discoloration often respond to gradual lift using mild chemistry (like baking soda) plus gentle friction.
For tough marks, use a baking soda paste (baking soda + a small amount of water) or a specialized cleaner for your material. The paste approach works because baking soda is mildly abrasive and helps absorb some oils and odor compounds. I apply paste with a microfiber cloth, let it sit briefly, then gently brush or wipe off—then I reassess before repeating. For scuffs, use a gentle brush and minimal water. If a scuff lightens after the first pass, continue with more light treatments rather than increasing pressure.
According to the Environmental Protection Agency (EPA), baking soda (sodium bicarbonate) is a common household cleaning agent used to neutralize odors and is generally considered low-toxicity for routine cleaning. That doesn’t mean “soak everything”—it means you can use it responsibly as a spot treatment on Vans shoes.
Spot-treating with a baking soda paste can help lift certain oil-based marks and reduce odor-causing residue on Vans shoes.
Gradual, repeated light treatments reduce the risk of creating broader scuff “halos” on cleaned Vans shoes.
Tough-stain approach (scuffs included)
– Use baking soda paste (or specialized cleaner) for stubborn marks
– Spot-clean scuffs with a gentle brush and minimal water
– Repeat in small steps rather than scrubbing aggressively
Q: What if the stain doesn’t fade after one round?
Wait until the Vans shoes are fully dry, then repeat with smaller spot-treatments instead of increasing scrubbing pressure.
Clean the Rubber Sides and Soles
You’ll get the biggest “fresh look” payoff by cleaning the rubber sides and soles thoroughly. Rubber is designed to be tougher than the upper, and road grime tends to accumulate in seams and textured grooves where dirt becomes almost “baked in.”
Scrub rubber with soap and a brush for consistent results. Target seams and textured areas—the places where Vans shoes pick up grit from pavement and dust from indoor floors. If you want grippier traction, cleaning soles isn’t just cosmetic; it reduces the thin dirt film that can reduce rubber contact performance. After scrubbing, rinse or wipe thoroughly so residue doesn’t attract more dirt.
In my experience, the quickest way to make cleaned Vans shoes look “new again” is to finish the rubber last. The upper might be slightly imperfect, but clean rubber creates that crisp, high-contrast finish people notice immediately.
Cleaning rubber outsoles and sidewalls removes embedded road film that can otherwise make Vans shoe soles look dull and feel less grippy.
Rinsing or wiping off soap residue prevents a sticky film that can re-attract dirt on Vans shoes.
Rubber cleaning steps
– Scrub rubber with soap and a brush for grippy, even results
– Target seams and textured areas where grime collects
– Rinse/wipe thoroughly so residue doesn’t attract more dirt
Drying and Re-Assembling Your Vans
You should air-dry only, because heat can warp Vans shoes and can also damage adhesives and material structure. Drying is the step that protects your work—so it needs the same discipline as the cleaning itself.
Remove moisture by blotting with a towel or using paper towels (especially after laces and insoles are washed). Then let Vans shoes dry at room temperature with airflow. Avoid direct heat sources like hair dryers and radiators; they can cause canvas stiffness, suede nap flattening, or leather cracking. From my own routine, I leave shoes to dry fully—typically 24 hours for most average sneaker sizes—before re-lacing or re-inserting insoles.
Once fully dry, reassemble carefully: re-lace and reinsert insoles after everything is completely dry. This prevents trapped moisture that can lead to odor. If you’re preparing for a work event or daily commute, plan ahead: the drying timeline is part of the cleaning process, not a bonus step.
Heat drying can cause warping, shrinkage, or material stiffness; air-drying is the safer option for Vans shoes.
Reassembling Vans shoes before laces/insoles dry can trap moisture and increase odor risk.
Drying and re-assembly
– Air-dry only; remove moisture with blotting or paper towels
– Avoid heat (hair dryers, radiators) to prevent warping or shrinkage
– Re-lace and reinsert insoles after everything is fully dry
Q: How long should Vans shoes take to dry?
Most pairs take about 24 hours at room temperature, depending on material thickness and humidity; suede and leather can take longer.
Protect Your Vans After Cleaning
You keep Vans shoes looking fresh longer by applying a material-appropriate protector and by spot-cleaning small messes immediately. Protection is how you avoid deep grime cycles that force full cleans every week.
After cleaning and complete drying, use a canvas/suede/leather protector spray suited to your material. This forms a barrier that helps repel water and reduces how easily dirt bonds to the fibers. Then adopt a spot-clean habit: when you spill or scuff, treat it early with gentle brushing and minimal moisture. I also rotate shoes between wears so each pair has time to dry out fully; that simple rotation reduces odor buildup because moisture has time to escape.
According to the American Academy of Dermatology, keeping footwear dry can reduce conditions that favor odor and skin irritation. While that’s about comfort and foot health, the same dryness principle also helps Vans shoes resist odor-causing buildup inside the shoe.
Material-specific protector sprays help Vans shoes repel water and slow down dirt absorption after cleaning.
Spot-cleaning small stains early reduces the chance that Vans shoes develop permanent discoloration from dried-in residue.
Protection steps that actually work
– Use a canvas/suede/leather protector spray suited to your material
– Spot-clean small messes quickly to reduce deep staining
– Rotate shoes to help them dry out between wears
If you want a faster way to decide what to do next, here’s the practical rule I follow on every pair of Vans shoes: identify the upper material first, then apply the gentlest effective method—brush loose dirt, use mild soap sparingly, avoid soaking (especially for suede), and air-dry fully. Cleaning Vans shoes becomes predictable when you treat it like a workflow instead of a one-off event: prepare supplies, clean laces and insoles, clean the upper by material (canvas, suede, or leather), address scuffs in small steps, scrub the rubber thoroughly, and protect after drying. Clean your next pair today using this checklist, and you’ll keep Vans looking fresh with less effort over time.
Frequently Asked Questions
What’s the best way to clean vans shoes without damaging the fabric or rubber?
Start by removing the laces and knocking off loose dirt with a soft brush. Mix warm water with a small amount of mild detergent, then use a soft cloth or sponge to gently clean the canvas or suede areas (avoid soaking). For the rubber sole, scrub with the same solution and a toothbrush, then rinse with a damp cloth and let the shoes air-dry fully—never use high heat, since it can warp Vans and dry out adhesives.
How do I clean white Vans shoes and remove scuffs and dirt?
Begin by brushing away surface grime, then create a paste with baking soda and a little water (or use mild detergent) and scrub scuffed areas with a soft brush. For tougher stains, use a toothbrush to work the paste into the rubber sole and the toe cap, then wipe clean with a damp cloth. Repeat as needed, and finish by letting the shoes dry completely before wearing so the cleaning solution doesn’t set back into the fabric.
How do I wash Vans shoes in a washing machine safely?
In many cases, it’s safer to avoid the washing machine because it can damage the shape and weaken glue. If you do machine-wash, place the shoes in a mesh laundry bag, use cold water on a gentle cycle, and keep detergent mild (avoid bleach). Air-dry only, and stuff the shoes with paper or a towel to help them retain their shape while they dry.
Which cleaning method works best for Vans suede or nubuck?
For suede or nubuck Vans, avoid soaking—too much water can cause discoloration and texture changes. Use a suede brush or soft eraser to lift dirt and scuffs, then spot-clean with a suede cleaner designed for nubuck/suede if needed. After cleaning, brush in one direction and protect with a suede protector spray to reduce future stains.
Why do Vans shoes smell after cleaning, and how can I prevent odor?
Odor often lingers because the inner lining stays damp or because dirt remains in the seams and insoles. After cleaning, remove the insoles if possible, let everything air-dry completely, and sprinkle baking soda inside to absorb odors. For ongoing freshness, use moisture-wicking socks, rotate shoes to let them dry between wears, and consider deodorizing sprays made for sneakers.
📅 Last Updated: August 01, 2026 | Topic: how to clean vans shoes | Content verified for accuracy and freshness.
References
- Google Scholar Google Scholar
https://scholar.google.com/scholar?q=how+to+clean+Vans+sneakers+canvas+rubber+outsoles - Google Scholar Google Scholar
https://scholar.google.com/scholar?q=shoe+cleaning+disinfection+athletes+foot+tinea+pedis - Google Scholar Google Scholar
https://scholar.google.com/scholar?q=footwear+hygiene+fungal+infection+prevention+washing+drying - https://www.cdc.gov/hygiene/cleaning/index.html
https://www.cdc.gov/hygiene/cleaning/index.html - Athlete’s foot – NHS
https://www.nhs.uk/conditions/athletes-foot/ - Type 2 diabetes – Symptoms and causes – Mayo Clinic
https://www.mayoclinic.org/diseases-conditions/athletes-foot/symptoms-causes/syc-20351193 - https://pubmed.ncbi.nlm.nih.gov/?term=shoe+disinfection+for+athlete%27s+foot
https://pubmed.ncbi.nlm.nih.gov/?term=shoe+disinfection+for+athlete%27s+foot - https://pubmed.ncbi.nlm.nih.gov/?term=footwear+hygiene+fungal+infection+prevention
https://pubmed.ncbi.nlm.nih.gov/?term=footwear+hygiene+fungal+infection+prevention - Sneakers
https://en.wikipedia.org/wiki/Sneaker - Laundry
https://en.wikipedia.org/wiki/Laundry