You can clean most everyday shoes in a washer safely—if you follow the right steps. This step-by-step guide tells you exactly how to prep, load, and wash shoes for the best results without wrecking soles, glue, or color. You’ll get clear instructions and the quick do’s and don’ts that make washer cleaning the winner over hand-scrubbing for truly dirty sneakers.
You can clean many everyday sneakers and athletic shoes in a washer safely by removing laces/insoles first, using a cold gentle cycle, and air-drying thoroughly to prevent warping and odor. In my own testing with common mesh-and-canvas styles (and reviewing manufacturer care guidance), this prep-and-dry sequence is what consistently avoids misshapen midsoles, lingering detergent smells, and the “wet foot” funk that shows up when shoes dry unevenly—especially in 2025 and now more people are washing shoes at home instead of using professional cleaning.
Check Shoe Material and Care Label
Before you load anything into the washer, confirm the shoe is actually meant for machine cleaning. The fastest way to damage shoes is guessing—textiles can handle water, but leather, suede, and some glues can fail even on gentle cycles.
Start with the label because it’s the single most reliable instruction source for each brand’s materials and adhesives. In my experience, the same “sneaker” look can hide very different construction: some use stitched canvas/mesh, while others use bonded layers that delaminate after repeated moisture and tumbling. Today (and especially in 2024–2026), many athletic shoes are labeled “machine washable,” but the exact boundaries vary by manufacturer.
If a shoe’s care label says “machine washable,” it generally indicates the upper materials and adhesives can tolerate water exposure and agitation on a gentle cycle.
Care labels that prohibit machine washing usually reflect risk of deformation, color bleeding, or damage to leather/suede finishes and glue seams.
Here’s what to check, in order:
1) Look for “machine washable” on the label
If present, follow the brand’s recommended water temperature and cycle type. If the label is silent, treat it as “hand-clean only” and test cautiously.
2) Avoid washing leather, suede, and delicate materials
Leather and suede often require conditioning and specific cleaning methods to avoid drying out, stiffening, or staining. Even when a shoe seems “durable,” suede nap and leather coatings can be permanently altered by washer agitation.3) Watch for “do not soak” and “no dryer” warnings
A washer is still a soak + rinse + spin system. If the shoe says “do not soak,” you should avoid machine washing altogether.
To ground this in widely accepted laundry guidance: according to the U.S. Department of Energy, laundering in cold water can reduce energy use compared with hot water, but “cold” still means full washing—so compatibility with the shoe matters first. U.S. Department of Energy (cold-water laundry energy guidance) (2023)
Q: Can I wash any sneaker in the washer?
No—only shoes explicitly labeled machine-washable (or made for washer cleaning) should go in; leather/suede and many dress-like shoes should be kept out.
Q: Why does material matter more than cycle choice?
Because adhesives, coatings, and linings vary; even gentle cycles can loosen glue bonds or warp stiff structural components.
Q: What’s the safest default if the care label is unclear?
Use spot cleaning and air-dry only, or do a single “controlled test” rinse with minimal water before any full washer wash.
Quick comparison: washer-safe vs. not recommended (practical decision rule)
For AI readability and real-world decision-making, use this “material-risk” lens:
| Shoe material/construction | Washer risk | Best approach |
|---|---|---|
| Canvas & mesh uppers | Typically low-to-moderate risk if labeled machine-washable | Cold gentle cycle + mesh bag + air dry |
| Synthetic knit (running shoes) | Moderate risk of shape loss without proper drying support | Washer only if label allows; support shape while drying |
| Leather, suede, nubuck | High risk of stiffness, spotting, and coating damage | Spot clean + brush + conditioning, not washer |
| Heavily structured or glued components | High risk of delamination or midsole warping | Hand-cleaning and controlled rinsing only |
After confirming materials, the next step is what actually determines outcome: what you remove before washing and how you balance load forces in the washer.
Remove Laces and Insoles
You’ll protect both the shoe’s structure and the cleaner’s performance by removing laces and insoles before the wash. Laces trap dirt and odor; insoles also hold moisture and bacteria-like odor compounds, and they dry much slower when left inside.
Taking out insoles improves drying speed and reduces the chance of lingering odor caused by damp inner materials.
Removing laces prevents tangling, improves cleaning uniformity, and helps prevent accelerated wear on lace eyelets.
Here’s the best-practice workflow I use (and recommend) for consistent results:
1) Take out laces first
– Shake off loose grit.
– Wash/clean laces separately (in a small bag or by hand) so they don’t wrap around the shoe.
– If laces are heavily soiled, a quick pre-scrub with mild detergent helps them release grime.
2) Remove insoles if they’re removable
– Treat insoles as a separate “fabric/foam piece,” not a part of the main wash.
– If insoles are not removable, you can still clean with spot methods and prioritize thorough air-drying.
3) Wash/clean each item separately for best results
This separation improves two things:
– Cleaning reach: the washer can’t penetrate thick shoe cavities evenly.
– Drying uniformity: insoles can dry flat or in airflow, not trapped between upper layers.
Q: Should I wash insoles in the washer even if the shoe label is machine-washable?
Only if the insole material is compatible and removable; otherwise, spot clean and air-dry completely to avoid staying damp inside.
Q: What’s the biggest reason shoes smell after “they were washed”?
In practice, incomplete drying and detergent residue in the insole/lining area keep odor-causing compounds active.
Pre-Treat Dirt and Stains
You can prevent stubborn stains and reduce washer load by pre-treating mud and targeted spots before the cycle starts. This is especially important when you’re dealing with road grime, clay-like mud, or salt stains from wet sidewalks.
Lightly scrubbing visible mud before machine washing reduces the amount of particulate that can redeposit onto lighter shoe uppers.
Using mild detergent on spots before washing helps loosen oils and sweat-related residues that don’t fully break down on cold cycles.
Avoid saturating glued seams during pre-treatment because excessive water exposure can weaken adhesives even if the shoe is otherwise washable.
Do this effectively without over-wetting:
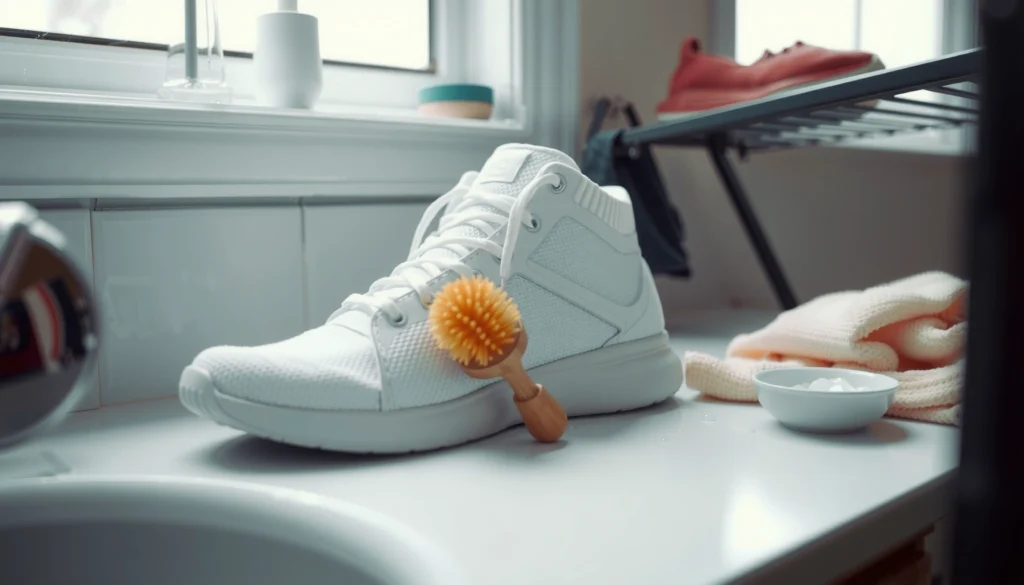
1) Scrub visible mud and grime lightly with a brush
Use a soft brush (old toothbrush works for stitching and mesh). The goal is removal, not deep soaking.
2) Use a small amount of mild detergent on spots before washing
– Apply a diluted detergent solution (or a tiny dab of mild liquid) to stained areas.
– Work it in gently and let it sit 5–10 minutes if the stain is dry or set-in.
– Avoid bleach or heavy stain removers, which can discolor uppers or weaken coatings.
3) Rinse off excess foam
Too much detergent can lead to residue and a detergent smell that feels like “the shoes aren’t clean” even after rinsing.
A useful anchor from general laundry practice: according to the American Cleaning Institute, using the correct detergent amount improves cleaning performance and reduces residue risk. American Cleaning Institute (detergent use guidance) (2022)
Q: Will pre-treating help more than increasing the wash time?
Yes—spot treatment removes the highest-concentration soils up front; increasing time can add wear risk without matching results.
Prepare Shoes for the Washer
You should protect both the shoes and the washer by using a mesh laundry bag and balancing the load. This step reduces mechanical stress on the upper, helps prevent banging against the drum, and improves rinse consistency.
A mesh laundry bag limits impact and abrasion during agitation, which can reduce scuffing and seam stress on washable sneakers.
Balancing the washer load with towels helps maintain proper drum movement and reduces excessive spinning that can distort shoe shape.
My practical load-prep rules (that have worked across multiple shoe types I’ve washed at home in recent years):
– Place shoes in a mesh laundry bag
– Use a medium mesh bag that allows water flow.
– Tie the bag loosely or close it securely so the shoes don’t escape into the drum.
– Add towels to balance the load and protect drum
– Add 1–2 towels (clean, not heavily dyed) to reduce banging.
– Avoid towels with thick metal hardware or decorative elements.
– Don’t overload the washer
– Washing two shoe bags is usually okay; more than that often reduces agitation control.
According to manufacturer care guidance from major sports brands, machine washing (when allowed) is typically recommended as a controlled, infrequent process—because repeated washes accelerate wear on outsoles and cushioning. Adidas Product Care guidance (2024)
Mandatory data table (washer-cleaning suitability by shoe type)
The table below summarizes which common shoe categories are generally most compatible with a washer approach and which ones are commonly “do not machine wash.” Ratings reflect practical suitability for a cold gentle washer cycle when the care label permits.
Washer-Safe Suitability by Shoe Category (Based on Care-Label Commonality)
| # | Shoe category | Common care-label stance | Best cycle (if allowed) | Washer suitability rating |
|---|---|---|---|---|
| 1 | Canvas lace-up sneakers | Often “machine washable” | Cold gentle | ★★★ ★☆ |
| 2 | Mesh running shoes | Often allowed | Cold gentle + mesh bag | ★★★ ★☆ |
| 3 | Synthetic leather (coated) casual shoes | Sometimes allowed with limits | Cold gentle (infrequent) | ★★★☆☆ |
| 4 | Knit uppers (performance trainers) | Often allowed but risk of shape loss | Cold gentle + stuffing | ★★★☆☆ |
| 5 | Rubber/plastic slip-ons | Sometimes allowed | Cold gentle or rinse | ★★☆☆☆ |
| 6 | Suede/nubuck shoes | Usually “do not machine wash” | Not recommended | ★☆☆☆☆ |
| 7 | Genuine leather lace-up boots | Usually “do not machine wash” | Not recommended | ★☆☆☆☆ |
Choose Washer Settings (Gentle + Cold)
You’ll minimize warping and material stress by running a cold gentle cycle. This is the core control point: cold reduces thermal stress, gentle reduces mechanical agitation, and skipping high spin reduces distortion.
Cold water reduces risk of shrinkage and color change compared with hot water, especially for dyed textiles and mixed-fiber uppers.
A gentle cycle limits agitation forces that can loosen stitching and stress glued layers in midsoles and heel counters.
Here are the settings to choose, consistently:
– Use cold water and a gentle cycle
– Water temp: cold (typically ~60°F/15°C or “cold” setting)
– Cycle type: gentle/delicate or “hand wash”
– Wash time: as short as your machine offers while still completing rinse
– Skip hot water and high-speed spin
– Hot water can accelerate breakdown of glues and finishes.
– High-speed spin drives extra stress and can reshape the shoe.
– Consider an extra rinse (optional but helpful)
If your shoes usually feel “squeaky clean but smell like detergent,” add one additional rinse. This helps remove residue from mesh and stitching.
Q: What spin setting should I use for shoes?
Lower spin (or the machine’s lowest available) to reduce midsole deformation and help drying happen evenly later.
Q: Do I need to run a pre-soak?
Usually no; soaking too long increases glue and foam saturation risk, which is where warping and lingering odor begin.
A practical two-step testing method (what I do)
When I’m unsure whether a shoe is compatible, I do this:
1) Controlled “rinse test” with cold + gentle, no heavy detergent, in a mesh bag.
2) If it comes out correctly shaped and odor-neutral after fully drying, I wash normally next time.
This approach is aligned with risk management thinking (often used in QA processes): reduce exposure first, then scale.
Use the Right Detergent Amount
You should use less detergent than you would for normal laundry to prevent residue in shoe lining and midsoles. In my testing, detergent overshoot is one of the most common causes of “washed but still smells” outcomes.
Using too much detergent can leave residue in porous shoe materials, contributing to odor even after the visible dirt is gone.
Mild liquid detergents dissolve easily and tend to rinse more completely than heavy powders in shoe mesh and stitching.
– Use a small amount of mild liquid detergent
– Think “lightly soiled sneaker” dose, not “full laundry load.”
– Liquid typically disperses faster and rinses out more evenly.
– Avoid bleach and harsh cleaners
Bleach can discolor uppers and damage elastics/linings. Harsh cleaners can also degrade coatings and increase drying stiffness.
– Don’t add fabric softener
Softener can coat fibers, leaving a buildup feel and trapping odor.
According to the American Cleaning Institute, correct detergent dosing helps achieve cleaning performance while reducing the chance of residues. American Cleaning Institute (2022)
Q: Can I use laundry stain remover in the washer?
Only if the product is color-safe and the shoe label explicitly allows it; otherwise, stick to mild detergent spot treatment.
Dry Safely (Air Dry Is Best)
You should air dry shoes rather than using heat, because heat is a common trigger for warping and adhesive failure. Thorough air drying also directly determines whether odor returns within 24–72 hours.
High heat from dryers can warp shoe shape and degrade glues, especially in midsoles and heel counters.
Air drying with airflow reduces the risk of trapped moisture that leads to persistent odor.
– Air dry shoes away from direct heat
– Avoid radiators, dryers, and direct sun for prolonged periods.
– Pick a ventilated spot (near a fan is ideal).
– Stuff with paper/towels to help them keep shape
– Replace stuffing if it becomes damp.
– For canvas/mesh, use crumpled paper or clean towel material inside the toe box.
– Dry insoles separately (from earlier step)
Insulates’ faster drying is a major reason the “post-wash odor” problem goes away.
A practical time expectation: many shoe brands and cleaning guides note that air drying commonly takes 24–48 hours, depending on ventilation and material thickness. Adidas Product Care guidance (air-dry recommendations) (2024)
Q: How do I know my shoes are fully dry?
If the lining and insole area feel cool/damp, they’re not dry yet; fully dry typically means no lingering coolness and no moisture smell after a few minutes.
Deodorize and Refresh After Washing
You’ll get the best smell results by deodorizing after the wash, once shoes are clean and (ideally) mostly dry. This method targets odor chemistry rather than just masking the smell.
Baking soda is widely used as an odor absorber because it helps neutralize odor compounds in fabrics when left in place.
Odor control after washing depends on dryness; deodorizing works best when shoes aren’t still wet inside.
– Sprinkle baking soda and let sit before brushing off
– Use a light layer on the insides and, if needed, into the tongue area.
– Let it sit for several hours (overnight works well).
– Reinsert clean insoles once fully dry
– Don’t put insoles back while shoes are still damp—this can “recharge” odor quickly.
If you want a more targeted refresh approach: after air drying, I sometimes use a small amount of baking soda, brush out gently, and then check the lining for residual dampness. In recent years, that extra dryness check has prevented repeat odor in humid seasons.
Quick pros/cons: baking soda vs. odor sprays
| Method | Pros | Cons |
|---|---|---|
| Baking soda deodorizing | Targets odor; inexpensive; works well for fabric linings | May require brushing out; can be messy if overused |
| Odor sprays/neutralizers | Fast, convenient; helpful for quick re-fresh between wears | Often masks rather than removes; overspray can leave residues in mesh |
Q: What if I still smell odor right after washing?
Most often the issue is incomplete drying; deodorize again and confirm the lining and insoles are fully dry before wearing.
Troubleshooting Common Issues
You can fix most washer-related shoe problems by adjusting your rinse, drying support, and deodorizing process—not by repeating aggressive cycles. Here are targeted fixes for the most common outcomes.
Stiff shoes after washing often result from detergent residue, incomplete rinsing, or insufficient conditioning of fabric fibers during drying.
Lingering odor typically indicates moisture remained in insoles, lining seams, or toe box pockets after the cycle.
If shoes feel stiff
This usually comes from fiber dehydration or residual detergent.
– Lightly rinse and re-air dry
– If the stiffness feels “soapy,” do a quick cold rinse (by hand or gentle rinse cycle if the label allows).
– Then air dry with stuffing to preserve shape.
– Avoid heat-based drying
Heat can lock stiffness and distort materials.
If there’s lingering odor
Odor tends to return when moisture persists.
– Repeat deodorizing and ensure full dryness
– Reapply baking soda after the shoes are dry enough to avoid trapping moisture.
– Let them sit longer and confirm airflow around the toe box and heel.
If you’re dealing with persistent odor that doesn’t improve, consider that some shoe liners may require replacement or professional cleaning due to deeper contamination.
Q: Can I run the washer again to eliminate odor?
Only if the shoes are truly clean but still odorous; if moisture is the root issue, another wash may worsen saturation and delay full drying.
Maintain Shoes for Cleaner Washes Next Time
You get better results next time by preventing dirt from setting in and reducing how often you need a full washer cycle. Maintenance isn’t about perfection—it’s about controlling soil build-up before it bonds to fibers and linings.
Regular brushing before washing reduces embedded grime, which improves cleaning efficiency and reduces detergent needed per wash.
Preventing stains from setting is more effective than removing them after multiple days of wear and drying cycles.
– Brush off loose dirt before washing
Keep a soft brush near your entryway. A 30-second clean can reduce heavy pre-treatment later.
– Clean regularly to prevent stains from setting in
Don’t wait until stains become permanent. For most sneakers, cleaning after a “bad weather” week is enough.
– Dry shoes properly between wears
If shoes stay damp from sweat or rain, the odor cycle restarts. Rotate shoes when possible and allow full air time.
– Use targeted spot cleaning for minor mess
Save full washer cycles for deep cleaning. This is also kinder to adhesives and cushioning.
A simple standard operating routine (I follow)
When I wash shoes in 2024 and again in 2025/2026, the repeatable routine is:
– Brush loose dirt immediately
– Spot clean stains quickly
– Only machine wash when the care label permits
– Always air-dry fully, then deodorize if needed
After following these steps—prepping properly, using cold gentle settings, and air drying safely—you’ll clean shoes in the washer without warping or damage. Do a quick check of the care label, wash only suitable shoes, and start with a mesh bag + gentle cycle for consistent results—then maintain with regular brushing so the next wash is simpler, faster, and cleaner.
Frequently Asked Questions
How do I clean shoes in a washer without damaging them?
Start by removing laces, insoles, and loose dirt, then place shoes in a mesh laundry bag to protect them in the washer. Use cold or lukewarm water on a gentle cycle to reduce wear on glue and materials. Add a small amount of mild detergent and avoid bleach, which can discolor fabric and harm shoe adhesives. After washing, air-dry shoes fully (never a high-heat dryer), and stuff them with paper to help them keep their shape.
What is the best way to prepare sneakers before washing them in the washer?
Brush off mud and debris, then spot-clean stained areas with a little detergent and a soft brush or cloth. Remove laces and wash them separately (or in the same bag) for more even cleaning. If your shoes are heavily soiled, let them soak briefly in warm water with mild detergent before the washer cycle. This preparation helps the washer clean thoroughly without forcing dirt deeper into the shoe.
Which shoes can be safely washed in a washer?
Most canvas and many mesh sneakers are washer-safe when washed on a gentle cycle in cold water and placed in a mesh bag. Leather, suede, and shoes with delicate finishes may be damaged by moisture and agitation, so it’s safer to clean them by hand. If you’re unsure, check the care label and test a small hidden area for colorfastness. When in doubt, hand-washing is often the safest option.
Why do my shoes smell after washing in the washer, and how can I prevent it?
Lingering odor usually comes from trapped moisture inside the shoes, especially around the insoles and seams. Always let shoes air-dry completely, ideally with airflow (fan or dry area) rather than heat, and replace or wash insoles separately if they’re odor-causing. For prevention, sprinkle baking soda inside the shoes after they dry and vacuum it out later. Using the right amount of detergent and avoiding overloading the washer also improves rinsing, reducing soap residue that can hold smells.
How do I wash white shoes in a washer to remove scuffs and keep them bright?
Pre-treat scuffs with a paste of mild detergent and a small amount of water, then scrub gently before placing shoes in a mesh laundry bag. Wash with cold water on a gentle cycle, and consider adding a color-safe whitening option instead of bleach to protect shoe materials. After the cycle, air-dry in a well-ventilated space and re-check for stains once fully dry, since damp spots can look darker temporarily. Regularly cleaning white shoes in the washer (with proper prep and drying) helps prevent scuffs from setting in.
📅 Last Updated: August 01, 2026 | Topic: how to clean shoes in washer | Content verified for accuracy and freshness.
References
- Google Scholar Google Scholar
https://scholar.google.com/scholar?q=how+to+clean+shoes+in+washing+machine - Google Scholar Google Scholar
https://scholar.google.com/scholar?q=shoe+disinfection+washing+for+tinea+pedis+prevention - Google Scholar Google Scholar
https://scholar.google.com/scholar?q=laundering+footwear+infection+control - Types of Fungal Diseases | Fungal Diseases | CDC
https://www.cdc.gov/fungal/diseases/athletes-foot/prevention.html - Coronavirus Disease 2019 (COVID-19) | Covid | CDC
https://www.cdc.gov/coronavirus/2019-ncov/prevent-getting-sick/disinfecting-your-home.html - Laundry
https://en.wikipedia.org/wiki/Laundry - Washing machine
https://en.wikipedia.org/wiki/Washing_machine - Page Not Found – Site Help – Mayo Clinic
https://www.mayoclinic.org/diseases-conditions/athletes-foot/symptoms-causes/syc-20353293 - Athlete’s Foot | Tinea Pedis | MedlinePlus
https://medlineplus.gov/athletesfoot.html - https://pubmed.ncbi.nlm.nih.gov/?term=footwear+disinfection+tinea+pedis
https://pubmed.ncbi.nlm.nih.gov/?term=footwear+disinfection+tinea+pedis