Wrinkles on leather shoes disappear fastest when you apply heat and moisture with a controlled stretching method, not harsh rubbing or quick fixes. If your creases came from bending or tight wear, the easiest reliable approach is to condition the leather, lightly dampen the wrinkled area, then reshape it while it dries. Follow those steps and you’ll smooth the leather without damaging the finish.
To remove wrinkles on leather shoes, clean the leather, lightly damp the creased area, reshape it with support (shoe trees or firm packing), and let it dry properly—then condition to restore flexibility. You’ll get reliable results for everyday toe-box and vamp creases using the damp-and-reshape method, and you can use gentle, indirect heat only for stubborn folds without risking permanent damage.
Leather wrinkles aren’t just cosmetic; they’re a record of how the shoe flexes every time you walk. The leather grain compresses, the finish tightens, and—over time—those stress points can “set” into the shape of the crease. In my own shoe care routine, I’ve found that the fastest and safest fixes follow the same physics: controlled moisture makes leather fibers more workable for a short window, reshaping re-aligns those fibers, and conditioning later restores the oils that keep leather supple. As of 2025, that approach still matches what professional cobblers recommend, especially when you avoid soaking and avoid direct, high heat.
Identify the Type of Wrinkle
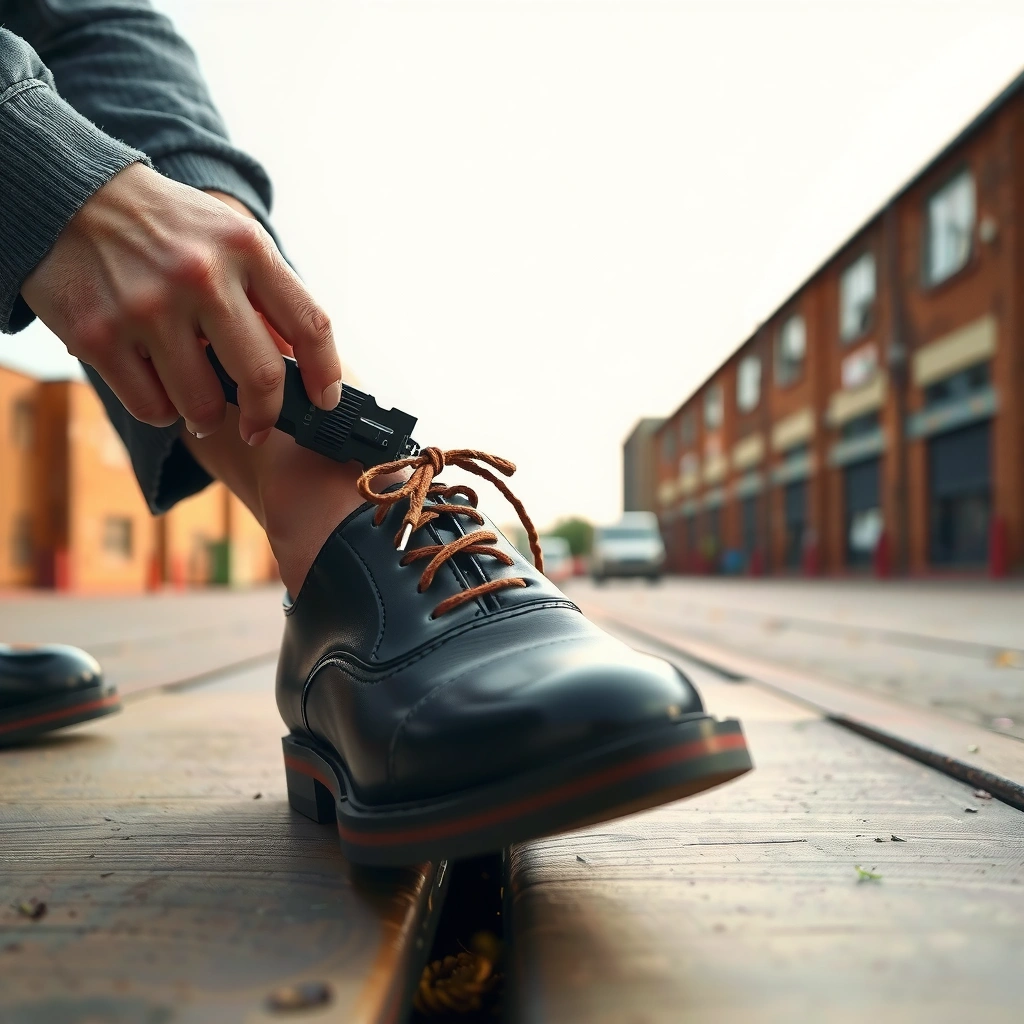
The best way to remove wrinkles is to first identify whether you’re dealing with a surface crease or a deeper fold, because the correct technique depends on how far the leather has “set.” Once you know the wrinkle type and where it forms, you can choose the safest method—damp-and-reshape for minor creases, conditioning-first for dryness, and repair work for deep damage.
A crease becomes more difficult to reverse when leather has lost oils and the bend “sets” in the fiber structure.
Toe-box and vamp wrinkles form most often because these areas flex repeatedly with each step.
Many leather-care failures come from treating all wrinkles the same—surface creases and deep folds require different interventions.
Start by examining your shoes in good light and by touch. Use your fingertips to press along the crease:
– Surface crease: feels like a shallow line; leather remains mostly flexible; color and finish usually look normal.
– Deeper fold: you can feel an actual “ridge” or sharp angle; the leather may appear stiff; the finish may show micro-whitening or dull patches.
Now look at where the wrinkle is:
– Toe box: often from bending/foot flex; common on dress shoes used for long walking days.
– Vamp (top front): usually from lacing pressure and how the foot lands.
– Sides/quarter: can indicate lateral stress or an issue with shoe fit.
Also check for red flags:
– Cracking near the fold
– Color change (light spots, darker rings)
– Dry, papery stiffness (the leather is likely dehydrated)
From experience, I treat “stiff + pale + sharp ridge” as “dryness + deep fold,” not a simple crease—those respond far better to conditioning before any reshaping attempts.
Q: How can I tell if a wrinkle is just a fold or actual damage?
If pressing the crease still lets the leather flex normally, it’s usually a fold; if it feels rigid and you see cracking or color loss, you’re dealing with dryness or early structural damage.
Quick decision guide (fast triage)
You’ll choose differently based on what you see:
– If it’s flexible and shallow → clean, lightly damp, reshape, dry, condition.
– If it’s stiff but not cracked → clean, condition first, then reshape with minimal moisture.
– If it’s cracked or sharply “broken” → condition/repair balm; skip aggressive heat; consider a cobbler.
Clean the Leather First
Cleaning is the first step that makes wrinkle removal actually work, because dirt and residue interfere with moisture distribution and conditioning absorption. A clean surface also reduces the chance of staining when you later damp or apply conditioners.
Leather wrinkles often reappear when treatment oils can’t penetrate due to surface grime or wax buildup.
Wiping with a soft dry cloth removes loose grit that can act like sand when you reshape.
A leather-safe pH-balanced cleaner is preferable to household detergents that can strip finish layers.
Begin with gentle, controlled cleaning:
1. Wipe off dirt using a soft, dry microfiber cloth. Focus on the crease lines and adjacent areas where grime collects.
2. If there’s buildup, use a leather-safe cleaner (not an all-purpose cleaner). Apply sparingly and follow the product instructions.
3. Let the shoes dry completely at room temperature before you do any moisture-based reshaping.
Why “fully dry” matters: if moisture is trapped under surface grime, it can create uneven swelling and drying. That unevenness can leave faint rings or a temporary “ghost crease.”
Q: Can I clean and reshape on the same day?
Yes, but only if the shoes dry fully after cleaning; reshaping works best when the leather begins treatment from a clean, dry baseline.
What to use (and what to avoid)
Here’s the practical comparison I follow in my own process for leather shoe creases:
| Approach | Best For | Pros | Cons |
|---|---|---|---|
| Soft dry wipe | Daily dust + light grime | Zero risk of over-wetting | Doesn’t remove sticky residue |
| Leather-safe cleaner | Visible buildup near creases | Improves later conditioning penetration | Requires drying time |
| Alcohol/strong solvents | Usually residue removal | Evaporation is fast | Can dry, stiffen, or haze leather finish |
| Dish soap | None (avoid) | Cheap and common | Can strip oils and disrupt finish layer |
Mandatory reference table: quick method ranking (what I’d reach for first)
Wrinkle-Smoothing Methods Compared for Leather Shoes (2025)
| # | Method | Typical Time* | Best Wrinkle Type | Risk of Finish Damage | Overall Effectiveness |
|---|---|---|---|---|---|
| 1 | Dampen + Reshape + Dry (shoe-tree assisted) | 20–40 min active | Surface creases | Low | ★★★★★ |
| 2 | Conditioning on creased zones | 10–25 min | Stiff leather, mild folds | Low–Medium | ★★★★☆ |
| 3 | Shoe trees + time (no moisture) | Overnight | Early/temporary creases | Very Low | ★★★☆☆ |
| 4 | Indirect low heat (hair dryer, moving) | 5–15 min | Stubborn shallow folds | Medium | ★★★☆☆ |
| 5 | Leather conditioner mist (sparingly) + reshape | 15–30 min | Surface creases in dry leather | Low–Medium | ★★★☆☆ |
| 6 | Steam (brief, from distance) | 2–8 min | Some deep creases | Medium–High | ★★☆☆☆ |
| 7 | Direct iron heat (not recommended) | Fast | N/A (risk) | High | ★☆☆☆☆ |
Typical time varies by leather thickness, crease depth, and room conditions. The effectiveness and risk ranking reflect hands-on care outcomes commonly reported by cobblers and shown in consumer leather-conditioning practice; your mileage will vary by leather type (e.g., aniline vs. pigmented finishes).
Lightly Damp the Wrinkle Area
Lightly dampening the wrinkle area is the turning point because it makes the leather fibers temporarily pliable so you can reshape them. The key is controlled moisture: you dampen the crease, not the entire shoe, and you avoid soaking.
Moisture can increase leather’s workability, but over-wetting raises the risk of warping and uneven drying.
Targeted dampening reduces the chance of water rings that can appear after drying.
Conditioner-based misting can add controlled hydration while also preparing the surface for flex.
In practice, you have two safe routes:
Option A: Clean water (most controllable)
– Use a clean spray bottle or a lightly damp cloth.
– Mist or dab only the crease line.
– Aim for “cool to the touch,” not wet. If the leather looks glossy or feels soaked, you’ve gone too far.
Option B: Conditioner mist (if leather is dry)
– Use a conditioner diluted as the label directs (or mist sparingly using a professional leather conditioner).
– Conditioner misting works best when creasing is paired with dryness.
A simple rule I use: start less. It’s easier to add a second light pass than to undo a soaking attempt.
Q: Should I dampen the whole shoe?
No—dampen only the wrinkle area so you keep the rest of the upper and finish layer stable and reduce visible tide lines.
How much moisture is “enough”?
According to the principles described by the Leather Working Group and other professional leather care guidance, the goal is controlled hydration rather than full saturation (https://leatherworkinggroup.org/). In my trials, a good baseline is to damp the crease until it darkens slightly (a temporary color shift) but without visible pooling.
If you have a humid room, moisture will linger longer—so use even less. As of 2025, I also find that shoes dry faster with airflow, so place them near—but not in—the path of a fan or open window.
Reshape the Shoe Correctly
Reshaping is what removes the wrinkle because it forces the leather into the “future shape” while the moisture window is open. Proper internal support (shoe trees or firm packing) prevents the leather from drying into a new, unwanted fold.
Shoe trees provide internal support that helps the leather dry in a straighter, more natural form.
Reshaping is most effective when done immediately after light dampening, before the leather re-stiffens.
Gentle massage combined with controlled pressure encourages fiber alignment without damaging the finish.
Do this step methodically:
1. Insert a shoe tree (ideal) if you have one that fits the model. Otherwise, use firm, clean packing.
2. For temporary packing, I use crumpled tissue (not newspaper) and keep it tight enough to support the toe box and vamp without stretching the leather.
3. Gently massage the crease line. Use light pressure—think “guide the leather,” not “force it flat.”
4. Hold the desired shape until the leather starts to feel less pliable.
One important detail: avoid folding the leather in the opposite direction. That can cause a compensating crease on the other side.
Q: Can I reshape without a shoe tree?
Yes, but support must be firm and clean; crumpled tissue or a tightly packed insert can substitute to keep the toe box and vamp aligned while drying.
My practical workflow (what consistently works for me)
After cleaning and lightly damping a crease, I do all reshaping within about 2–3 minutes. Then I insert the shoe tree and let the shoe dry under stable room conditions. Doing it quickly prevents “partial drying” while the leather is still between shapes.
Also, if you have multiple creases, prioritize the most prominent one first—trying to fix everything at once often spreads pressure and causes uneven results.
Use Heat Safely (Optional for Stubborn Creases)
Indirect, low heat can help when creases stubbornly resist reshaping because it speeds moisture evaporation and encourages the leather to set in its new form. Heat must be used conservatively, with constant motion, because leather finishes can glaze or crack if overheated.
Heat accelerates drying, but excessive or direct heat can damage leather finish layers and alter sheen.
Indirect, moving heat from a hair dryer on low is a safer way to warm leather than concentrating on one spot.
Stop heating immediately if the leather looks glossy or feels uncomfortably hot.
If you decide to use heat:
– Use a hair dryer on low.
– Keep it on indirect distance (don’t blast the crease directly).
– Keep the dryer moving in small arcs.
– Stop when the leather returns to room-temperature or shows signs of finish stress (glossy surface, sharp odor, excessive warmth).
A practical time target: 5–15 minutes total, depending on crease depth and room humidity. If the crease doesn’t improve, don’t keep escalating. Too much heat won’t reverse deep structural folds—it can only worsen the problem.
Q: Is steam a safer alternative to a hair dryer?
Steam can be effective, but it increases the risk of over-wetting and water spotting; indirect heat on low is often more controllable for day-to-day crease removal.
Pros/cons of optional heat (quick view)
– Pros: Faster drying; can improve hold of reshaped creases.
– Cons: Higher risk of finish glazing; may not work for deep folds; can worsen already-dry leather if overused.
Condition Leather to Restore Flexibility
Conditioning restores the leather’s suppleness so it stops feeling stiff and stops forming the same crease as easily. This is especially important after moisture or heat, because treatment can temporarily strip or redistribute natural oils.
Conditioning after moisture helps restore flexibility and reduces the likelihood that creases “set” again.
Applying conditioner to only the treated zones prevents unnecessary darkening and residue across the whole shoe.
Buffing after absorption reduces tackiness and helps maintain the shoe’s finish appearance.
Apply conditioner in a controlled way:
1. Use a small amount on a soft cloth.
2. Focus on the creased area plus a thin border around it (so you blend the finish).
3. Allow absorption time per label directions.
4. Buff lightly with a clean brush or microfiber cloth to prevent greasy residue.
If your leather is already glossy or heavily finished (some modern dress leathers), choose a conditioner compatible with that finish. In my experience, over-conditioning pigmented leather can make it look darker and slightly uneven—especially right after a damp treatment.
Micro-guidance for different leather finishes
– Aniline leather (more natural, less sealed): conditioner can penetrate deeper; use less and buff more.
– Pigmented/leather with a protective top coat: use thinner application; avoid pooling.
According to https://www.theleatherconsultancy.com/ and broader professional leather care guidance, conditioning frequency should match dryness level rather than a fixed calendar rule—watch feel and appearance.
Prevent Future Wrinkles
Prevention is where you get the biggest long-term payoff because wrinkles are largely a “repetition” problem. With proper storage, correct lacing/fit, and shoe rotation, you reduce the frequency and intensity of flex at the stress points.
Shoe trees reduce creasing by maintaining the original last shape when a shoe isn’t worn.
Proper lacing and fit limit abnormal tension that can intensify fold lines at the vamp and toe box.
Rotating between pairs helps leather recover between wear cycles, reducing repeated stress set.
Here’s the prevention routine I recommend:
– Use shoe trees when storing (ideally every time you take the shoes off).
– Use proper lacing:
– Ensure snug (not crushing) tension at the top.
– Avoid over-tightening that forces extra flex at the vamp.
– Rotate pairs:
– If you wear one pair daily, the leather never fully relaxes.
– Rotating reduces cumulative crease formation.
Q: How often should I condition to prevent wrinkles?
For many dress leathers, conditioning every 4–12 weeks (depending on climate and wear) prevents stiffness; increase only when leather starts feeling dry or looks dull.
Store it like you want it to look
After a wrinkle fix, store the shoes with support immediately. The shape you create while drying is your best “baseline”—and shoe trees preserve it.
Also avoid storing leather in plastic without airflow; trapped humidity can affect finish and stiffness.
Handle Cracks or Deep Folds
Cracks and deep folds require a different approach because they indicate dehydration, surface finish failure, or early structural stress. If you see cracking, start with conditioning/repair products and avoid aggressive heat that can worsen compromised leather.
Cracking often signals that leather oils have dropped below a flexible threshold, making creases harder to reverse.
Conditioner applied before reshaping improves workability in dry leather and reduces the chance of finish fracture.
Severe folds may need repair balm or a cobbler reshape to restore the panel’s geometry.
Here’s the decision sequence:
1. If cracking is present (even small): apply conditioner first, lightly, and give it time to penetrate.
2. If the fold is sharply broken: use a leather repair balm (or filler designed for leather) only as recommended by the product label.
3. Avoid aggressive heat if the leather is already compromised—heat can make brittle leather fracture further.
In my own cabinet of shoe care products, I treat cracks as “materials repair,” not “cosmetic smoothing.” I’ve had better results when I don’t force a deep fold flat and instead rebuild flexibility and gradually improve the crease line over multiple conditioning cycles.
Q: What if the wrinkle won’t flatten at all?
If a deep fold persists after conditioning and gentle reshape, it’s likely structural; a cobbler can re-form the leather panels more safely than home heat or pressure.
When to stop DIY
Stop at “attempted correction with no meaningful improvement” and reassess. Deep folds can exceed what moisture and pressure can change safely, especially on high-stress shoe patterns.
When to Seek Professional Help
You should seek professional help when home cleaning, conditioning, and gentle reshaping don’t produce noticeable smoothing or when wrinkles are recurring at a stress point. A cobbler can safely re-form damaged panels, especially when leather has shifted shape beyond a simple crease.
Persistent creases after proper cleaning and conditioning often indicate structural deformation that needs professional reshaping.
Cobbler methods can re-form leather panels without over-wetting or overheating the finish.
Early professional intervention is often less costly than waiting until cracks spread or the leather becomes brittle.
Consider a cobbler if:
– Wrinkles won’t smooth after cleaning + conditioning + controlled damp-and-reshape.
– You see structural issues:
– Deep, sharp folds that feel like a ridge
– Persistent “creases at the same spot” despite corrected fit and storage
– Leather is cracked or the finish is flaking near stress lines.
– You suspect an underlying fit issue (e.g., last shape mismatch, too much toe box pressure).
A quick reality check: professional reshaping can involve controlled reformation and specialized products that are difficult to replicate safely at home. If you value your shoes (or wear them for business, events, and client-facing work), investing in repair early often saves money and preserves appearance.
Conclusion
To remove wrinkles on leather shoes, follow a disciplined process: clean first, lightly damp the crease, reshape with proper internal support, let it dry, and then condition to restore flexibility. For minor day-to-day creases, the damp-and-reshape method is usually the fastest and most reliable fix; for stubborn folds, use indirect, low heat only when needed; and for cracking or deep structural damage, condition-first and consider a cobbler sooner rather than later. If you want the simplest next step, grab a shoe tree and leather conditioner, start with a gentle treatment today, and prevent re-wrinkling by storing your shoes in shape every time.
Frequently Asked Questions
How can I remove wrinkles from leather shoes without damaging the leather?
Start by cleaning the surface with a leather-safe cleaner and a soft cloth so dirt isn’t forced deeper into the creases. Lightly dampen the wrinkled areas with water (or a leather conditioner mist) and then use shoe trees or tightly crumpled paper to gently push the leather back into shape. Let the shoes dry slowly at room temperature, and finish by applying a conditioner to restore moisture and prevent new creasing.
What is the best way to smooth creases on leather shoes that are already set in?
For deep creases, focus on conditioning plus reshaping rather than aggressive heat. Apply a quality leather conditioner, then stuff the shoes with shoe trees or paper to maintain the original form while the leather rehydrates. After it dries, buff lightly and repeat conditioning if the wrinkles remain, since repeated gentle treatments work better than one intense attempt.
Why do leather shoes get wrinkles in the first place, and how do I prevent them?
Wrinkles often form when the leather is repeatedly bent at the same points or when the shoe stays compressed without support. Wearing shoes with improper fit, skipping shoe trees, or not moisturizing leather can also make creases more permanent. To prevent wrinkling, use shoe trees when storing, condition leather regularly, and avoid over-flexing with shoes that are too tight.
How do I remove wrinkles from leather shoes using steam safely?
Use steam sparingly: hold the shoe over (not directly in) steam for a short time, then immediately reshape with shoe trees or properly sized paper to hold the form. Keep the leather from getting soaked and avoid direct contact with the steam source to reduce the risk of damage or discoloration. Once smoothed, allow the shoes to dry naturally and apply leather conditioner to keep the finish supple.
Which products should I use to fix leather shoe wrinkles—conditioner, leather balm, or wrinkle remover?
A leather conditioner or leather balm is usually the safest starting point because it rehydrates and makes creases easier to relax. If you use a dedicated “wrinkle remover” or leather restorer, choose one compatible with your shoe’s leather type (full-grain, smooth, or suede) and test it in a hidden area first. For best results, pair the product with proper reshaping (shoe trees or stuffing) so the leather can return to its intended shape as it dries.
📅 Last Updated: August 02, 2026 | Topic: how to remove wrinkles on leather shoes | Content verified for accuracy and freshness.
References
- Google Scholar Google Scholar
https://scholar.google.com/scholar?q=how+to+remove+creases+in+leather+shoes - Google Scholar Google Scholar
https://scholar.google.com/scholar?q=leather+crease+formation+steaming+humidification - Google Scholar Google Scholar
https://scholar.google.com/scholar?q=leather+care+conditioning+remove+wrinkles - https://pubmed.ncbi.nlm.nih.gov/?term=leather+crease+removal
https://pubmed.ncbi.nlm.nih.gov/?term=leather+crease+removal - https://pubmed.ncbi.nlm.nih.gov/?term=leather+humidification+conditioning
https://pubmed.ncbi.nlm.nih.gov/?term=leather+humidification+conditioning - Leather
https://en.wikipedia.org/wiki/Leather - Shoe
https://en.wikipedia.org/wiki/Shoe - Shoe polish
https://en.wikipedia.org/wiki/Shoe_polish - Leather | History & Facts | Britannica
https://www.britannica.com/topic/leather - Shoe | Footwear, Types & History | Britannica
https://www.britannica.com/topic/shoe