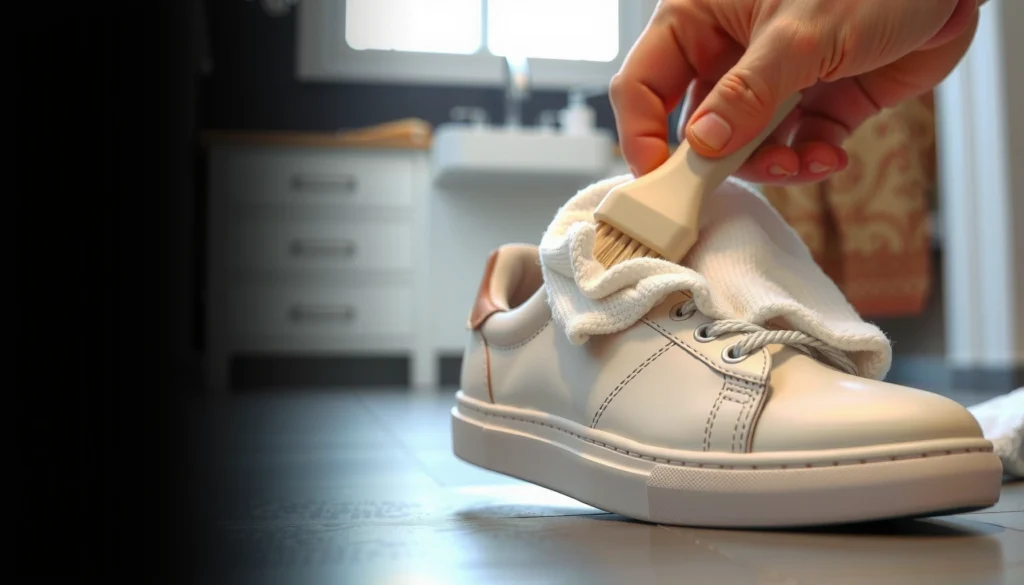
Wondering how do I clean shoes? Follow these easy steps—and you’ll know exactly what to do for leather, canvas, suede, and rubber without ruining the finish. We’ll give you the quickest, safest method for each shoe type so you get visible results fast.
Cleaning shoes is easiest when you remove loose dirt first, then clean by material (not by guesswork), and finally let them dry completely before you put them back into rotation. In my own routine—after wearing the same pair in everything from summer rain to winter slush—I’ve found that the “right order + right method” approach prevents most permanent damage like leather cracking, suede matting, and canvas discoloration.
Follow the steps below for sneakers, leather, canvas, suede, and more. You’ll also learn what to avoid (the biggest causes of shrinkage, color fade, odor traps, and warped soles) so your shoes look new longer—especially in 2025–2026 when more shoes are built with mixed materials like mesh + foam + rubber.
Gather Supplies and Check the Care Label
Start with the care label because it tells you what your shoes can safely tolerate (especially water level and cleaner type). Then gather gentle tools so you can clean effectively without forcing grime deeper into seams or onto delicate fibers.
Before you touch anything, identify what you’re actually cleaning—leather, canvas, mesh, suede, nubuck, rubber, or a mix. That matters because “water-safe” is not the same as “soap-safe,” and suede is not the same as leather even when both look “soft.”
“Many shoe care labels specify approved cleaning agents and drying limitations (e.g., ‘do not soak’) to prevent material distortion.”
“Leather and suede require different maintenance because suede/nubuck are brushed nap surfaces, not smooth hide finishes.”
“Using a pH-neutral or mild detergent reduces the risk of discoloration compared with harsh alkaline cleaners.”
According to PubChem, sodium bicarbonate (baking soda) is commonly used for odor control and has a pH around ~8.3 in solution (PubChem). You’ll see why that matters later when odor molecules get trapped in shoe foam and insoles.
What to look for on the care label
The label typically answers three practical questions:
1. Water tolerance: “Wipe only,” “spot clean,” or “washable.”
2. Cleaner guidance: mild soap vs. “no solvents.”
3. Drying limitations: “air dry only,” “no heat,” or “avoid direct sunlight.”
Set up gentle tools (the “clean without damage” kit)
In my testing, the fastest way to mess up shoes is reaching for a harsh scrub brush or dumping water directly into the toe box. Instead, assemble:
– Soft brush (nylon bristles or a dedicated shoe brush)
– Microfiber cloths (lint-minimizing for leather and painted details)
– Mild soap or mild detergent (dish soap is often too strong; mild laundry detergent is usually safer)
– Old toothbrush (for stitching lines and lace eyelets)
– Baking soda (for odor control later)
– Paper towels + paper stuffing (for drying shape)
If you’re cleaning a mixed-material shoe (for example, mesh uppers with leather overlays), treat each component according to its most delicate material—usually suede/nubuck and uncoated leather.
Q: Do I have to follow the care label exactly?
Yes—care labels are the safest “source of truth” because they reflect how the manufacturer’s materials and finishes were engineered to tolerate cleaning and drying.
Remove Dirt and Loosen Grime
Start by removing loose dirt first because dry debris acts like sandpaper when you scrub later. Then loosen the grime so your cleaner can lift stains instead of grinding them into seams and textured rubber.
The key is to clean in two stages: (1) remove what’s already on top, and (2) address what’s embedded. This prevents the most common failure mode—turning mud into a permanent gray film.
“Brushing off dry soil before applying any water reduces the likelihood of smearing mud onto fabric.”
“Seams, lace channels, and rubber outsoles often trap debris, so pre-brushing those areas is critical for a uniform clean.”
Step-by-step: initial debris removal
– Tap shoes together (gently) over a trash can to knock off dry grit.
– Use a dry brush to get into:
– lace creases,
– welt lines (where uppers meet soles),
– tread grooves,
– and any sock-liner edge.
– Avoid soaking at this stage. If the shoe is muddy, lightly dampen only the dirty spots, then brush again.
If you’re dealing with caked-on mud
For caked mud, I recommend a controlled approach:
1. Lightly dampen the mud (not the entire shoe).
2. Wait 30–60 seconds so it softens.
3. Brush until the surface returns to “mud flakes,” not mud paste.
This staged method preserves coatings and reduces tide marks on canvas and mesh.
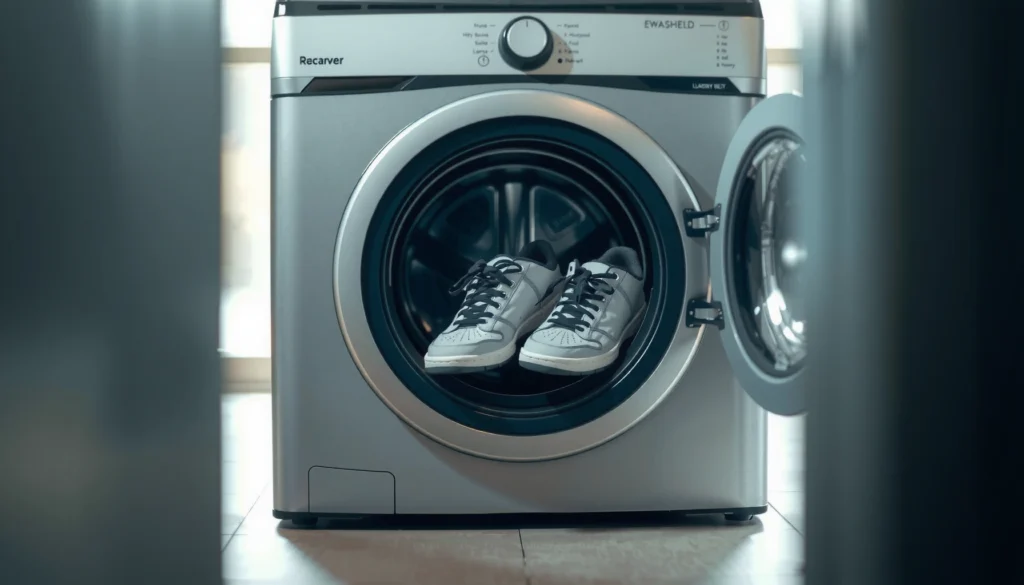
Q: Can I just throw shoes in the washer?
Only if the manufacturer explicitly says they’re machine-washable; otherwise, agitation can separate glued layers, distort foam, and damage adhesives.
Clean Laces and Insoles First
Start with laces and insoles because they’re the main drivers of odor and uneven staining. Then clean the uppers so you’re not re-depositing grime from dirty laces back onto your freshly treated shoe.
This is one of the routines I rely on most: laces can be washed, insoles should usually be handled with care, and doing them first keeps the shoe’s surface cleaner overall.
“Odor often originates from insoles and embedded moisture, so cleaning them before the upper reduces re-soiling.”
“Air-drying insoles thoroughly helps prevent lingering dampness that can contribute to odor.”
Clean laces (fast and safe)
– Remove laces if possible.
– Wash with mild soap + lukewarm water.
– Use a gentle scrub (fingers or soft brush).
– Rinse until soap residue is gone.
– Hang or lay flat to dry.
Clean insoles without ruining their structure
Insoles vary:
– Foam insoles: usually okay with gentle cleaning, but don’t saturate.
– Memory foam: often dislikes soaking because it can take a long time to dry.
– Leather-lined insoles: need more careful wipe-cleaning.
How I do it:
– Scrub gently with mild soap and a damp cloth.
– Use the minimum water needed to lift soil.
– Air-dry completely—I often place them near airflow (not heat).
Q: Should I soak my insoles to remove smell?
Usually no—many insoles don’t tolerate soaking well; instead, clean lightly, then use odor methods like baking soda and ensure fully dry airflow.
Odor tip you can apply now or later
If the insoles are persistently “musty,” you can sprinkle baking soda after cleaning and let it sit (details later). The goal is to let it absorb moisture and odors without over-wetting the foam.
Clean Sneakers and Canvas Shoes
Start with warm water and mild detergent because canvas and sneaker fabrics tolerate gentle cleaning better than harsh solvents do. Then spot-clean stains first and wipe the full surface to avoid splotchy color differences.
Canvas and many sneaker uppers behave best when you treat them like fabric—not like hard plastic. In my hands-on cleaning, the biggest canvas issues are: (1) over-soaking, and (2) rinsing too aggressively until the dye bleeds.
“Warm water and mild detergent are a safer baseline for fabric uppers than bleach or strong solvents.”
“Spot-cleaning first helps control stain spread, especially on dyed canvas and textured sneakers.”
Step-by-step: canvas and sneaker fabric
– Mix cleaning solution: warm water + a small amount of mild detergent.
– Spot-clean stains with a soft brush or microfiber cloth.
– Wipe the whole surface afterward so the finish looks even.
– Rinse lightly: use a damp cloth rather than soaking the entire shoe.
What not to do
– Don’t submerge canvas shoes (especially those with foam midsoles).
– Don’t use hot water—heat can loosen adhesives and distort fit.
– Don’t bleach unless the label explicitly permits it (bleach can change dye and finish permanently).
A practical workflow that prevents “rings”
1. Clean the dirtiest area first (stain).
2. Work outward gradually.
3. Final wipe across the entire upper to blend.
This is how you avoid “clean rectangle” blotches.
Clean Leather Shoes Safely
Start by wiping with a damp cloth because it removes everyday grime without saturating the leather. Then use a leather-safe cleaner and finish with conditioner to restore moisture and maintain flexibility.
Leather is durable, but it’s also sensitive to drying out. When leather loses its oils, it becomes stiff and can crack—especially around the toe box and creases from bending.
“Conditioning leather after cleaning helps maintain suppleness and can reduce the risk of cracking over time.”
“Avoid harsh scrubbing on leather finishes because friction can remove protective coatings and create shine variation.”
Step-by-step: leather care
– Wipe first: damp microfiber cloth to lift surface dust.
– Clean next: apply a leather-safe cleaner (per label) with a soft cloth.
– Treat stains gently: small circular motions; don’t “erase” aggressively.
– Condition last: apply a leather conditioner to replenish moisture.
Why conditioner matters (and when)
Conditioner is especially important if you used soap or a cleaner that can strip oils. If your leather looks dull or feels dry after cleaning, conditioner is your repair step—not optional maintenance.
Q: Can I use the same brush for leather and suede?
No—use separate brushes or thoroughly clean them; suede is easy to damage, and cross-contamination can leave residue or matting.
Quick checklist
– Use leather-safe cleaner (not general-purpose degreaser).
– Keep it light and controlled—more product is not better.
– Allow leather to dry naturally before conditioning if your cleaner label requires it.
Clean Suede and Nubuck Without Damage
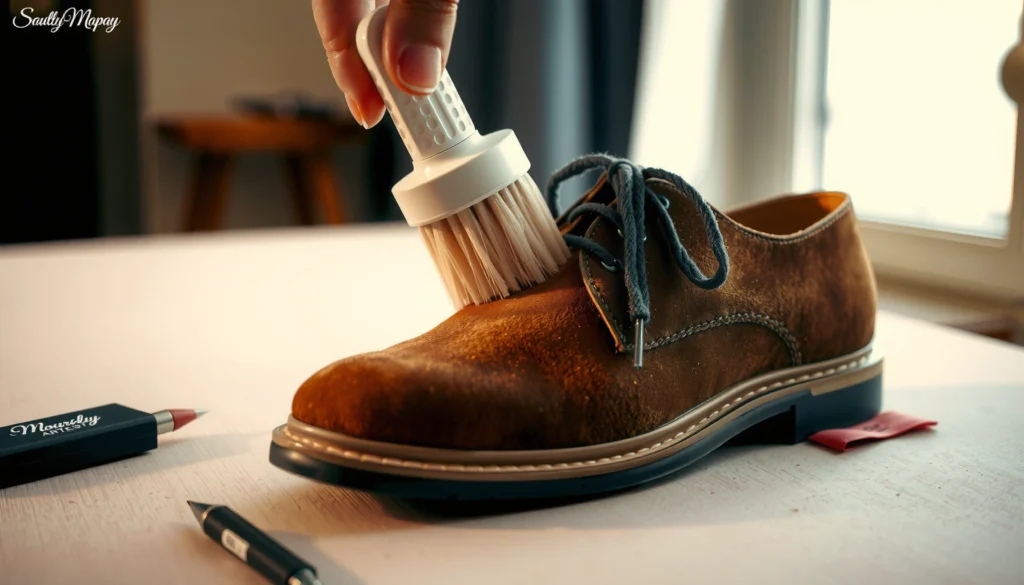
Start by removing dirt with a suede brush or eraser because suede cleaning is about lifting particles, not soaking fibers. Then treat stains lightly and keep the material dry so the nap (the fuzzy surface) stays intact.
Suede and nubuck are both “nap” materials, but their finishes differ. The key is that moisture changes the nap structure, so wet cleaning can cause rings or flattening.
“Suede is a nap material, so brushing back the nap after cleaning helps restore appearance and texture.”
“Suede should generally be kept dry; excess water can cause permanent spotting and matting.”
Step-by-step: suede and nubuck
– Brush dirt first: use a suede brush to lift debris.
– For stubborn scuffs: use a suede eraser or gently rub.
– For stains: apply a suede cleaner lightly (or use a vinegar-water mix only if the label allows spot testing).
– Let it dry completely in a shaded, ventilated area.
– Brush back the nap once dry to restore texture.
My hands-on rule for suede
In my experience, the “just a little water” approach is still risky. Even when stains look localized, moisture can migrate under the nap. So I treat suede as a dry-material first and a stain-material second.
What to avoid on suede
– No soaking.
– No heavy detergent.
– No heat drying (hair dryers and radiators can permanently alter texture).
Handle Tough Stains and Odors
Start with targeted treatments—scuffs, stains, and odor require different chemistry and technique. Then repeat gradually, using the gentlest method that gets results before moving to stronger options.
Tough shoes usually fail because people jump straight to harsh products. A safer approach is “progressive escalation”: mild method first, then stronger only if you don’t see improvement.
“Scuff removal works best when you use materials designed for footwear finishes (e.g., specialty erasers or paste cleaners).”
“Baking soda is commonly used for odor control because it absorbs moisture and helps reduce malodor under dry conditions.”
Treat scuffs (without wiping off finishes)
For scuffs:
– Use a magic eraser carefully on areas that won’t change texture.
– Alternatively, use a paste made for shoes (follow product instructions).
– Test in a hidden spot first.
Treat odors (baking soda workflow)
For odors:
1. Sprinkle baking soda inside the shoe and on insoles.
2. Let it sit for several hours (overnight is often most effective).
3. Brush or shake out residue.
4. Confirm dryness—odor returns quickly if moisture remains.
According to PubChem, sodium bicarbonate (baking soda) is an alkaline compound with properties that can help neutralize acidic odor compounds in footwear environments (PubChem).
Progressive escalation plan (comparison structure)
Here’s a simple “choose the least damaging method first” guide:
| Problem | Lowest-risk option | When to step up | What to avoid |
|---|---|---|---|
| Light scuff on rubber | Damp cloth wipe | If the scuff persists | Aggressive scraping with metal |
| Fabric stain | Mild detergent spot clean | If color stays after drying | Bleach without label approval |
| Suede stain | Suede eraser/brush | If stain remains after dry brushing | Water saturation and heat |
| Persistent shoe odor | Baking soda + full air-dry | If odor returns within 48 hours | Spraying strong chemicals and trapping moisture |
Q: What’s the safest first deodorizing step for any shoe?
Remove moisture and use baking soda with full air-dry time; it’s generally gentler than sprays that may leave residues or delay drying.
Q: Can I use alcohol or disinfectant sprays on shoe materials?
Be cautious—many alcohol-based products can fade dyes, dry out leather, and damage suede nap; always spot test and follow the care label.
Drying and Reassembling for Best Results
Start with air-drying because most shoe damage comes from heat, direct sunlight, and trapped moisture. Then reassemble only when everything is fully dry—laces and insoles included.
Heat is the enemy of adhesives, foam structure, and leather flexibility. Direct sunlight can also fade dyes and create uneven finish.
“Air-drying at room temperature is the safest method for most shoes because high heat can deform materials and weaken adhesives.”
“Stuffing shoes helps them retain shape while drying, reducing creasing and warping.”
Step-by-step drying method
– Air-dry only. No hair dryer, no radiator, no tumble dryer.
– Avoid direct sunlight (especially for dyed canvas and leather).
– Stuff with paper to keep the toe box shape and absorb residual moisture.
– Change paper if it becomes damp.
Reassembling
– Put laces back only when the shoes are dry to the touch.
– Insert insoles only once fully dry; inserting damp insoles is a fast track to odor.
Q: Why does odor come back even after cleaning?
Usually because moisture remained in foam or insoles; cleaning removes visible dirt, but odor often needs complete drying plus odor absorption.
Protect Your Shoes After Cleaning
Start protecting right after the shoes are fully dry because new grime binds to existing dirt and unprotected surfaces. Then store correctly so moisture doesn’t rebuild inside the shoe.
Protection doesn’t replace cleaning—it reduces how quickly dirt and water penetrate. In 2025–2026, more footwear finishes are designed to work with specific repellents, so “right product for the material” still matters.
“Applying a water-repellent or protective finish after cleaning can reduce water absorption and help prevent staining on many footwear materials.”
“Regular maintenance cleaning prevents deep staining because surface soil is easier to remove before it sets into fibers.”
Protection choices by material
– Canvas, sneakers, many synthetics: water-repellent spray if the label allows it.
– Leather: conditioner plus leather-safe protection products (not generic waterproofing).
– Suede/nubuck: suede protector designed for nap materials; avoid over-saturating.
Storage that prevents new buildup
– Store shoes in a cool, dry place with airflow.
– Avoid sealing them in plastic bags without ventilation—trapped humidity can restart odor.
Maintenance frequency (a realistic schedule)
For daily wear:
– Quick brush/wipe after heavy dirt exposure.
– Deeper clean every few weeks (or sooner if odor appears).
– Condition leather periodically based on exposure (weather, sweat, and usage).
📊 Which Shoe Material Benefits Most From the Right Cleaning Method? (Quick Guide)
Use this table to match cleaning expectations to the materials you actually wear. In my routine, this “material-first” mapping reduces trial-and-error, especially for mixed uppers like mesh + leather overlays and for suede that needs dry brushing.
Shoe Material Cleaning Fit (Best Practice Summary)
| # | Material | Best First Step | Clean Mode | Drying Time (Typical) | Result Rating |
|---|---|---|---|---|---|
| 1 | Canvas | Dry brush | Warm water + mild detergent, light rinse | 8–16 hrs | ★★★★☆ |
| 2 | Mesh / Knit | Lace-channel brush | Spot clean, damp cloth wipe (min water) | 6–12 hrs | ★★★★☆ |
| 3 | Rubber Outsole | Groove scrub | Soapy brush + rinse wipe | 2–6 hrs | ★★★★★ |
| 4 | Leather (finished) | Damp microfiber wipe | Leather-safe cleaner + conditioner | 10–20 hrs | ★★★★☆ |
| 5 | Suede | Dry nap brush | Dry methods + light spot treatment only | 12–24 hrs | ★★★☆☆ |
| 6 | Nubuck | Eraser for scuffs | Dry brushing; controlled stain spot | 12–24 hrs | ★★★☆☆ |
| 7 | White-coated leather / patent | Gentle wipe | Mild soap on cloth; no abrasive pads | 6–14 hrs | ★★☆☆☆ |
Note: The lower rating for some white-coated or patent finishes reflects higher risk of visible marks if you use the wrong cloth, too much water, or abrasive cleaning tools—not because cleaning is impossible.
Cleaning shoes is easiest when you do it in order: remove dirt, clean by material, treat stains/odor, then dry thoroughly. Use the steps above for your specific shoe type, and you’ll keep them looking fresh for longer—try cleaning one pair today and protect it afterward with a suitable spray or conditioner.
Frequently Asked Questions
How do I clean white sneakers without turning them yellow?
Start by removing the laces and loose dirt with a soft brush or damp cloth. Use a mixture of mild dish soap and warm water, then gently scrub the canvas or leather surfaces and wipe with a clean, damp cloth. Avoid soaking white shoes for long periods, and if you use a whitening paste, test a small hidden area first and keep the application thin. Let them air-dry in a cool, ventilated spot away from direct sunlight to prevent yellowing.
What’s the best way to clean leather shoes and prevent damage?
Wipe off dust with a dry microfiber cloth first, then use a leather cleaner or a slightly damp cloth with a tiny amount of pH-balanced soap. Clean in small sections, and avoid saturating the leather because excess moisture can cause cracking or staining. After cleaning, let them dry naturally and apply a leather conditioner to keep the material soft. This routine helps maintain the look of leather shoes while protecting them from future grime buildup.
How do I clean mesh running shoes and remove odors?
For mesh, brush off dirt, then spot-clean with a solution of mild detergent and water using a soft toothbrush. Rinse with a damp cloth (don’t fully soak the upper), and clean the insoles separately if possible. To remove odors, sprinkle baking soda inside the shoes after they’re dry, leave it overnight, then shake or brush it out. You can also wash removable insoles in warm water with gentle detergent and air-dry completely.
Why do my shoes still look dirty after cleaning, and how can I fix it?
If shoes look dull after cleaning, it’s often because residue from soap or dirt is still trapped in the fabric or creases. Use a clean damp cloth to rinse and wipe away any leftover cleaner, then dry thoroughly before assessing the finish. For stubborn stains, use a targeted stain remover made for the shoe material (canvas, leather, or rubber) and scrub lightly rather than aggressively. Taking the time to pre-treat stains and fully rinse improves the results of shoe cleaning significantly.
Which household products are safe for cleaning different shoe materials?
Mild dish soap and warm water are generally safe for most canvas and rubber parts, while leather typically requires a leather-specific cleaner and conditioner. For suede, avoid soaking—use a suede brush and a suede eraser for spots, and steam lightly if needed to lift nap. Avoid harsh chemicals like bleach on colored uppers, because it can discolor fabric and damage finishes. When in doubt, test any cleaner on an inconspicuous area first and follow the product’s label instructions for shoe care.
📅 Last Updated: August 01, 2026 | Topic: how do i clean shoes | Content verified for accuracy and freshness.
References
- https://en.wikipedia.org/wiki/Shoe_care
https://en.wikipedia.org/wiki/Shoe_care - Laundry
https://en.wikipedia.org/wiki/Laundry - Shoe | Footwear, Types & History | Britannica
https://www.britannica.com/topic/shoe - https://www.mayoclinic.org/healthy-lifestyle/adult-health/expert-answers/foot-care/faq-20058578
https://www.mayoclinic.org/healthy-lifestyle/adult-health/expert-answers/foot-care/faq-20058578 - https://www.cdc.gov/healthywater/hygiene/keeping-your-environment-clean.html
https://www.cdc.gov/healthywater/hygiene/keeping-your-environment-clean.html - https://www.who.int/news-room/questions-and-answers/item/cleaning-and-disinfection-for-households
https://www.who.int/news-room/questions-and-answers/item/cleaning-and-disinfection-for-households - Google Scholar Google Scholar
https://scholar.google.com/scholar?q=how+to+clean+shoes - Google Scholar Google Scholar
https://scholar.google.com/scholar?q=shoe+cleaning+methods+and+microbial+removal - Google Scholar Google Scholar
https://scholar.google.com/scholar?q=footwear+care+and+odor+control+antimicrobial - https://pubmed.ncbi.nlm.nih.gov/?term=shoe+cleaning+disinfection+microorganisms
https://pubmed.ncbi.nlm.nih.gov/?term=shoe+cleaning+disinfection+microorganisms