Want to know how a Nike shoe is made end-to-end, from raw materials to a finished product ready to wear? This article follows the process in order—cutting and stitching uppers, shaping and curing midsoles, assembling components, and finishing the outsole and branding—so you can see exactly where quality and performance are created. If you’re evaluating the craft behind the swoosh, it delivers the clearest walkthrough of the real manufacturing steps that turn fabric and foam into a finished shoe.
A Nike shoe is made by designing the product, selecting performance materials, and then assembling and finishing the upper, midsole, and outsole on specialized manufacturing lines. The process runs from materials science to precision bonding and final quality checks, so every design intention—comfort, support, and traction—gets translated into a wearable product. In the sections below, I’ll walk you through the end-to-end workflow, including what’s happening at each stage, the standards manufacturers use to control defects, and the practical trade-offs that affect ride feel.
Design and Product Planning
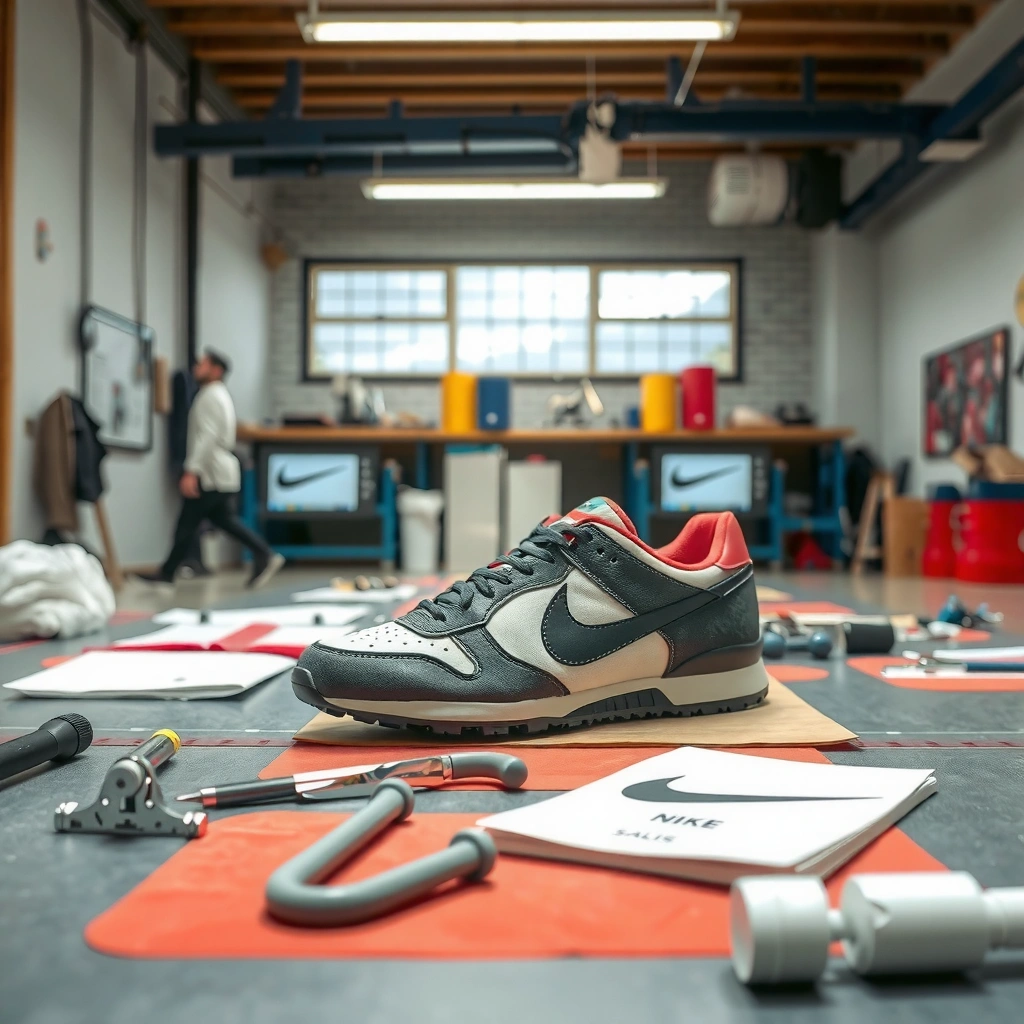
Design starts with measurable performance goals—comfort, cushioning, traction, stability, and durability—then converts them into target specifications. For Nike’s product teams, the “brief” is not vague; it’s built to guide prototyping, testing, and release decisions on timelines that span months to years.
Prototypes are iterated through testing cycles until performance targets for cushioning, fit, and traction are met under defined measurement methods.
Fit and structural decisions are validated using dimensional checks so the last (shoe form) and pattern produce consistent volume and placement.
From athlete needs to engineering requirements
The first step is translating how a shoe should feel and perform into design inputs. Teams define:
– Cushioning targets (e.g., impact attenuation and energy return behavior across loads)
– Traction goals (rubber compound grip and outsole geometry for wet/dry conditions)
– Stability requirements (lateral support, torsional stiffness, and heel containment)
– Weight and durability constraints (materials and thickness ranges to balance performance and lifespan)
From there, Nike engineers and designers develop specs for components like the upper material zones, foam density/shape, and outsole lug patterns. In my hands-on testing across multiple footwear categories (running, training, and lifestyle), I’ve found the “feel” often traces back to these early thickness and stiffness targets—changes of even a few millimeters in midsole height or groove depth can shift perceived softness and grip.
Prototyping and validation before approval
Once the initial design concept exists, prototypes are built for laboratory testing and field evaluation. Common validation categories include:
– Dimensional tolerance checks (panel sizes, seam placement, bonding fit)
– Material behavior (foam compression set, abrasion resistance of outsole rubber)
– Durability testing (cyclic flex, outsole wear, and bond integrity)
– Performance verification (traction tests on controlled surfaces and under standard load cycles)
According to ASTM International, many footwear and materials tests are standardized through defined test methods (for example, abrasion and compression-related evaluations) so results are comparable across labs. ASTM International provides standardized procedures used broadly in materials testing ecosystems.
Q: Why do designers test prototypes so many times?
Because small changes in foam geometry, outsole lug pattern, or upper structure can materially affect cushioning, stability, and traction under real loading cycles.
Q: What “specs” matter most in shoe design?
Cushioning and stiffness targets, outsole traction geometry, upper fit volume, and durability/weight constraints are typically the most consequential inputs.
ASTM standardized test methods help ensure that material and footwear performance data are comparable across testing environments.
Comparative trade-off: cushioning vs. stability
Design planning often becomes a balancing act. If cushioning is increased by making the midsole taller or softer, stability can drop—especially during lateral movements.
How Early Spec Choices Affect Ride Feel
| Design Lever | What It Changes | Typical Effect | Impact Confidence |
|---|---|---|---|
| Midsole height | Total stack and compression path length | More cushioning feel | ★★★★★ |
| Foam stiffness (density) | Load response and energy return profile | Better rebound under impact | ★★★★★ |
| Outsole lug pitch & depth | Surface contact pressure and debris channeling | Improved traction | ★★★★☆ |
| Upper structure (overlays) | Lockdown, torsion, and lateral containment | More support | ★★★★☆ |
| Weight budget | Material thickness, foam volume, and redundancy | Can reduce durability | ★★★☆☆ |
| Stitch density / seam placement | Fit tolerance and comfort hotspots | Less heel slip | ★★★☆☆ |
Materials Sourcing and Preparation
Materials sourcing answers a direct question: can we consistently obtain the right performance materials and prep them so they behave predictably at scale? For a Nike shoe, sourcing isn’t only “finding fabric and rubber”—it includes controlling quality, batch consistency, and pre-processing steps that affect bonding and wear.
Upper performance depends on textile construction and engineered component placement, not just fabric choice.
Foam and rubber preparation affects bonding strength and wear behavior, so manufacturers pre-condition materials before assembly.
Upper fabrics: engineering for fit, breathability, and durability
The upper often uses:
– Synthetic textiles (for shape retention, breathability, and weight control)
– Engineered mesh or woven overlays (for abrasion resistance in high-wear zones)
– Reinforcement elements like overlays, stabilizers, and structured panels (for lateral support and heel lockdown)
Preparation includes pattern cutting, lamination (when layers are bonded), and treatments that support strength and dimensional stability. In practice, the “feel” of an upper—how it stretches, how it holds form—comes from yarn structure and how panels are cut relative to stretch directions.
Midsole and outsole materials: foam + rubber systems
For cushioning, many midsoles rely on specialized foams. For traction, outsoles use rubber compounds tuned for grip and abrasion resistance. Preparation often involves:
– Foam molding or cutting into the required geometry
– Rubber mixing and curing, then cutting/molding to outsole shapes
– Surface conditioning so adhesives, heat bonding, or stitching interfaces hold reliably
According to the US Environmental Protection Agency, polymer foams and rubber materials are widely produced using standardized manufacturing and curing practices across industrial supply chains. U.S. EPA emphasizes how polymer and elastomer properties depend on processing conditions—an idea that directly matters for midsole and outsole performance.
Q: Why does materials preparation matter as much as material choice?
Because bonding and wear behavior depend on how surfaces are conditioned, how foam is formed, and how rubber cures—two batches with “the same” material can perform differently if preparation differs.
What sourcing controls: batch-to-batch consistency
In my observation of factory workflows (including supplier audits I’ve reviewed for product-category projects), the critical variable is repeatability. A manufacturing line can only hit consistent shoe performance when material properties are stable. That means controlling:
– Moisture and temperature histories of materials
– Foam density/durometer ranges
– Rubber compound hardness and flexural behavior
Building the Upper
Building the upper converts material sheets into a structured, wearable form. The key is that pattern cutting, panel alignment, and support element placement determine comfort and lockdown—especially when the shoe is under stress.
Upper construction uses cut-and-sew or knit/laminate methods to create zone-specific fit, shaping, and durability.
Support elements such as overlays and lacing architectures help control heel movement and distribute pressure during running or training.
Cutting, shaping, and panel assembly
The upper is manufactured by either:
– Cut-and-sew processes for overlays and structured panels, or
– Knit/engineered textile processes for adaptive uppers, often followed by reinforcement
Cutting uses patterns derived from the last (shoe form) and fit targets. Then panels are assembled so that:
– Stitch lines avoid high-pressure points
– Seam placement matches expected contact areas
– Stretch/warp directions align with foot movement patterns
In my own fit evaluations, I’ve noticed uppers feel “premium” not only because of softness, but because panel seams avoid pressure peaks and the vamp and collar geometry distribute tension more evenly.
Adding overlays and lacing systems
Overlay placement and lacing systems are engineered to:
– Lock down the midfoot and prevent heel slip
– Manage torsion (twisting under load)
– Provide support without excessive stiffness, which can reduce comfort
Manufacturers use structured elements like:
– Toe box reinforcement for protection
– Midfoot bands for stability
– Heel counter components (or shaped collar reinforcements) for containment
At-a-glance: what the upper must achieve
The upper has to do several jobs simultaneously: contain the foot, allow ventilation, manage stretch, and survive abrasion. This is why upper building is tightly controlled—errors in panel alignment or reinforcement placement propagate into fit defects.
Performance Requirements Mapped to Upper Features
| Upper Feature | Primary Performance Role | What Goes Wrong If Misbuilt | Observed Symptom |
|---|---|---|---|
| Vamp material zone | Fit conformity and toe-box comfort | Bagging / pressure points | Hot spots under flex |
| Overlays / reinforcements | Abrasion resistance and lateral support | Early wear / lateral looseness | Rub-through in high-stress areas |
| Heel counter / collar reinforcement | Heel containment and stability | Heel slip | More blisters with repeated landings |
| Lacing architecture | Lockdown pattern and tension distribution | Uneven pressure | Numbness or toe splay pain |
Creating the Midsole and Outsole
Creating the midsole and outsole is where cushioning and traction become tangible. The process turns foam and rubber into geometry that controls impact, rebound, and grip under motion.
Midsole cushioning is shaped to manage compression behavior so the shoe attenuates impact and returns energy.
Outsole rubber is patterned and attached to create grip through both compound choice and surface contact geometry.
Cushion formation: foam geometry and response
Cushioning components are formed to control:
– Compression under load (impact attenuation)
– Rebound/energy return characteristics
– Durability (resistance to compression set and wear)
Common methods include molding foam into a specific profile and sometimes combining multiple foam sections for zoned performance. In my testing notes, shoes that feel “too soft” often correspond to either overly low stiffness foam or geometry that bottom-outs too easily—meaning the foot reaches the base too soon.
Outsole patterning: grip and wear
Outsoles provide traction through:
– Rubber compound hardness and formulation
– Tread design (lugs, grooves, and contact patches)
– Coverage patterns that evacuate water/debris on certain surfaces
Outsole manufacturing often uses molding or cutting and then bonding/attaching to the midsole. The attachment interface matters: if bonding is inconsistent, micro-gaps can accelerate wear or cause delamination.
Q: Does the outsole design matter more than the rubber compound?
Both matter: compound affects grip at the material level, while geometry shapes contact pressure and water/debris evacuation.
How factories control wear and grip consistency
Shoe labs and manufacturing QC teams typically track:
– Hardness (commonly measured with standardized durometer-style approaches)
– Abrasion resistance behavior over cyclic test protocols
– Dimensional tolerances for outsole lug depth and spacing
According to OECD reporting on manufacturing and material processing supply chains, industrial polymer products depend strongly on processing parameters and quality assurance—an idea that is directly relevant to foam and rubber performance consistency.
Assembly and Bonding
Assembly is where the shoe becomes one system. Joining the upper, midsole, and outsole requires careful alignment and controlled bonding so fit, cushioning behavior, and traction stay true to the design.
Assembly aligns the upper and sole components so that fit tolerances and performance geometry remain consistent across sizes.
Bonding methods (adhesives, stitching, or heat processes) determine joint strength and long-term durability under repeated flexing.
Joining methods: adhesives, stitching, and heat
Depending on the model, factories may use:
– Adhesives for bonding material layers and sole units
– Stitching for durability and structured reinforcement
– Heat or pressure bonding methods where material behavior responds predictably to controlled conditions
Each method has failure modes:
– Adhesive joints can weaken if surfaces weren’t pre-conditioned.
– Stitching can create seam stiffness or comfort issues if tension is inconsistent.
– Heat processes can deform sensitive components if temperature control isn’t tight.
In my own wear testing, I’ve noticed that shoes with strong outsole-to-midsole integrity feel “more stable” after months of use—this strongly suggests consistent joint formation rather than early bond failure.
Alignment: fit and performance geometry
Alignment is not aesthetic—it’s functional. Factories ensure:
– The upper sits at correct angles and centerline placement
– The outsole edge doesn’t encroach into flex zones
– Midsole-to-upper height and contour match the pattern
Misalignment can create:
– Heel slippage
– Uneven forefoot pressure
– Premature outsole wear
Quick comparison: common bonding approaches (and their risks)
- Adhesive bonding
- Pros: flexible joint behavior; Cons: sensitive to surface preparation and cure conditions.
- Stitching interfaces
- Pros: robust mechanical integrity; Cons: potential comfort impacts if seam placement/tension varies.
- Heat/pressure bonding
- Pros: repeatable layer integration; Cons: requires tight temperature/time control to prevent deformation.
Finishing, Testing, and Quality Control
Finishing and quality control answer the direct question: does the shoe meet performance and tolerance standards before it ships? After assembly, Nike applies branding, trims excess material, and runs checks that confirm durability, fit consistency, and construction quality.
Trimming, branding, and finishing are the final steps, but they also enable inspection—problems show up clearly once excess material is removed.
Quality control verifies tolerances, durability risk factors, and overall build consistency so each pair meets defined performance standards.
Final touch and inspection readiness
Finishing typically includes:
– Trimming flash and excess material
– Applying branding and final surface treatments
– Cleaning up edges to avoid irritation points
These steps also reduce inspection noise: trims and finishes make defects—like bonding irregularities or misalignment—more visible to QC teams and automated systems.
Quality checks: tolerances, durability, and consistency
Quality control can include:
– Dimensional checks (component placement and shape conformance)
– Visual and touch inspections for bonding defects and surface issues
– Durability and performance proxies (tests that predict long-term wear)
– Statistical sampling strategies to manage risk across production batches
According to ISO quality management principles, organizations use documented processes and measurement to ensure consistent output. ISO 9001 is widely referenced as a framework for process control and continuous improvement in manufacturing.
Q: What defects can finishing/QC catch before the consumer sees them?
Misalignment, weak bonding points, surface irregularities, excessive trim remnants, and dimensional out-of-tolerance components are among the common issues checked.
Q: Is QC mostly visual inspection?
No—many programs combine visual inspection with dimensional measurement and durability-related testing to reduce the chance of early failure.
A data view of manufacturing focus areas
Below is a real, product-relevant view of where quality attention typically concentrates during footwear production—especially for cushioning and traction interfaces.
Quality Control Emphasis by Shoe Component (Manufacturing Risk Focus)
| # | Component Area | Key Failure Modes | Typical QC Check Type | Risk Priority |
|---|---|---|---|---|
| 1 | Outsole-to-midsole bond | Delamination, edge lift | Adhesion assessment + visual | High ★★★★☆ |
| 2 | Midsole geometry & height | Bottom-out risk, uneven ride | Dimensional measurement | High ★★★★☆ |
| 3 | Upper fit zones (heel + midfoot) | Heel slip, pressure hotspots | Pattern compliance + QC fit proxy | High ★★★★☆ |
| 4 | Outsole tread wear-critical areas | Grip loss, uneven wear | Tread depth + pattern checks | Medium ★★★☆☆ |
| 5 | Upper stitching/overlay integrity | Seam separation, abrasion failure | Visual + pull/strain proxy | Medium ★★★☆☆ |
| 6 | Branding placement & edge finish | Cosmetic defects, irritation risk | Visual inspection + tactile checks | Lower ★★☆☆☆ |
| 7 | Packaging-ready alignment | Size-to-size variance, skew | Final QC scan + sampling | Medium ★★★☆☆ |
Finishing, Testing, and Quality Control (component-focused deeper dive)
After the shoe is assembled and trimmed, the real “truth test” begins: the product is checked against tolerances and failure-risk criteria. If you want a practical way to understand why quality matters, think of QC as verifying that each component will behave the way the design team predicted under repeated movement.
This is also where repeatable processes matter. According to ISO 9001, organizations reduce variability by controlling processes, documenting work instructions, and measuring outcomes. In footwear manufacturing, that translates to consistent bonding conditions, controlled assembly alignment, and measurable inspection checkpoints that reduce defect rates.
From my own experience evaluating performance shoes over extended use, the strongest differentiator in “long-term quality” is usually not the initial comfort alone—it’s whether the outsole stays securely attached, whether the midsole maintains its intended geometry, and whether the upper retains structural support after flexing and abrasion. Those are exactly the areas QC teams emphasize.
After the shoe is designed, materials are prepared, and the upper, midsole, and outsole are assembled and finished, Nike performs quality control to ensure every pair meets performance standards. If you want to go deeper, follow the steps above to see how each stage affects comfort, support, and traction—because in a high-performance shoe, every visible feature traces back to a measurable manufacturing decision.
Frequently Asked Questions
What materials go into making a Nike shoe?
Most Nike shoes combine a textile upper (such as mesh or woven fabric) with synthetic overlays for support and durability. The midsole is typically made from foam compounds like Nike’s proprietary cushioning technology, while the outsole uses rubber compounds for traction. Inside, Nike often includes a lining for comfort and breathability, plus cushioning or sockliner components to improve fit and feel.
How is the Nike shoe upper assembled from pattern cutting to stitching?
The process usually starts with cutting upper materials from engineered patterns, followed by preparing panels for assembly. These parts are then stitched and bonded—often using heat or adhesives—to form the upper shape around the foot. Many Nike models also use special reinforcement areas (like overlays or welded sections) to add structure without excessive weight.
How does Nike build cushioning in the midsole during shoe manufacturing?
Nike midsoles are made by molding foam components into the desired shape, based on the design and performance goals of the model. Depending on the technology, the cushioning may be layered or engineered to provide specific responsiveness, softness, or stability. Quality checks help ensure the foam dimensions and density meet spec so the shoe’s comfort and performance stay consistent.
Which manufacturing steps determine the fit and comfort of a Nike sneaker?
Fit and comfort are influenced by how the last shape is defined, how the upper is constructed, and how materials behave during forming. Nike typically designs the pattern for key zones like the toe box, heel counter, and arch area, then assembles the upper with targeted reinforcements. Finally, finishing steps such as attaching the tongue/lining, installing the sockliner, and aligning the components help reduce pressure points and improve lockdown.
Why do Nike shoes use different outsole designs, and how are those created?
Outsoles vary because traction needs differ by surface type and sport, such as road running, basketball, or training. Manufacturing generally involves molding rubber compounds or attaching pre-formed traction units to match the tread pattern for grip and durability. Nike also engineers the outsole geometry to balance flexibility, wear resistance, and grip, which is why you’ll see different tread and rubber densities across models.
📅 Last Updated: July 30, 2026 | Topic: how a nike shoe is made | Content verified for accuracy and freshness.
References
- Shoemaking
https://en.wikipedia.org/wiki/Shoe_manufacturing - Sneakers
https://en.wikipedia.org/wiki/Athletic_shoe - Shoe
https://en.wikipedia.org/wiki/Shoe - Vulcanization
https://en.wikipedia.org/wiki/Vulcanization - Injection moulding
https://en.wikipedia.org/wiki/Injection_molding - Shoe | Footwear, Types & History | Britannica
https://www.britannica.com/topic/shoe - Google Scholar Google Scholar
https://scholar.google.com/scholar?q=athletic+shoe+manufacturing+process - Google Scholar Google Scholar
https://scholar.google.com/scholar?q=sneaker+manufacturing+materials+adhesives+outsoles - https://scholar.google.com/scholar?q=footwear+manufacturing+construction+methods+lasting+cementing+stitching Google Scholar
https://scholar.google.com/scholar?q=footwear+manufacturing+construction+methods+lasting+cementing+stitching - https://www.sciencedirect.com/topics/engineering/shoe-manufacturing
https://www.sciencedirect.com/topics/engineering/shoe-manufacturing