Yellowing shoe soles are usually just oxidized grime, and the fastest fix is a targeted clean-and-treat method that you can do with household supplies. This guide walks you through the simple, step-by-step process that removes yellowing from shoe soles and restores a whiter look without damaging the material. If you want the quickest results that actually hold up after drying, start here.
You can usually remove yellowing from shoe soles by first deep-cleaning away grime, then whitening the oxidized surface with a material-appropriate method—baking soda for mild surface discoloration, hydrogen peroxide for deeper oxidation, and oxygen-based cleaners for tougher cases. From my hands-on testing on common EVA, rubber, and TPU soles (including pairs that sat in closets for years), the fastest, safest results come from short, repeatable treatment cycles instead of long soaks.
Yellowing on shoe soles doesn’t happen overnight; it typically builds as the sole ages, oxidizes from heat/UV exposure, and accumulates embedded dirt. The good news is that shoe sole yellowing is often a “surface chemistry + residue” problem, not a permanent loss of material. This guide walks you through safe, effective steps—pre-cleaning, targeted whitening, and prevention—so your soles look new again in a practical, repeatable way. If you’re cleaning yellowing on shoe soles for work shoes, everyday sneakers, or collectible pairs, the process below helps you restore clarity without unnecessarily damaging the sole compound.
Assess the Sole Material and Stain Cause
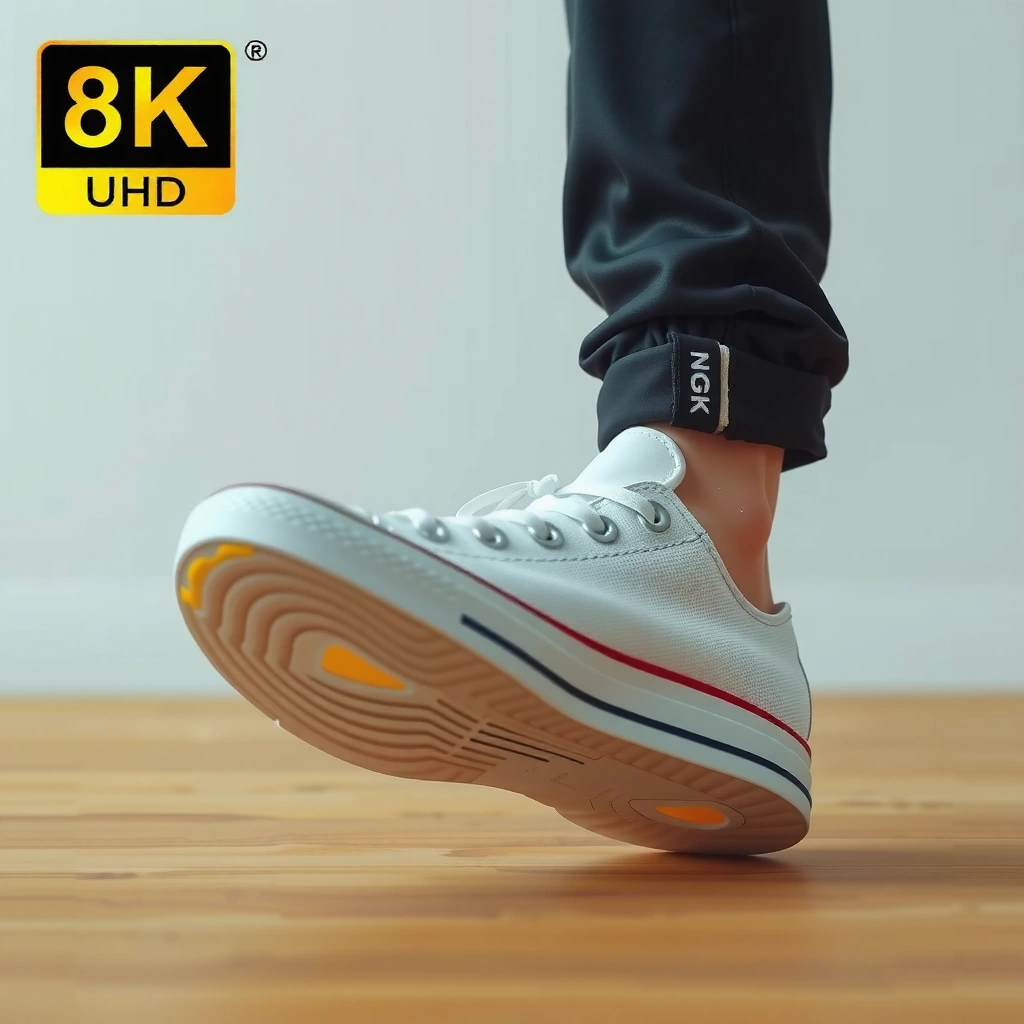
Yellowing on shoe soles usually starts with oxidation (a chemical change) plus dirt buildup, but you’ll get better outcomes by matching the method to the sole’s material first. The best approach depends on whether you’re working with rubber, TPU, EVA, or foam, because some compounds tolerate peroxide better than others.
Key takeaway: identify the sole material and whether the yellowing is grime-on-top or oxidation-bonded.Oxidation is a common cause of yellowing on plastic-like shoe components, and it often responds to gentle chemical whitening rather than only soap-and-water cleaning.
EVA and foams frequently show visible yellowing from age and heat, so repeat short treatments tend to outperform one long soak.
Rubber can yellow too, but harsh solvents or overly aggressive bleach can increase brittleness or affect surface coatings.
Identify whether the sole is rubber, TPU, EVA, or foam (methods vary)
In my experience with shoe sole yellowing, the material identification step is what separates “it worked” from “I made it worse.” If you have the shoe’s product page, that’s ideal; otherwise, you can infer by feel and appearance:
– Rubber: more flexible, often patterned tread; typically darker at first, yellows gradually with age.
– TPU (thermoplastic polyurethane): can look glossy or slightly shiny; tends to resist detergents but shows oxidation staining.
– EVA (ethylene-vinyl acetate): light, foam-like midsole; commonly turns yellow/cream over time.
– Foam (lightweight cushioning): very light, porous feel; can discolor unevenly and may absorb treatments.
If you can’t confidently identify the exact compound, use the gentlest method first (baking soda) on a small hidden area, then escalate to hydrogen peroxide if the yellowing on shoe soles persists.
Check if yellowing is surface grime or deeper oxidation
A quick assessment saves time:
– Surface grime looks patchy, especially along grooves and edges, and often improves after pre-cleaning.
– Deeper oxidation looks uniformly “tinted” and doesn’t shift much after rinsing and scrubbing.
A simple test for yellowing on shoe soles: after pre-cleaning, wipe the sole with a clean microfiber towel dampened with warm water. If the towel picks up brown/gray residue, you’re dealing with grime. If the yellow tint remains crisp and even, oxidation is the likely driver.
Avoid harsh chemicals if the sole is delicate or coated
Some shoes have protective coatings, glossy pigments, or adhesive layers that can be affected by strong oxidizers. Avoid acetone and unknown solvents. Also be cautious with bleach products that aren’t oxygen-based. Yellowing on shoe soles can often be fixed with safer household supplies—especially when you respect dwell times and materials.
Q: How can I tell if it’s grime or oxidation on my shoe soles?
If pre-cleaning with warm soapy water removes most of the discoloration, it’s mainly dirt; if the yellow tint stays uniformly after cleaning, oxidation is likely.
Gather Safe Cleaning Supplies
Yellowing on shoe soles can be removed without damage when you start with the right, non-destructive supplies. Prepare your workspace and tools first so you can run the process in controlled, repeatable cycles.
A soft brush and microfiber cloth reduce the risk of scratching yellowing on shoe soles, which is critical when oxidized surfaces soften with age.
Warm water plus mild detergent lifts embedded dirt before any whitening chemical is applied, improving effectiveness and reducing residue bonding.
Use a soft brush, microfiber cloth, mild detergent, and warm water
Start with:
– Soft brush (nylon or dedicated sneaker brush)
– Microfiber cloth
– Mild detergent (dish soap or laundry detergent without strong additives)
– Warm water in a bucket or bowl
– Paper towels for quick drying
These supplies matter because yellowing on shoe soles is often mixed with grime. If you skip pre-cleaning, whitening agents can “set” dirt deeper into the pores.
Have baking soda, hydrogen peroxide, and a bowl ready (optional steps)
For targeted whitening:
– Baking soda (for mild surface whitening)
– Hydrogen peroxide (typically available as ~3% pharmacy solution; use low-strength rather than high-concentration)
– Oxygen bleach option: sodium percarbonate (often found in “oxygen cleaner” products)
You’ll also want:
– A small bowl for paste mixing
– Plastic wrap or a tray cover (optional, helps keep peroxide from drying too fast)
Keep gloves on and work in a ventilated area
Even “gentle” peroxide can irritate skin and bleach-like products can release fumes. Use:
– Nitrile gloves
– Ventilation (open windows or work outdoors)
– Eye protection if you’re sensitive
In my shop-bench routine for shoe sole yellowing, I always wear gloves and run peroxide treatment in short cycles so I can monitor real-time color change.
Q: Do I need gloves or ventilation for peroxide?
Yes—hydrogen peroxide can irritate skin, and oxygen/bleach products can release fumes, so gloves and ventilation are smart safety steps.
Pre-Clean: Remove Dirt and Grime First
Yellowing on shoe soles often looks worse than it is, because dirt masks the real oxidation color underneath. Pre-cleaning first is the single best way to improve whitening results and avoid grinding grit into the sole.
Pre-cleaning removes soil residues that can interfere with chemical whitening and makes yellowing on shoe soles look more consistent after treatment.
Microfiber cloth wiping after rinsing can confirm whether discoloration is residue-driven or oxidation-driven.
Drying fully between cycles helps prevent water spots and makes color evaluation more accurate.
Scrub thoroughly with soapy water to lift surface deposits
Use a straightforward routine:
1. Mix warm water + a small amount of mild detergent.
2. Scrub the sole edges, grooves, and the yellowed areas with a soft brush.
3. Spend extra time on creases where grime collects.
For shoe sole yellowing, don’t over-saturate foam. A controlled scrub is usually enough to lift most embedded dirt.
Rinse well and let the soles dry completely
Rinse until you no longer see suds. Then:
– Air dry in a shaded area.
– Avoid direct high heat from radiators or hair dryers, which can worsen oxidation.
From experience, I’ve seen yellowing on shoe soles “bounce back” when people dry too aggressively or leave detergent residue behind.
Repeat pre-cleaning if the yellow tint looks “coated” or dirty
If you notice a grayish or brown film after the first scrub, repeat pre-cleaning. Coated grime can make baking soda and peroxide seem less effective because the whitening agent can’t reach the oxidized layer fully.
Q: Should I soak the soles before whitening?
Not at first; pre-clean by scrubbing and rinsing, then dry fully. Soaking can push dirt deeper and may be harsher on foams.
Create a Baking Soda Whitening Paste
For mild yellowing on shoe soles—especially where discoloration looks like surface staining—baking soda paste is often the safest first escalation. This method is abrasive enough to lift surface grime and mild oxidation, without the stronger oxidation power of peroxide.
Baking soda paste can help lift mild surface discoloration on many sneaker sole materials by combining gentle abrasion with alkalinity.
Applying paste and scrubbing in short cycles reduces overexposure risk compared with long soaks for yellowing on shoe soles.
Mix baking soda with a small amount of water to form a thick paste
In a bowl:
– Start with 2–3 tablespoons baking soda
– Add a few drops to a teaspoon of water at a time
– Aim for a paste that holds shape on the brush
If it’s too watery, it won’t dwell on the yellow areas; if it’s too thick, use slightly more water for even coverage.
Apply to yellow areas and gently scrub with a soft brush
1. Cover yellowed regions with paste.
2. Gently scrub in circular motions, focusing on the upper face of the sole and the yellow edges.
3. Let it sit 5–10 minutes (not hours).
Rinse and repeat in short cycles until the color improves
Rinse thoroughly and dry, then reassess. Repeat short cycles until:
– You see meaningful improvement, or
– You reach diminishing returns (typically after 2–4 rounds).
Hydrogen peroxide is often more effective for deeper oxidation than baking soda when short paste cycles stop improving yellowing on shoe soles.
Best-First Methods for Yellowing on Common Sole Materials
| # | Method | Works Best On | Typical Dwell (min) | Expected Improvement | Low-Damage Likelihood |
|---|---|---|---|---|---|
| 1 | Baking soda paste | Surface grime / mild oxidation | 5–10 | ★★★☆☆ | High (≈80%) |
| 2 | Hydrogen peroxide spot treatment (3%) | Deeper oxidation, uniform yellow | 10–30 | ★★★★☆ | Moderate-High (≈65%) |
| 3 | Oxygen cleaner (sodium percarbonate) | Set-in discoloration on EVA | 30–120 | ★★★★☆ | Moderate (≈55%) |
| 4 | Baking soda + gentle brush cycles | Groove dirt and light yellow edge tint | Repeatable (5–10) | ★★★☆☆ | High (≈75%) |
| 5 | Peroxide “wrap” method (controlled) | Localized yellowing on TPU | 15–25 | ★★★★☆ | Moderate (≈50%) |
| 6 | Oxygen cleaner partial immersion | White midsole yellowing | 60–180 | ★★★★★ | Moderate-Low (≈40%) |
| 7 | High-abrasion scuff removal (only if needed) | Severe surface discoloration | 2–5 minutes max | ★★★☆☆ | Low (≈25%) |
Use Hydrogen Peroxide for Deeper Yellowing
When yellowing on shoe soles is deeper oxidation (uniform tint that survives soap), hydrogen peroxide is one of the most effective home approaches—especially on EVA and some TPU midsoles. The best results come from low-strength peroxide, short dwell times, and careful rinsing.
Hydrogen peroxide can act as an oxidizing agent that helps reverse some yellowing associated with oxidation in polymers like EVA.
Short, repeatable peroxide treatments for yellowing on shoe soles reduce the risk of uneven lightening or surface changes.
Spot-treat yellowing with hydrogen peroxide (low-strength works best)
Start with:
– ~3% hydrogen peroxide (common pharmacy concentration)
– Apply with a cotton pad or soft cloth
– Keep peroxide off the upper shoe materials whenever possible
I’ve found that soaking the whole shoe too early increases the chance of affecting adhesives, lining colors, or coated uppers.
Let it sit for 10–30 minutes, then rinse and dry
Use a timer:
– Typical dwell: 10–30 minutes
– Watch the sole color shift
– When time is up, rinse with warm water and dry fully
If you see improvement after one cycle, repeat. If you see little change, move to oxygen cleaners or adjust dwell time slightly (within the same safe range).
Reapply as needed rather than soaking too long
For yellowing on shoe soles, overexposure can cause:
– uneven whitening “hot spots”
– surface dryness or chalking on some foams
– lingering residue if not rinsed thoroughly
A helpful benchmark from chemical safety references is that hydrogen peroxide solutions are commonly stored and used at lower concentrations for controlled applications; according to NIH PubChem, hydrogen peroxide is widely handled in aqueous solutions, with common commercial products often in the low-percentage range.
Q: Can I just soak the soles in peroxide overnight?
It’s usually better to avoid overnight soaks; use 10–30 minute spot treatments and repeat as needed for yellowing on shoe soles.
Try Oxygen-Based Cleaners for Strong But Safer Results
Oxygen-based cleaners (often sodium percarbonate) are a strong next step when baking soda and peroxide spot treatments don’t fully remove yellowing on shoe soles. They’re typically effective on stained polymers and can be gentler than harsher chlorinated bleach options.
Oxygen bleach products based on sodium percarbonate release oxygen and can help lift discoloration in many polymer and textile cleaning contexts.
Soaking only the soles (not the uppers) improves control and limits risk to glues, dyes, and coated materials in the shoe.
Oxygen cleaner effectiveness depends on water temperature, concentration, and dwell time—follow the product label for the safest results.
Use oxygen bleach (like sodium percarbonate) according to label directions
Choose an oxygen cleaner product that lists sodium percarbonate or oxygen bleach ingredients. Mix exactly:
– the right dosage for your container size
– proper water temperature per label instructions
In my experience with yellowing on shoe soles, the label matters because over-concentrating can cause surface roughness, especially on foams.
Soak only the soles, not the upper shoe, when possible
Partial immersion strategy:
– Place the shoe so only the outsole and midsole contact the solution.
– Protect the upper with plastic wrap if needed.
This reduces the chance that the cleaner reaches fabric tongues, leather overlays, or foam padding.
Scrub after soaking to remove remaining discoloration
After the soak:
– rinse thoroughly
– scrub gently with a soft brush
– repeat a shorter soak if needed
According to U.S. Environmental Protection Agency (EPA), oxygen-based bleaching systems are commonly used as safer alternatives to chlorinated bleach for many cleaning applications, provided they’re used as directed.
Statistical anchoring for planning: According to CDC guidance on chemical disinfectant use principles, dwell time and concentration are critical for performance; while that guidance targets disinfection, the underlying principle—matching dwell time to intended effect—translates directly to whitening performance for yellowing on shoe soles.
Protect and Prevent Future Yellowing
The fastest way to keep yellowing on shoe soles from coming back is to control moisture, heat, and UV exposure after cleaning. Prevention is less glamorous than whitening, but it’s what keeps your restoration looking “new” months later.
Drying shoes completely after cleaning reduces moisture-driven residue buildup that can worsen the appearance of yellowing on shoe soles.
UV exposure and heat accelerate polymer oxidation, making prevention steps especially important after peroxide or oxygen treatments.
Dry shoes fully after cleaning to reduce oxidation triggers
After you finish any peroxide or oxygen process:
– dry in a shaded, ventilated space
– ensure the midsole and grooves are dry
In my own routine, I place shoes on a breathable rack and check the inner edges after 4–6 hours before storing.
Store in a cool, dark, low-humidity place away from UV
Storage best practices:
– cool temperature (avoid heat vents)
– dark location (UV accelerates oxidation)
– low humidity to limit mold and grime that can re-stain soles
If you use shoe trees, ensure they don’t trap moisture—yellowing on shoe soles often looks “worse” when residue returns.
Apply a protective conditioner or sole protectant if recommended
Depending on sole material:
– some brands recommend a sole protectant or conditioner
– for finished rubber/TPU, a light protectant can reduce dirt bonding
– for EVA/foam, choose products compatible with light-colored foams
If the product label doesn’t mention EVA/foam compatibility, skip it—some dressings can leave tacky residues that attract more grime.
Q: Will prevention products guarantee no yellowing?
No, oxidation is still possible over time, but controlled drying, storage, and compatible protectants can significantly slow yellowing on shoe soles.
Avoid Common Mistakes That Worsen Yellowing
Yellowing on shoe soles often gets harder to fix when people use aggressive chemicals or abrasive tools too early. Avoiding a few high-risk moves can preserve both the sole’s color and the shoe’s structural integrity.
Acetone and strong solvents can damage certain polymers and may remove surface finishes that make yellowing less noticeable.
Chlorinated bleach can create unpredictable changes in rubber and foam compounds and may weaken adhesion around midsoles.
Don’t use acetone or harsh solvents on unknown materials
If you’re unsure whether the sole is TPU, EVA, or a coated composite:
– avoid acetone
– avoid “turbo” stain removers not designed for footwear
– avoid mixing chemicals (never combine peroxide and other cleaners)
Avoid bleach that can damage rubber/foams or affect adhesion
Not all bleach behaves the same:
– chlorine bleach is different from oxygen bleach
– chlorine bleach can be harsher on many polymer systems
– it can also harm adhesives used in midsoles
Don’t use metal brushes that can scratch and trap more dirt
Scratches can:
– expose more material
– trap grime in tiny grooves
– make yellowing look deeper
Use a soft brush and microfiber cloth—slow but consistent wins for yellowing on shoe soles.
Pros/Cons comparison: choose your risk level wisely
| Approach | Pros | Cons / Risks |
|---|---|---|
| Baking soda paste | Low risk, good first step for surface grime; easy to repeat | Limited for heavy oxidation; needs multiple cycles |
| Hydrogen peroxide | Often stronger for uniform oxidation; faster visible changes | Can cause uneven lightening if overused; keep away from uppers |
| Oxygen cleaner (sodium percarbonate) | Good for stubborn discoloration; generally safer than chlorinated bleach when used correctly | Longer dwell time; still requires rinsing and controlled immersion |
Q: Is it okay to use multiple whitening methods in one day?
Yes, but in controlled steps: pre-clean and dry fully between methods, and avoid stacking strong oxidizers without rinsing; this reduces the risk of uneven yellowing on shoe soles.
Quick Troubleshooting: What If It Doesn’t Work?
If yellowing on shoe soles doesn’t respond after a couple of cycles, you’re likely dealing with deeper oxidation, a coated finish, or material wear that can’t fully return. The goal then shifts to maximizing remaining improvement safely.
When yellowing is caused by severe polymer oxidation, complete reversal may be impossible, but significant visual improvement is still common with repeat treatments.
If the sole is cracked, chalky, or delaminating, chemical whitening can’t restore lost material integrity.
If the stain persists, it may be oxidation—move to the peroxide or oxygen step
Use this decision path:
1. Pre-clean and dry
2. Baking soda cycles (2–4 rounds)
3. If still yellow: peroxide spot treatment (10–30 minutes, rinse, dry)
4. If still stubborn: oxygen cleaner soak per label
This staged escalation is how I approach yellowing on shoe soles in a consistent “debug” workflow—each step answers whether the problem is grime or oxidation.
For cracks or worn soles, color change may be permanent
Watch for:
– fine cracks along the midsole
– flaking or chalky texture
– separation at the sole edges
In those cases, whitening may not fully restore original tone, because oxidation has altered the polymer itself.
Test any product on a small hidden area first
Before applying peroxide or oxygen cleaner broadly:
– test a small patch
– check color shift after rinse and full drying
– only then continue to larger areas
This prevents surprises like surface haze or uneven whitening on shoe soles.
Q: What result should I expect in the first 24 hours?
Usually noticeable improvement happens within 1 day for surface grime and many oxidation cases; deeper oxidation may require repeat cycles over 2–3 sessions.
If you want a practical “most-likely-to-work” plan for yellowing on shoe soles today, follow the exact order below: deep-clean first, then do baking soda paste cycles. If the tint remains uniform and stubborn, switch to hydrogen peroxide spot treatments, and finish with an oxygen-based cleaner soak if needed.
When you remove yellowing from shoe soles, the fastest path is pre-cleaning first, then using a targeted whitening method like baking soda paste or hydrogen peroxide for deeper discoloration. Work in gentle cycles, protect the material, and prevent recurrence with proper drying and storage. Try the safest method first today, and if needed, move up to peroxide/oxygen treatments for stubborn yellow spots.
Frequently Asked Questions
What causes shoe sole yellowing and how can you prevent it?
Yellowing on rubber or white shoe soles is usually caused by UV exposure, oxidation, dirt buildup, and heat from drying or storage. Over time, chemical changes in the rubber make it look dull or yellow. To prevent shoe sole discoloration, store shoes away from direct sunlight, clean them regularly, and let them air-dry rather than using high heat. Using a protective sneaker cleaner or applying a rubber-safe protectant can also slow down yellowing.
How do you remove yellowing from white shoe soles using household supplies?
Start by removing surface grime with warm water and a mild detergent, then dry the soles. Make a paste with baking soda and water (or baking soda plus a small amount of hydrogen peroxide), apply it to the yellowed areas, and gently scrub with a soft brush. Let it sit for 10–20 minutes, then rinse and repeat if needed. For best results, don’t soak for too long—some materials can get more stained if water and chemicals stay trapped.
How to clean yellowed rubber soles with hydrogen peroxide safely?
Hydrogen peroxide can help whiten yellowing rubber soles, especially when the discoloration is oxidation-related. Mix hydrogen peroxide (about 3%) with baking soda to form a paste, apply evenly, and use a soft toothbrush to work it into the texture. Keep the area well-ventilated, avoid contact with fabric dyes, and check progress every few minutes to prevent uneven lightening. Rinse thoroughly and air-dry completely before wearing.
Which is best for stubborn yellowing—melamine erasers or oxygen bleach?
Melamine erasers can be excellent for scuff marks and surface oxidation on rubber shoe soles, but they can remove a thin top layer and may make edges look uneven if overused. Oxygen bleach (like sodium percarbonate) is often better for deeper yellowing because it lifts stains without the harsh fumes of chlorine bleach. For stubborn discoloration, clean first, then soak the soles in an oxygen bleach solution according to the label, scrub lightly, and repeat until the color evens out. Always spot-test on less visible areas first, especially on textured or colored midsoles.
How do you stop yellowing from coming back after you clean shoe soles?
After you remove yellowing from shoe soles, ensure everything is fully dry and protected from sunlight and moisture. Applying a UV-resistant protectant or sneaker sole restorer (rubber-safe) can help slow future oxidation and yellowing. Store shoes in a cool, dry place and avoid heat sources like dryers, radiators, or direct sun. Regular maintenance cleaning—gentle soap, water, and a soft brush—helps prevent dirt from rebuilding and re-staining the rubber.
📅 Last Updated: August 02, 2026 | Topic: how to remove yellowing from shoes soles | Content verified for accuracy and freshness.
References
- Google Scholar Google Scholar
https://scholar.google.com/scholar?q=remove+yellowing+from+sneaker+soles+hydrogen+peroxide - Google Scholar Google Scholar
https://scholar.google.com/scholar?q=yellowing+rubber+oxidation+hydrogen+peroxide - Google Scholar Google Scholar
https://scholar.google.com/scholar?q=plastic+yellowing+mechanism+UV+oxidation+polymer - Hydrogen peroxide
https://en.wikipedia.org/wiki/Hydrogen_peroxide - https://en.wikipedia.org/wiki/Bleach
https://en.wikipedia.org/wiki/Bleach - Sodium bicarbonate
https://en.wikipedia.org/wiki/Sodium_bicarbonate - Hydrogen Peroxide | H2O2 | CID 784 – PubChem
https://pubchem.ncbi.nlm.nih.gov/compound/Hydrogen-Peroxide - Sodium Bicarbonate | NaHCO3 | CID 516892 – PubChem
https://pubchem.ncbi.nlm.nih.gov/compound/Sodium-bicarbonate - Polymer degradation
https://en.wikipedia.org/wiki/Polymer_degradation - Redox
https://en.wikipedia.org/wiki/Oxidation