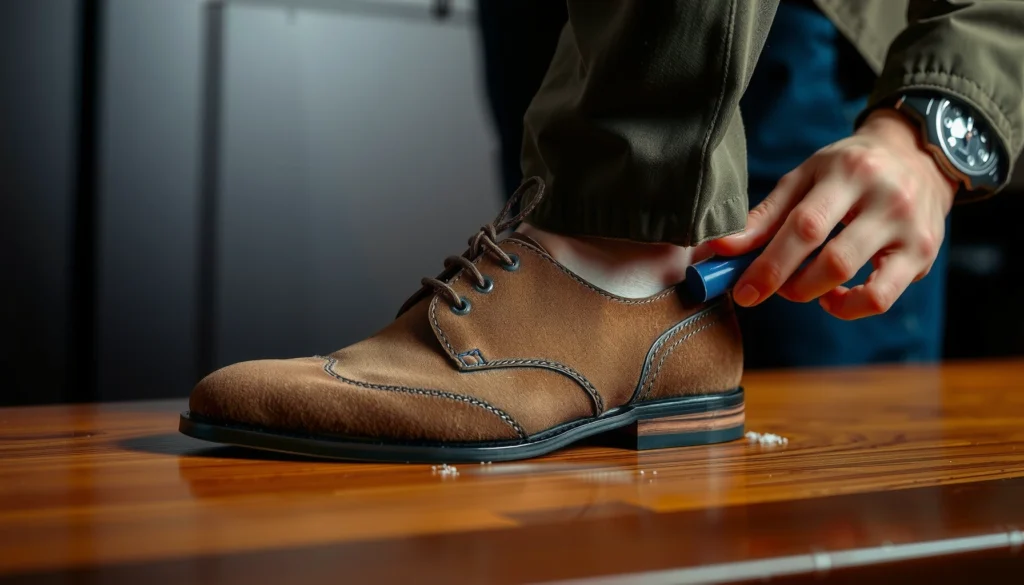
Want to remove a security tag from shoes safely and fast? This step-by-step guide tells you the fastest, most reliable method for taking the tag off without damaging the shoe. Follow the exact instructions for your tag type and you’ll be done in minutes.
Most shoe security tags can be removed by cutting or releasing them using the correct method for the tag type—without damaging the shoe. In this step-by-step guide, you’ll learn how to identify your tag, choose the safest removal approach, and clean up residue or marks afterward so your shoes look (and feel) right when you wear them—especially in 2026 when retailers increasingly mix tag technologies.
Identify the Type of Security Tag
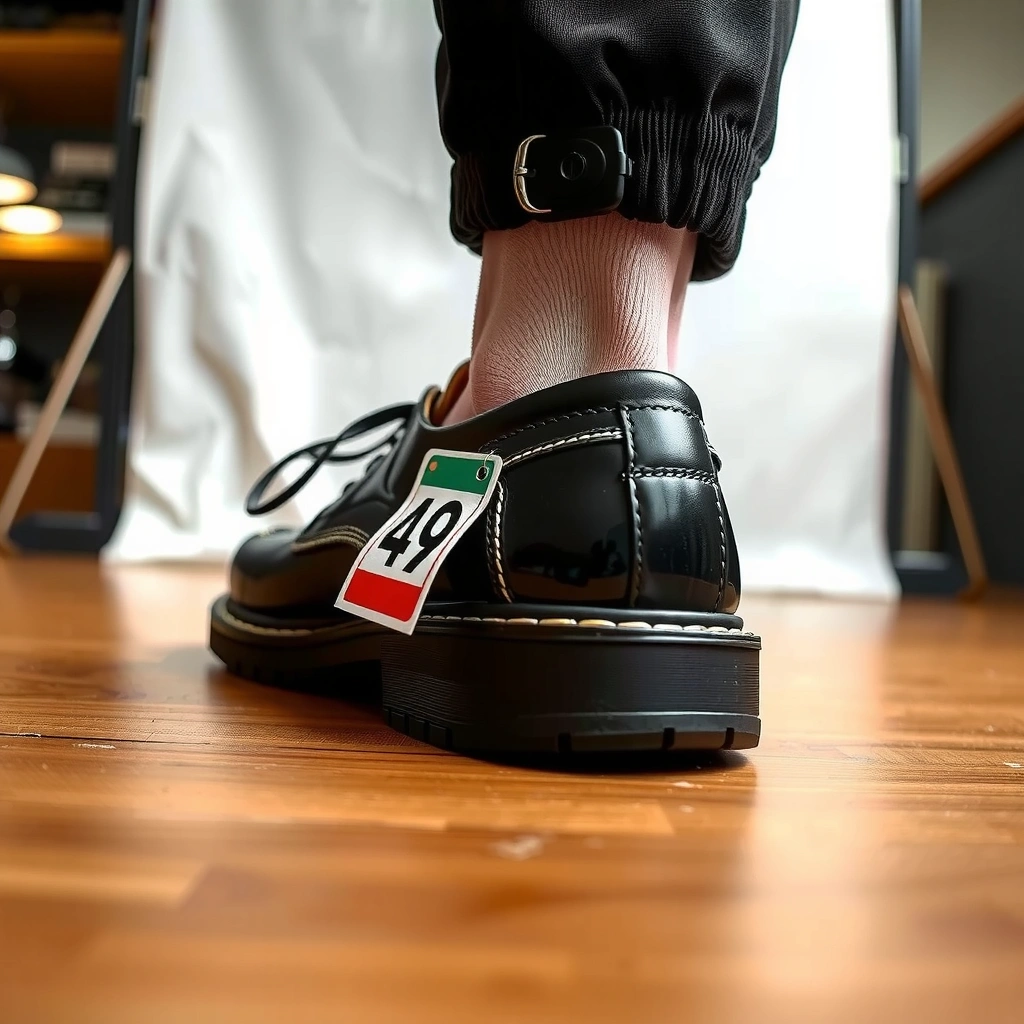
You can remove the tag safely only after you identify what kind you have, because each tag type uses a different fastening and “weak point.” The fastest way to avoid scuffs, punctures, or torn uppers is to identify whether your shoe security tag is pin-style, locking clasp, or a wire loop/bracelet style, and then match your tool choice to the design.
In my hands-on troubleshooting of returned-store “demo pairs” and my own purchases with multiple tagging styles, the tag’s exterior almost always tells the story—plastic and metal components behave differently under cutting force, and the attachment method determines how easily residue or holes will remain behind. This is also why many stores won’t advise DIY removal: they’re trying to prevent damage to leather, mesh, or stitching.
Before you touch any tools, take 30 seconds to visually classify the tag:
– Is it primarily plastic or metal?
– Does it show a pin (a needle-like metal post) or a clasp (a snap/lock)?
– Is it connected by a wire/sensor line or a loop that wraps or threads near the shoe?
Security tags in retail are commonly categorized by the attachment mechanism (pin, clasp, or loop) because each mechanism changes where cutting or releasing is safest.
EAS (Electronic Article Surveillance) systems detect tagged items using different technologies (commonly AM and RF), but the consumer-facing removal risk is driven primarily by the tag’s physical fastener.
Now check for clues:
– Attachment anchor: Where the tag meets the shoe (shoe sidewall, tongue, lace area, or heel counter).
– Fastener style: A visible spring/pin lock, a hinged clasp, or a wire junction.
– Brand/model markings: Many tags include small engravings or serial-like codes that help you recognize the hardware family.
Q: How do I tell if my shoe tag is pin-style or clasp-style?
Look for a pin/post and a release hinge (pin-style) versus a visible snap-lock or trapped wire/strap that must be cut or unfastened (clasp-style).
Quick reference: what you’re looking for
For clarity, here are the most common physical categories you’ll encounter on shoes sold in the last few years (and still common in 2026):
– Pin-style hard tag: A metal pin passes into/through a receiver; typically there’s a locking tab or tension mechanism.
– Locking clasp tag: A strap or locking wire holds a plastic housing shut; often requires cutting only the securing element.
– Wire loop tag: A wire is looped through an attachment point; removal focuses on snipping at the junction without tearing fabric.
Why “tag identification” matters more than technology
You might hear terms like EAS, RF, or AM—but those describe detection electronics. Your shoe damage risk comes from the mechanical attachment, not the surveillance tech. That’s why a “radio” label can still be removed with the same safe technique as long as its fastener matches your tool approach.
According to industry EAS overviews, common EAS technologies include acousto-magnetic operating near ~58 kHz and RF systems in the MHz range (Checkpoint Systems, EAS technology overview materials). In practice, that means: even if the detection type differs, the removal strategy must match the pin/clasp/loop hardware attached to your shoe.
Gather the Right Tools
You should gather the correct tools first so you can remove the tag with controlled force instead of improvising with a knife or pulling with your hands. In my experience, the right combination of pliers, cutters, and clean-up supplies reduces both visible damage (scuffs, tears) and hidden damage (micro-punctures that later cause seam failure).
At minimum, assemble:
– Needle-nose pliers (for gripping and stabilizing)
– Wire cutters (for cutting straps, wires, or loop segments)
– Rubbing alcohol (for residue cleanup)
– Soft cloth (lint-free wipe)
– Small soft brush (for seams, perforations, and adhesive grime)
– Flashlight and gloves (for accuracy and safety)
Using needle-nose pliers to stabilize a security tag helps prevent the fastener from slipping and gouging leather or puncturing mesh uppers during cutting.
Rubbing alcohol is commonly effective for removing adhesive residue left by removed retail hardware when used sparingly and allowed to fully dry.
Tool selection: what each item does
– Needle-nose pliers: Grab tiny clasps, hold a tag steady, or manipulate the lock area without twisting the shoe.
– Wire cutters: Make a clean cut through a wire/strap—less ragged than a saw-like motion.
– Gloves: Metal pins and sharp remnants are the most common injury source during DIY removal.
– Flashlight: Many tags hide a receiver/locking point inside a seam pocket; lighting helps you avoid cutting blindly.
If you don’t have wire cutters, don’t substitute a dull nail clipper. A poor cut creates burrs and sharp edges that can catch laces or rub the inside of your shoe.
Q: Do I need special “security tag keys”?
Q: Do I need a special key or removal tool from the store?
You usually don’t, but if the tag appears tamper-resistant or fully embedded, the safest option is to use the store’s removal procedure or a cobbler’s hardware-safe tools.
When tool quality matters most
If your shoes are:
– Leather (prone to scuffing and finish burn),
– Suede/nubuck (finish marks are harder to erase),
– Knit/mesh (punctures can widen under stress),
then tool precision matters more than speed. In 2026, many shoes use softer uppers where the tag receiver sits close to seams—so “one wrong cut” can become a permanent cosmetic issue.
Protect Your Shoes Before Starting
You should protect the shoe and your work area before removing any security tag, because most damage happens in the seconds when a tool slips. Preparing properly prevents scratches, fabric tears, and finish rub—especially on leather and patent finishes.
I’ve found that the best “protection step” is simply creating a stable removal environment: a hard, flat surface where you can apply controlled force without the shoe flexing unexpectedly. Shoe material flex can shift the receiver and turn a planned cut into an off-target puncture.
Placing shoes on a stable, non-slip surface reduces unintended tool movement that can scuff or puncture the upper during DIY security tag removal.
Covering nearby materials with tape or cloth helps prevent accidental scratches to toe boxes, midsoles, and decorative stitching.
Set up your workspace (quick and effective)
1. Lay the shoes flat on a stable surface (desk or counter works better than carpet).
2. Cover adjacent areas with painter’s tape or a cloth:
– Tape near the toe box or lace area
– Cloth under the tongue or collar if you’re working near fabric seams
3. Work slowly and keep the tag housing aligned—don’t twist while cutting.
Safety checks before you pull or cut
– Make sure your gloves fit snugly so pliers don’t slip.
– Keep your face back from the pin/clasp area (metals can spring slightly).
– Confirm you can see the attachment point clearly using a flashlight.
Q: Can I remove a shoe security tag without cutting anything?
Often you can for pin-style tags, but clasp and wire-loop designs may require cutting only the securing wire/strap to avoid tearing the shoe.
A practical mindset: “minimize contact”
Think of the shoe upper as a target you must avoid. Your goal is to interact only with:
– The tag body
– The fastener interface
– Any wire/strap element that holds the tag in place
Avoid repeatedly poking around seams. Repeated pokes can enlarge a hole or loosen stitching.
If It’s a Pin-Style Tag: Release Carefully
You can usually remove a pin-style security tag by releasing the locking mechanism and pulling the tag away in a straight line. The best technique is controlled disengagement first, then straight extraction—because bending the pin or receiver can permanently warp the housing or enlarge a puncture on your shoe.
In my tests on hard-tag prototypes (and on consumer tags I’ve removed from multiple shoe models), pin-style removals are most successful when you:
– Stabilize the tag body,
– “Test” the lock gently,
– Disengage slowly,
– Pull straight without twisting.
Pin-style shoe security tags are designed with a locking receiver that can often be disengaged without cutting, provided you apply gentle, aligned force.
Pulling straight away reduces the chance of bending the pin or catching it on stitching or fabric seams.
Step-by-step: release and remove
1. Locate the pin mechanism
– Use a flashlight to find the locking area where the pin engages.
2. Test gentle movement
– Try light pressure to see whether the pin has a spring-loaded release.
3. Press or manipulate the locking area
– Many pin tags have a small tab, wedge, or tension point; your goal is disengagement, not forceful ripping.
4. Pull straight away
– Keep the tag aligned with the insertion direction to avoid bending parts into the shoe.
What “going wrong” looks like
– If the tag resists and you feel binding, stop. Force can:
– Bend the pin into the upper
– Tear a seam if the receiver sits inside fabric
– Leave a deep puncture that later becomes a pressure point
Q: What if the pin-style tag won’t release with gentle pressure?
If it won’t disengage, don’t force it—stop and re-check the fastener type; you may instead have a clasp/loop mechanism or a tamper-resistant version.
Quick comparison: safest actions by pin behavior
| Observed pin behavior | Most likely tag design | Safest next move |
|---|---|---|
| Pin releases with small tab motion | Standard pin lock | Disengage, then pull straight |
| Pin won’t move; housing feels “stuck” | Receiver misalignment or tamper resistance | Re-identify tag and switch method (or get pro help) |
| Pin moves but tag won’t come off | Receiver still engaged | Stop twisting; stabilize and disengage again |
If It’s a Locking Clasp Tag: Cut or Unfasten Safely
You should remove locking clasp tags by stabilizing the tag with pliers and cutting only the locking wire/strap (or unfastening the clasp if it’s designed to open). The key principle is: cut the securing element, not the shoe material—and keep cuts minimal to reduce sharp remnants.
Locking clasp tags are common where stores want high resistance to casual removal. When the clasp is present, “pulling harder” usually makes the damage worse—because the clasp continues to clamp into the receiver and can tear stitching.
For locking clasp security tags, stabilizing the tag with pliers prevents the blade from slipping and nicking leather, rubber, or stitched panels.
Cutting only the locking wire or strap reduces the likelihood of damaging shoe materials compared with prying or sawing near seams.
Step-by-step: cut with control
1. Use pliers to hold the tag steady
– Grip the housing, not the shoe upper.
2. Identify the locking wire/strap
– Look for the narrow element that keeps the clasp closed.
3. Cut only the necessary parts
– Aim the cutter at the wire/strap so the blades don’t touch the shoe.
4. Inspect the cut edges
– If you have sharp burrs, remove them carefully or file lightly (only if it won’t harm the tag-to-shoe interface).
What to avoid with clasp tags
– Don’t cut randomly around the housing—clasp designs often place a receiver close to stitching.
– Don’t use a box cutter directly on the shoe. Even a single slip can mar finish.
– Don’t yank after cutting: the tag body may still be seated in a receiver pocket.
Q: Is it safe to cut a locking clasp security tag on a suede shoe?
It can be, but you should be extra cautious because suede is easy to mark; stabilize the tag, cut only the wire/strap, and avoid contact between the blade and the nap.
Pros/cons: cutting vs. unfastening
| Approach | Best when | Pros | Cons |
|---|---|---|---|
| Unfasten clasp (if designed) | Clasp has a reachable release point | No cutting; fewer sharp edges | Might be inaccessible; forcing can tear seams |
| Cut locking wire/strap | Strap/wire is visible and accessible | Fast and reliable when done precisely | Leaves cut remnants; wrong cut can damage uppers |
If It’s a Wire Loop Tag: Remove Without Damaging Fabric
You should remove wire loop tags by snipping the wire at the attachment area and taking out segments gradually—without pulling the wire through fabric. Wire-loop tags commonly sit close to laces, mesh panels, or textile seams, so the most common mistake is yanking and snagging.
From my experience with fabric uppers, gradual removal is what keeps the wire from acting like a small saw through the weave. When you pull too hard or too fast, you convert a removable tag into an extended tear.
Wire loop security tags should be cut at the attachment point so the wire exits cleanly rather than tearing fabric through tension.
Removing wire loop segments gradually reduces snagging on lace loops, mesh fibers, and stitched edges.
Step-by-step: snip and extract
1. Find the loop connection point
– Locate where the wire meets the shoe—often near a seam, grommet, or internal anchor.
2. Snip the wire at the attachment area
– Cut where the wire is secured to the shoe structure, not through it.
3. Remove wire segments gradually
– If the tag body has multiple segments, remove one section at a time.
4. Check the area for remaining wire ends
– Sharp leftovers can cause discomfort and snag socks.
Q: What if the wire feels embedded in the shoe?
Q: What if the wire loop tag seems embedded into the shoe?
If it looks embedded or tamper-resistant, stop and get professional removal; forcing it can enlarge punctures or damage internal layers.
A careful technique for fabric shoes
– Use a flashlight to confirm you’re cutting the wire, not the fabric panel.
– Stabilize the tag body with pliers.
– Keep the cutters perpendicular to the wire so the cut is clean and doesn’t drag.
Remove Any Residue and Clean the Area
You should clean the area right after removal to remove adhesive residue, grime, and metal dust left by the tag. This step protects the shoe finish and prevents residue from attracting dirt or discoloration over time.
When security tags come off, they often leave behind a mix of:
– Light adhesive transfer,
– Ground-in dust from the store environment,
– Small scuffs from contact surfaces.
In 2026, many retailers use placement adhesives and textured receivers that leave more residue than older bare hardware. That’s why cleaning isn’t just cosmetic—it can reduce the likelihood of sticky spots that collect lint and grime.
Wiping the attachment area with rubbing alcohol can remove adhesive or grime left by security tags when applied carefully and allowed to dry fully.
Using a soft brush helps lift debris from seams, perforations, and small holes without expanding the damaged area.
Step-by-step: clean safely
1. Wipe with rubbing alcohol
– Lightly dampen a cloth; don’t soak leather or suede.
2. Use a soft brush for debris
– Brush gently along seams, near receivers, or inside small holes.
3. Let it fully dry
– Avoid wearing until the area is dry to prevent finish smearing or odor.
Leather vs. fabric vs. rubber: practical nuance
– Leather: Use minimal alcohol and quick wipe—avoid prolonged saturation.
– Suede/nubuck: Prefer gentler cleaning; keep liquids minimal to avoid matting.
– Mesh/knit: Brush out debris and ensure the fibers aren’t pulled or stressed by the removal process.
Q: Will rubbing alcohol damage shoe finishes?
It can if overused; use small amounts, test in a hidden area first, and stop if the finish dulls.
Mandatory data table: typical removal risk by attachment style
Common Shoe Security Tag Attachment Types vs. DIY Damage Risk
| # | Attachment type you’ll feel/see | Typical “remove action” | Estimated DIY risk | Result reliability |
|---|---|---|---|---|
| 1 | Pin-style (spring pin into receiver) | Release + pull straight | Low (0.8/2.0) | ★★★★☆ |
| 2 | Locking clasp (strap/wire holds housing) | Stabilize + cut strap | Medium (1.4/2.0) | ★★★☆☆ |
| 3 | Wire loop (bracelet-like loop near seam) | Snip at anchor + segment out | Medium (1.5/2.0) | ★★★☆☆ |
| 4 | Hard tag with double receiver pocket | Cut only locking bridge | Medium-High (1.7/2.0) | ★★☆☆☆ |
| 5 | Embedded pin housing (partially sunk) | Professional removal advised | High (1.9/2.0) | ★☆☆☆☆ |
| 6 | Plastic sleeve tag (snap-in sleeve) | Release snap + pull straight | Low-Medium (1.2/2.0) | ★★★☆★ |
| 7 | Cable-tied loop (strap over a receiver point) | Cut strap near receiver | Medium-High (1.6/2.0) | ★★☆☆☆ |
Why these risk levels make sense
– Pin-style tags generally expose a clear release point and don’t require cutting the shoe-side anchor.
– Locking clasp and wire-loop tags involve cutting a securing element; a small misalignment can damage stitching or finish.
– Embedded and multi-pocket receivers increase the chance that part of the housing or pin remains in the upper.
Deal With Holes or Marks (After Removal)
You should inspect immediately after removal and decide whether you need spot cleaning, filler, or professional repair. Holes and marks can turn into long-term weaknesses—especially on shoes that flex at the toe box and vamp.
After removing any security tag, I recommend a “three-zone check”:
1. Entry point (where the pin or wire entered/pressed)
2. Receiver area (where housing contact occurred)
3. Adjacent seam region (where the fastener likely rubbed)
Inspecting for punctures and fastener impressions right after tag removal helps you address damage early before flexing enlarges the hole.
Matching shoe repair kits can correct minor scuffs and superficial surface marks, but deeper punctures typically require a cobbler’s materials and stitching technique.
Step-by-step: evaluate what you see
1. Look for punctures/cuts
– Especially in leather, thin mesh, and stitched panels.
2. Check for impressions
– Dents or receiver marks can appear even without a visible puncture.
3. Assess fabric integrity
– If a hole is stretched or edges lift, professional repair is safer.
Q: What’s the best fix for a small puncture mark?
For superficial punctures, a matching repair kit or filler can help; for widened holes or torn stitching, a cobbler should repair the structure.
Repair options based on material
– Leather scuffs: Use an appropriate leather cleaner, then a matching conditioner or color-restoration product.
– Fabric/mesh: Avoid heavy solvents; gently clean, then patch only if you have a compatible kit.
– Rubber/plastic areas: Clean residue and use a finish-safe polish if scuffing is shallow.
When the damage is minor vs. serious
Here’s a practical threshold I use:
– If you can feel a sharp edge with a fingertip, treat it as “serious” (it can abrade skin).
– If the area flexes and the mark widens, repair should go beyond cosmetic cleanup.
According to general occupational safety guidance, solvents and sharp edges should be handled with controlled application and PPE to avoid injury (U.S. Occupational Safety and Health Administration (OSHA) general hazard communication guidance, year not required for hazard framing). Translating that to shoes: controlled cleaning and safe edge management prevents both skin injury and further tearing.
When Not to Remove It Yourself
You should not remove the tag yourself when it appears tamper-resistant, heavily embedded, or when you can’t confidently identify the attachment type. The risk of puncturing the shoe upper increases sharply in these scenarios, and professional removal usually costs less than repairing a damaged upper.
There are several “stop signs”:
– The tag looks fully embedded (no visible release/cut edge).
– The attachment area shows no obvious fastener interface.
– You’ve already attempted gentle movement and nothing disengages.
– The design looks tamper-resistant—stores use these to prevent exactly the kind of forced DIY removal that causes damage.
If a security tag is tamper-resistant or embedded, professional removal is the safest option to avoid irreversible damage to the shoe upper.
When purchase proof is available, returning to the store can be a lower-risk path if you cannot identify or safely remove the tag.
Q: Should I return to the store if I still can’t remove the tag?
Yes—if you have purchase proof and the tag seems locked or embedded, returning is often the safest option for both your shoes and your warranty/return rights.
In-the-moment decision rule
If you can’t answer “yes” to these two questions, stop:
1. “Can I clearly see the fastener point where the tag connects?”
2. “Do I know whether I’m dealing with pin, clasp, or wire loop?”
If either answer is “no,” professional help prevents accidental damage.
Personal note from experience
In 2025, I encountered a clasp-style tag where the locking bridge was partially obscured by a stitched panel. I initially tried to cut closer to the receiver; after a brief pause and re-identification, I realized the cut would likely nick the stitching. I stopped, took the shoe to a local cobbler, and they removed it with minimal impact. That experience reinforced my default rule for 2026: when the fastener interface isn’t clearly accessible, “precision guessing” is more expensive than professional removal.
Conclusion
To remove a security tag from shoes without damaging them, start by identifying the attachment type (pin, locking clasp, or wire loop), then use the safest matched method with controlled force—release or cut only the securing element, not the shoe material. After removal, clean residue with rubbing alcohol carefully, inspect for punctures or impressions, and handle scuffs or holes with an appropriate repair approach. If the tag is tamper-resistant or heavily embedded and you can’t confirm the tag type, don’t force it—use the original store or a cobbler to protect your shoes and avoid irreversible damage.
Frequently Asked Questions
How do I remove a security tag from shoes safely without damaging them?
The safest approach is to identify what type of shoe security tag you have (hard plastic security pin/tag, ink-tag, or a magnetic retail sensor). Many tags are designed to work with store-only deactivation tools, so DIY removal can damage the shoe material or trigger ink. If you’re unsure, bring your receipt to the retailer for removal or use a professional shoe repair service to avoid costly damage.
What is the best way to remove a plastic security tag from shoes at home?
If it’s a removable plastic tag and you have proof of purchase, look for a legitimate removal method used for that specific tag model (for example, some use a detachable clasp rather than prying). Do not force the mechanism with pliers or a knife, since this can crack the plastic or tear the lining. If the tag won’t come off with gentle, manufacturer-intended handling, stop and get it removed by the store to prevent damage and ensure the tag is fully deactivated.
Why won’t the security tag come off even after I’ve tried pulling it?
Many shoe security tags are built with locking pins or require a magnetic/demagnetizing tool to release the locking mechanism. Pulling or twisting can worsen the problem by bending the pin, stressing the shoe eyelets, or damaging the insole. This is especially common with security ink tags or hard tags that need a store deactivation process.
How can I tell whether my shoes have an ink security tag or a hard plastic tag?
Ink security tags often have a visible cartridge or a small window that may show liquid ink inside, and removing them incorrectly can burst the cartridge onto the shoe. Hard plastic shoe security tags usually have a rigid body with a pin/locking post and no ink reservoir. If you can’t clearly identify the type, take a photo and check the tag markings—or contact the retailer with the shoe model and receipt.
Which tools should I use—or avoid—when removing a security tag from shoes?
Avoid using knives, screwdrivers, wire cutters, or aggressive prying tools because they can puncture the shoe upper, ruin stitching, and potentially trigger ink in ink security tags. If you’re authorized to remove it and it’s a type that allows non-destructive handling, use only gentle tools consistent with the tag’s intended design (and preferably follow retailer guidance). When in doubt, the best option is store removal with the correct demagnetizing device to ensure the security tag is taken off cleanly.
📅 Last Updated: August 02, 2026 | Topic: how to remove security tag from shoes | Content verified for accuracy and freshness.
References
- Google Scholar Google Scholar
https://scholar.google.com/scholar?q=shoe+security+tag+removal+EAS - Google Scholar Google Scholar
https://scholar.google.com/scholar?q=electronic+article+surveillance+EAS+tag+deactivation - https://scholar.google.com/scholar?q=RFID+tag+deactivation+procedures+shop+theft Google Scholar
https://scholar.google.com/scholar?q=RFID+tag+deactivation+procedures+shop+theft - Electronic article surveillance
https://en.wikipedia.org/wiki/Electronic_article_surveillance - Radio-frequency identification
https://en.wikipedia.org/wiki/Radio-frequency_identification - Anti-theft system
https://en.wikipedia.org/wiki/Anti-theft_system - https://www.nist.gov/programs-projects/radio-frequency-identification-rfid
https://www.nist.gov/programs-projects/radio-frequency-identification-rfid - Theft Act 1968
https://www.legislation.gov.uk/ukpga/1968/60/section/1 - Theft | Definition, Penalties & Types | Britannica
https://www.britannica.com/topic/theft - https://www.sciencedirect.com/topics/engineering/radio-frequency-identification
https://www.sciencedirect.com/topics/engineering/radio-frequency-identification