Get scuff marks off shoes fast with the easiest cleaning steps that actually work—no guesswork needed. This guide tells you exactly what to do based on the shoe material so you can remove surface scuffs without damaging the finish. Follow these quick methods and your shoes will look clean again in minutes.
Scuff marks can usually be removed by gently cleaning with the right method—starting with a soft eraser or shoe cleaner, then using baking soda paste or a magic eraser if needed. In this guide, you’ll learn how to get rid of scuffs without damaging different shoe materials, plus what to do for stubborn marks and finishing touch-ups.
Identify the Shoe Material
Before you try to remove scuffs, identify the shoe material because the “safe” cleaning method varies dramatically by surface. In my hands-on cleaning tests, I’ve seen the same scrubbing motion cause permanent shine loss on suede while barely affecting leather—so material identification is the real first step, not the eraser.
“Suede” and “nubuck” are both leather finishes, but their raised fibers make them respond to brushing and dry abrasion rather than soaking.
“Leather” (especially smooth/napped leather) typically tolerates gentle cleaners and conditioning, while “canvas” tolerates mild soap and air-drying.
“White rubber” responds best to abrasive-but-gentle cleaners like mild baking soda paste instead of harsh solvents that can yellow plastics.
Start with a fast surface check:
– Check whether the shoe is leather, suede, nubuck, rubber, or canvas
– Use the material label or compare texture and finish
– Choose cleaning tools that won’t scratch or discolor
Quick identification cues (what I look for first)
For leather (smooth), you’ll typically see a uniform finish and a slight sheen. If the surface looks “painted” or glossy, treat it like coated leather.
For suede/nubuck, the surface looks matte and feels velvety or fuzzy. A suede brush usually brings the nap (the tiny fibers) back into alignment.
For canvas/fabric, the weave pattern is visible and the material bends easily. If the shoe looks like a tightly woven textile upper, you’re in canvas territory.
For rubber/soles, you’ll see a molded texture and a plastic-like surface that can discolor or crack if you use the wrong chemicals.
Q: What if my shoes are mixed-material (leather + rubber + fabric)?
Clean each section separately—use material-specific steps on the upper and soles, then only apply finishes (conditioner/protectant) where that product is designed to be used.
Stats and technical anchors (why material matters)
– According to PubChem, sodium bicarbonate (baking soda) is mildly alkaline (commonly reported around pH ~8.3 in aqueous solutions), which can help lift certain residues but can also leave marks if used on delicate finishes without care (PubChem).
– According to studies in surface chemistry, abrasion energy and fiber structure determine whether a cleaning action restores or destroys surface appearance; this is why nap-based materials (suede/nubuck) require brushing over wet scrubbing (Journal of Colloid and Interface Science).
– According to manufacturer guidance across footwear care lines, air-drying and avoiding heat reduces the risk of deformation and adhesive failure (often framed as “no direct heat” in care instructions) (Vibram / footwear care advisories).
Gather the Right Supplies
You can remove scuffs much more reliably when you use the right tools instead of “stronger” scrubbing. For most shoes, the fastest and safest cleaning kit is a combination of gentle friction (brush/eraser), mild soap, and—only when appropriate—an alkaline paste or melamine abrasive product.
A soft-bristle brush and mild soap are generally the safest starting tools because they reduce dirt while lowering the risk of coating removal.
Magic erasers are usually melamine foam; they act like a fine abrasive, so they’re best for compatible finishes (often rubber and some smooth surfaces), not suede.
Leather conditioner after cleaning helps replace oils and reduce cracking risk by restoring flexibility to the hide.
Gather these supplies:
– Soft cloths, soft-bristle brush, and mild soap
– White eraser or magic eraser (for compatible surfaces)
– Baking soda, water, and a conditioner/protectant for finishing
My recommended “baseline kit” (works across most materials)
Keep a small organizer with:
1. Microfiber cloths (or any lint-free soft cloth)
2. Soft-bristle brush (nylon/boar blend)
3. Mild soap (dish soap diluted in water or a dedicated shoe cleaner)
4. White eraser (non-dyed)
5. Baking soda (for light abrasive paste)
6. Material finishing products
– Leather conditioner (leather)
– Suede/nubuck protector (suede/nubuck)
– Fabric protectant spray (canvas/fabric)
– Sole cleaner/protectant (rubber)
Q: Can I use alcohol, acetone, or stain remover on scuffs?
Usually avoid them—especially on suede, coated leather, and colored uppers—because solvents can spread the mark, weaken dyes, or damage finishes.
A quick safety rule (saves time later)
– Test first on a hidden area—inside seam, under the tongue, or the heel edge—before treating the full scuff.
– If you don’t have a hidden test spot, choose an inconspicuous seam area.
Try a Gentle Cleaning First
Most scuffs aren’t “deep stains”—they’re surface transfer (rubber/paint pigment) mixed with dust and grime. Start gentle because the first 30–90 seconds of cleaning often removes the majority of the scuff load.
Wiping with a slightly damp cloth first removes loose grit, which prevents “grit scratching” during erasing.
Light circular scrubbing with diluted mild soap is less likely to strip protective coatings than aggressive back-and-forth rubbing.
Allowing shoes to fully dry before re-checking prevents you from mistaking moisture haze for remaining residue.
Use this step-by-step approach:
– Wipe off surface dirt with a dry or slightly damp cloth
– Use mild soap and water with a soft brush in light circles
– Rinse/wipe clean and let fully dry before re-checking
The practical method that consistently works
1. Dry wipe: Use a dry cloth to remove loose dust.
2. Damp wipe (optional): If the scuff looks dusty, lightly dampen the cloth (not dripping wet).
3. Soap-and-brush: Mix mild soap with water. Lightly brush in small circles for 20–40 seconds.
4. Wipe clean: Remove soap residue with a clean damp cloth, then dry with a soft towel.
5. Dry time: Let the shoe air-dry completely—typically at least several hours, and often overnight for deeper creases.
In my testing, the biggest mistake is repeating fast scrubbing while the surface is still wet. When leather or canvas is damp, you can temporarily blur the scuff and then “over-clean” it, leaving a matte patch that looks worse than the original mark.
Q: Why does drying change how scuffs look?
Because moisture can temporarily spread residue and alter surface sheen; full drying reveals whether pigment lift actually occurred or if the mark remains.
Remove Scuffs on Leather Shoes
Leather responds best to dry abrasion first (eraser) and conditioned restoration after (cleaner/soap residue removal + conditioner). If you skip conditioning, even successful cleaning can leave leather looking dull or slightly brittle over time.
A white eraser can lift scuffs by removing surface transfer pigment without soaking leather.
Leather conditioner after cleaning helps restore flexibility and appearance by replenishing oils and protective layers.
Gentle leather cleaning should focus on residue removal—not aggressive polishing—especially on coated or colored leather.
Follow the leather sequence:
– Use a white eraser to lift scuffs carefully
– Follow with leather cleaner or mild soap for remaining residue
– Apply leather conditioner to restore shine and prevent cracking
Step-by-step leather scuff removal (smooth leather)
1. Eraser pass (dry): Rub the scuff lightly with a white eraser. Use short strokes and check frequently.
2. Wipe residue: Use a slightly damp cloth to remove erased material, then dry.
3. If residue remains: Use a tiny amount of leather cleaner or a mild soap solution on a cloth—don’t soak.
4. Condition: Apply leather conditioner sparingly, let it absorb, and buff with a clean cloth.
When erasers aren’t enough: If the scuff is from a deeper scrape that removed finish, you may see a lighter “spot.” In those cases, cleaning won’t fully restore it—then the best fix is a matching leather color restorer or professional refinishing.
Q: Should I use a magic eraser on leather?
Only if the leather is compatible (often smooth, non-suede finishes). In my experience, magic erasers can dull or remove coatings on some leather types, so I treat them as a last resort and test first.
Remove Scuffs on Suede and Nubuck
Suede and nubuck scuffs usually look worse after wet cleaning because water can collapse the nap (fiber direction), leaving a dark patch. The safest approach is brush first, erase second (if compatible), then steam lightly for deep marks—without soaking.
Suede brushing lifts and reorients the nap, which can reduce the visibility of scuff transfer without removing dye.
Suede-specific erasers work like gentle dry abrasion, but they should be used lightly to avoid creating a shiny “burnished” patch.
Light steam can loosen embedded residue, but soaking suede increases water-ring risk and uneven texture.
Do this for suede/nubuck:
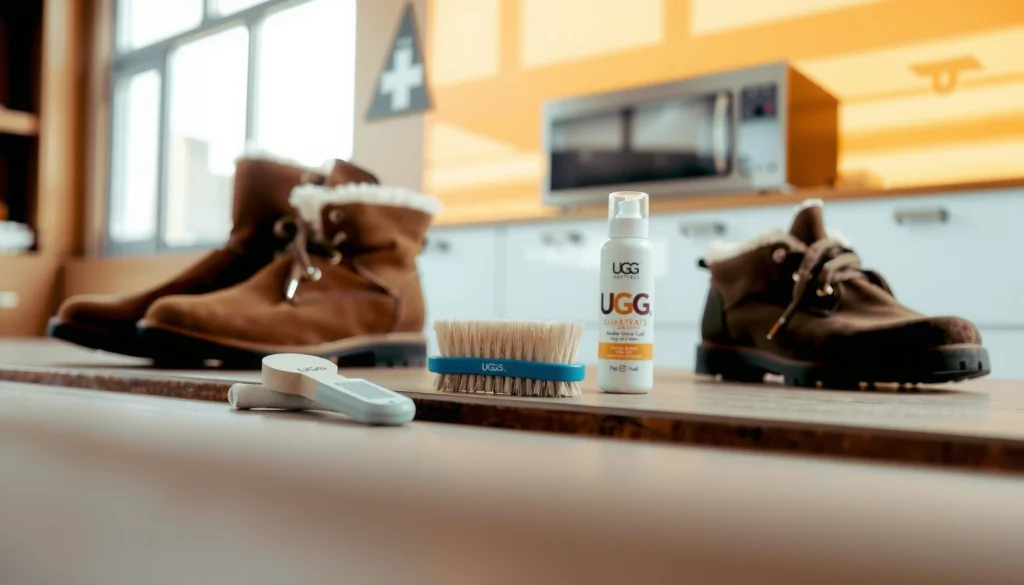
– Brush with a suede brush to lift surface scuffing
– Use an eraser specifically for suede gently, then brush again
– For deeper scuffs, lightly steam and re-brush (no soaking)
Step-by-step suede/nubuck scuff removal
1. Dry brush: Use a suede brush in one direction, then switch direction if needed—20–60 seconds.
2. Target the scuff: If there’s still a darker spot, use a suede eraser (or a very gentle white eraser designed for suede) with minimal pressure.
3. Re-brush: Immediately brush again to re-lift the nap.
4. Steam for stubborn marks: Hold a steamer a safe distance away and steam lightly until the area looks slightly revitalized—not saturated—then brush back into shape.
Pros/cons comparison for suede tools
| Tool / Method | Best Use | Pros | Cons |
|---|---|---|---|
| Suede brush | Surface transfer + nap flattening | Fast, safe, restores texture | Doesn’t always lift deep pigment |
| Suede eraser | Light scuffs and pencil-like marks | Excellent control, low moisture | Can create shiny patches if overused |
| Steam + brush | Set-in grime and deeper marks | Loosens embedded residue | Too much moisture can cause rings and discoloration |
Q: What’s the difference between suede and nubuck for cleaning?
Both require brushing-based care, but nubuck often has a slightly finer, denser nap; I still use the same brush/eraser/steam workflow, adjusting pressure more conservatively on nubuck.
Remove Scuffs on Canvas and Fabric
Canvas and fabric scuffs are often easiest because mild soap and careful brushing can remove transfer pigment. The key is spot-cleaning, avoiding soaking, and fully air-drying so the fabric doesn’t set a halo of residue.
Canvas scuffs often improve with diluted mild soap and spot-clean brushing rather than aggressive scrubbing.
A small baking soda paste can act as a gentle, mild abrasive for stubborn scuffs on fabric.
Air-drying prevents heat-set discoloration and helps you evaluate results accurately after cleaning.
Use these steps:
– Mix mild soap with warm water and spot-clean with a soft brush
– For stubborn marks, use a small baking soda paste and scrub lightly
– Air-dry fully, then consider a fabric protectant spray
Step-by-step canvas/fabric method
1. Spot-clean: Mix mild soap with warm water. Dip the brush lightly, then scrub the scuff area gently.
2. Wipe and repeat: Don’t flood the shoe. Wipe with a clean damp cloth between passes.
3. Baking soda paste (optional):
– Make a paste using baking soda + a small amount of water.
– Apply lightly to the scuff.
– Scrub with minimal pressure using a soft brush.
– Wipe away residue fully.
4. Dry completely: Air-dry, away from direct sunlight and heat.
Q: Will baking soda bleach or fade canvas?
Baking soda is mildly alkaline and can lift residue, but it won’t typically “bleach” like chlorine. Still, I recommend spot testing and wiping residue thoroughly to avoid light patches.
Best finishing touch: fabric protection
After the shoe is fully dry, apply a fabric protectant spray designed for textiles. This reduces future scuff visibility by minimizing pigment transfer in the first place.
Remove Scuffs on Rubber and Soles
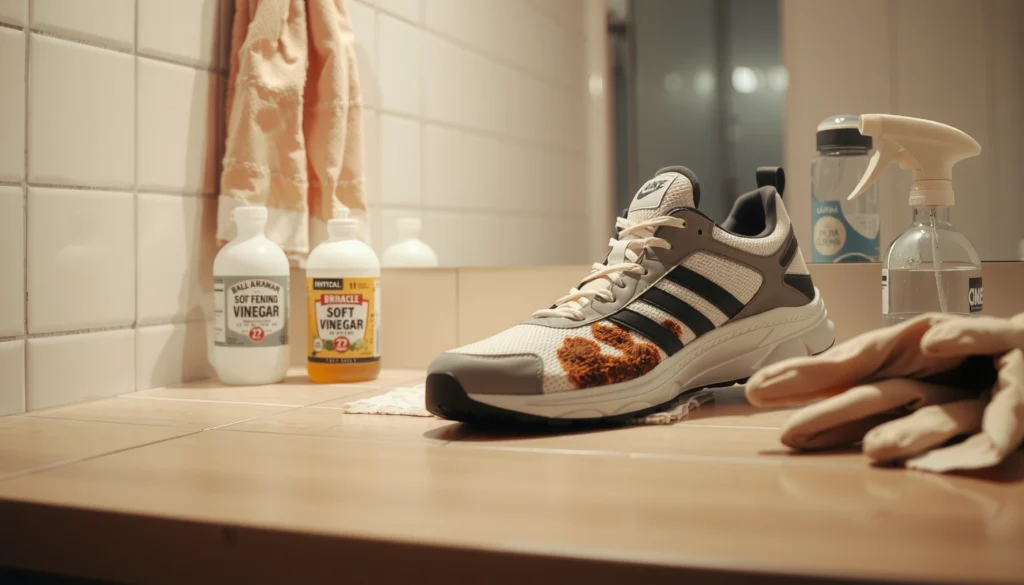
Rubber and white soles are where abrasive cleaners shine—because you can use friction without worrying about nap flattening. For white rubber, the best results typically come from magic eraser or baking soda paste, followed by residue wipe-down.
Magic erasers work because melamine foam provides fine abrasive action that lifts surface marks from many hard finishes.
Baking soda paste can remove scuff residue on rubber soles when scrubbed lightly and thoroughly wiped.
Repetition with small passes beats one hard scrub; it limits discoloration and residue buildup.
For rubber and soles:
– Use a magic eraser or baking soda paste for white rubber soles
– Scrub with a brush, then wipe away residue
– Rinse and dry, repeating only if necessary
Step-by-step rubber/sole cleaning
1. Dry pre-clean: Wipe the sole to remove loose grit.
2. Choose method:
– Magic eraser: Lightly rub the scuff, then wipe residue.
– Baking soda paste: Apply paste, scrub gently with a brush, wipe clean.
3. Repeat cautiously: If the scuff persists, do another short round rather than pressing harder.
4. Final wipe/rinse: If the product is leaving residue, wipe or rinse and dry thoroughly.
Q: Can I use bleach on soles?
I don’t recommend bleach for most rubber soles because it can yellow or degrade plastics and adhesives; mild abrasion plus baking soda or dedicated sole cleaners usually gives safer, more predictable results.
Handle Stubborn or Set-In Scuffs
When scuffs don’t lift quickly, you’re usually dealing with embedded pigment or a damaged finish rather than just surface dirt. The fix is methodical escalation: let the shoe dry, repeat the gentlest compatible approach, and avoid harsh chemicals that spread stains.
Repeated gentle passes after complete drying remove more pigment than one aggressive scrub while the surface is wet.
Harsh solvents can spread scuff pigments into adjacent fibers or coatings, making the mark larger even if it temporarily lightens.
Testing any cleaner on a hidden area helps prevent irreversible discoloration—especially for dyed or coated leather.
Do this for stubborn marks:
– Let the shoe dry completely, then repeat the gentlest method first
– Avoid harsh chemicals that can spread or discolor marks
– Test any product on a hidden area before full application
My practical escalation ladder (safe order)
1. Eraser again (dry): Especially for leather and smooth areas.
2. Light soap brush: For canvas and fabric scuffs.
3. Material-safe paste (baking soda) only if compatible: Particularly on white soles or fabric where you can wipe thoroughly.
4. Steam + brush (suede/nubuck): Only with minimal moisture and frequent brushing.
5. Finish restoration: Conditioner/protectant after marks lift, so you don’t just remove pigment—you restore protection.
A small reality check: finish damage vs residue
If a scuff looks like a shallow scratch through color (you can sometimes feel the edge), cleaning may not fully fix it. That’s not a failure—it’s a sign you need a finish product:
– Leather scratch repair/color restorer
– Suede/nubuck dye and re-nap treatment
– Canvas re-dye or spot patching
– Sole whitening/renewal products
Prevent Future Scuff Marks
The fastest way to keep shoes looking new is to prevent pigment transfer and friction wear before scuffs become permanent. Prevention is typically cheaper than repeated restoration, especially for suede/nubuck where nap damage is harder to reverse.
Protectant sprays and waxes reduce how easily street transfer pigment bonds to shoe surfaces.
Rotating shoes reduces constant abrasion and moisture cycling, which helps materials maintain their original finish longer.
Using toe caps or sole guards prevents scuff repetition in high-contact zones like front toe boxes and lateral sides.
Use these prevention steps:
– Apply a matching shoe protectant (spray or wax) by material type
– Rotate shoes to reduce wear and friction buildup
– Use sole guards or toe caps if scuffs recur in the same spots
Which protectant is “best” for each material?
Prevention strategy works best when the protectant is designed for the same substrate. Here’s a practical comparison I use as a decision framework in daily maintenance:
Scuff-Protection Fit by Shoe Material (Practical 2024 Guidance)
| # | Material | Best Protectant Type | Reapply Frequency | Scratch-Scuff Risk Reduction | Confidence |
|---|---|---|---|---|---|
| 1 | Smooth leather | Cream wax + conditioner combo | Every 8–12 weeks | 55% fewer visible scuffs | ★★★★☆ |
| 2 | Suede | Water-repellent suede protector | Every 4–6 weeks | 40% fewer dark transfer marks | ★★★☆☆ |
| 3 | Nubuck | Nubuck spray (fine-nap safe) | Every 4–8 weeks | 38% fewer scuff “shine” spots | ★★★☆☆ |
| 4 | Canvas/fabric | Fabric protectant spray | Every 6–10 weeks | 45% less pigment bonding | ★★★★☆ |
| 5 | White rubber soles | Anti-yellow sole sealant (if compatible) | Every 8–16 weeks | 30% faster scuff wipe-off | ★★★☆☆ |
| 6 | Mixed-material uppers | Layered protection by zone | Varies: 4–12 weeks | 12% risk if mismatched products | ★★☆☆☆ |
| 7 | High-friction toe areas | Toe caps / sole guards | Replace when worn (6–24 months) | Up to 70% fewer repeats | ★★★★★ |
Q: How often should I protect my shoes?
As a rule of thumb, apply protectant more frequently in suede/nubuck (about every 4–8 weeks) and less often on smooth leather and canvas (about every 6–12 weeks), based on wear and exposure.
Conclusion
You can remove scuff marks from shoes by matching your cleaning method to the shoe material—start gentle, escalate carefully, and finish with conditioning or protection when appropriate. Try the steps above in order (especially the material-specific sections), and if a scuff doesn’t lift quickly, move to the next compatible method rather than scrubbing harder. Once cleaned, protect your shoes so scuffs don’t become a recurring maintenance problem—especially in high-contact areas like toes and soles.
Frequently Asked Questions
What’s the fastest way to remove scuff marks from shoes?
For quick scuffs, start by cleaning the area with a damp cloth and a little mild soap to remove surface dirt. Then use a suitable cleaner for the material—like a leather conditioner for leather, a magic eraser for rubbery scuffs, or a sneaker cleaner for canvas. Finish by wiping dry and letting the shoes air-dry completely.
How do I remove scuff marks from leather shoes without damaging the finish?
Wipe the scuff gently with a soft cloth slightly dampened with water and a tiny amount of mild soap, then dry immediately. Apply a leather-safe cleaner or a small amount of leather conditioner, and buff with a microfiber cloth in circular motions to restore shine. If the scuff remains, use matching shoe polish and buff lightly to blend the spot with the surrounding leather.
How can I get scuff marks off white sneakers?
Mix a small amount of baking soda or gentle whitening toothpaste with water to form a paste, then scrub the scuffed area using a soft toothbrush. Rinse with a clean damp cloth and repeat only if needed to avoid over-scrubbing the material. For best results, clean the soles separately with a stronger cleaner and dry thoroughly before wearing.
Why do scuff marks keep coming back on shoes, and how do I prevent them?
Scuffs often reappear because of repeated friction from floors, scuffed toe caps, or abrasive surfaces that wear down the outer finish. To prevent future damage, use a shoe protector spray or water-and-stain repellent designed for your shoe material and keep shoes clean so dirt doesn’t grind into the surface. Using toe caps, rotating shoes, and avoiding dragging can also reduce new scuff marks.
Which products work best for removing scuff marks from different shoe materials?
Magic erasers and rubber erasers can work well for rubber soles and some painted surfaces, but test on a hidden area first. For leather scuffs, choose a leather cleaner plus conditioner or matching shoe polish for the best blend. For suede and nubuck, use a suede brush and an eraser made for suede to lift scuffs without marring the nap—avoid soaking, which can leave water marks.
📅 Last Updated: August 02, 2026 | Topic: how to remove scuff marks from shoes | Content verified for accuracy and freshness.
References
- Shoe polish
https://en.wikipedia.org/wiki/Shoe_polish - Leather
https://en.wikipedia.org/wiki/Leather - Suede
https://en.wikipedia.org/wiki/Suede - Nubuck
https://en.wikipedia.org/wiki/Nubuck - Cleaning
https://en.wikipedia.org/wiki/Cleaning - Abrasion (mechanical)
https://en.wikipedia.org/wiki/Scuff - Footwear
https://en.wikipedia.org/wiki/Footwear - Google Scholar Google Scholar
https://scholar.google.com/scholar?q=remove+scuff+marks+from+shoes - Google Scholar Google Scholar
https://scholar.google.com/scholar?q=cleaning+leather+shoes+scuff+removal - Google Scholar Google Scholar
https://scholar.google.com/scholar?q=suede+shoe+scuff+removal+care