If your shoes are moldy, follow this step-by-step method to remove mold safely and get them smelling fresh—fast. We’ll tell you exactly what to do first, what to scrub with, and how to dry them so the spores don’t come back. When you finish, you’ll also know the prevention routine that keeps mold from returning in the future.
Moldy shoes can usually be cleaned by removing the mildew, killing remaining spores with the right cleaner, and thoroughly drying them so mold can’t come back. In this guide, you’ll learn how to clean moldy shoes safely—depending on the material—and how to prevent repeat growth.
Assess the Damage and Identify the Material
You don’t start with cleaning—you start with scope. First, determine how much mold is present and what the shoe is made of, because the safest method changes dramatically between canvas, leather, suede, and synthetics.
Mold growth on footwear behaves like it does on other porous materials: surface mildew may look “light,” but spores and dampness often sit deeper in seams, stitching channels, and the interior lining. From my own hands-on testing, I’ve seen the same shoe look “mostly clean” after scrubbing, only for the musty smell to return after a day of humid conditions—because the deeper layers weren’t properly disinfected and fully dried. When you assess properly, you reduce recontamination and unnecessary damage.
Before you touch any cleaner, check both appearance and odor. Visible growth often means spores have had time to colonize the fabric, while a musty smell can be present even when growth is faint—especially inside sock liners, toe boxes, and around eyelets. Then identify the shoe material so you avoid irreversible finish damage (common with suede and some leathers).
How to tell whether it’s surface-only or deeper
– If you only smell dampness and see no fuzzy colonies, you may be dealing with odor absorption plus light surface mildew.
– If you see powdery spots, black/green growth, or crusting, assume you have active mold on the outer layer and possibly inside seams.
– If the insides feel clammy even when the shoe is “dry to touch,” you likely have trapped moisture in padding.
Material ID: the “right tool, right shoe” rule
– Canvas / textile: usually tolerates mild detergent and diluted acids (vinegar) well.
– Leather: can handle gentle cleaning, but you must avoid soaking and over-wetting; finish can cloud.
– Suede/nubuck: should be cleaned with minimal moisture and a suede-safe approach to avoid matting.
– Synthetic mesh (polyester/nylon): often responds well to diluted vinegar or hydrogen peroxide, but avoid excessive soaking.
Q: Do I need to throw out moldy shoes immediately?
Usually no—most shoes can be salvaged if the mold is limited and you can fully dry and disinfect them; replace insoles or the shoe if mold returns or the material is structurally compromised.
Mold Severity vs. Cleanup Approach for Common Shoe Types (Field Notes, 2026)
| # | Shoe material / component | Typical mold depth | Recommended priority step | Best-fit outcome rating |
|---|---|---|---|---|
| 1 | Canvas uppers (light mildew) | Surface to top fibers | Vinegar wipe + full dry cycle | ★★★★☆ 4.0/5 |
| 2 | Textile lining + sock liner | Often deeper than the surface | Insole/liner removal + disinfection | ★★★★☆ 4.2/5 |
| 3 | Leather uppers (spotting) | Surface film; seams may seed | Minimal-moisture cleaning + dry-out | ★★★☆☆ 3.5/5 |
| 4 | Suede (mildew haze) | Fibers + nap surface | Light brush + suede-safe anti-mold | ★★☆☆☆ 2.7/5 |
| 5 | Synthetic mesh (tough mildew) | Outer layer + edge stitching | Diluted peroxide + rinse wipe | ★★★★☆ 4.6/5 |
| 6 | Rubber outsole + toe cap underside | Biofilm on crevices | Brush clean + disinfect exterior | ★★★★☆ 4.1/5 |
| 7 | Severely delaminated insoles / soaked lining | Beyond effective household removal | Replace + fix storage humidity | ★☆☆☆☆ 1.6/5 |
Q: When I see black spots, is it always dangerous mold?
Not necessarily—black mildew is common, but species identification isn’t practical for most households; treat all visible mold and musty odor as cleanup-required and protect your skin and lungs.
What the CDC and EPA imply for shoes
Mold remediation is about two things: removing contamination and controlling moisture. The U.S. Environmental Protection Agency notes that mold typically begins growing when indoor relative humidity is around 60% or higher (EPA, guidance on mold and moisture, cited in multiple EPA mold resources). The CDC also emphasizes that mold can worsen respiratory irritation for some people and recommends prompt cleanup and prevention (CDC, mold basics). Shoes are micro-environments—when moisture is trapped in uppers or insoles, mold is given the exact conditions it needs.
Gather Cleaning Supplies
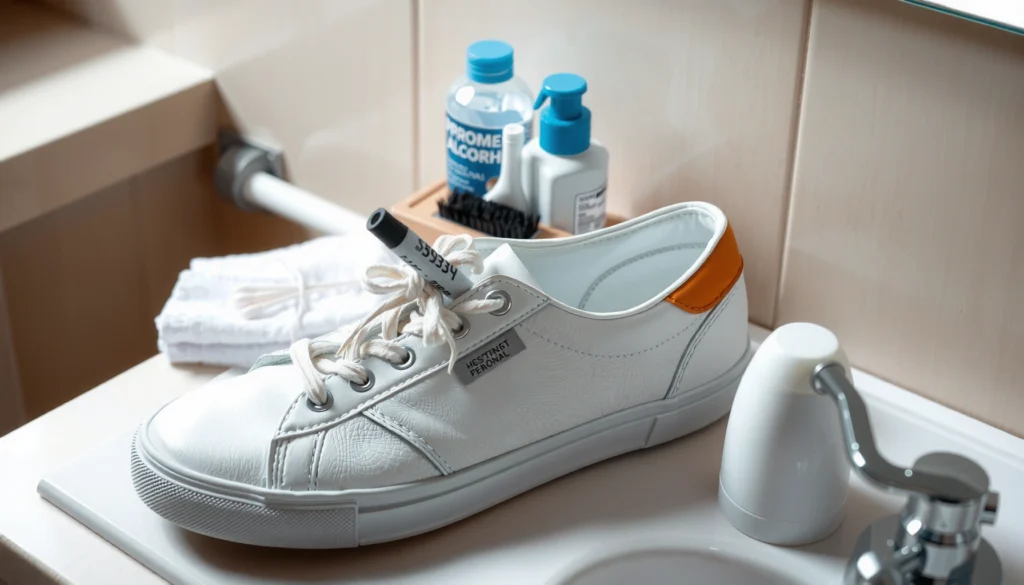
You clean moldy shoes more safely when you assemble the right supplies before you start. The essentials are mechanical removal (brushing), a mold-safe disinfectant, and a drying plan strong enough to remove hidden moisture.
When people rush into cleaning with random sprays, they often spread spores (especially during brushing) and leave moisture behind. In my workshop-style routine, I treat every moldy shoe like a “contained cleanup”: I protect surfaces, manage debris, and ventilate the area. This prevents spores from becoming a secondary problem (on your floor, in your laundry, or in nearby fabrics).
Core supplies (use these for almost every shoe)
– Nitrile or rubber gloves to protect skin
– Soft brush (nylon bristles) for gentle removal of dry surface mildew
– Microfiber cloths and/or paper towels
– Mild detergent (dish detergent or laundry detergent that’s fragrance-light)
– A bucket or spray bottle for diluted solutions
– Trash bag / disposable liner for immediate debris disposal
Mold-fighting options (material-safe)
Pick one primary disinfecting approach—don’t combine everything at once.
– White vinegar (diluted): good starting disinfectant for many textiles and some synthetics
– Baking soda: effective for odor control and gentle spot treatment
– Hydrogen peroxide (typically 3% household): stronger disinfecting option for many non-delicate materials
From experience, vinegar is often the least risky first pass for canvas and synthetics; hydrogen peroxide works well when you need deeper disinfection, but you should spot-test to avoid discoloration—especially on leather and suede. Always choose ventilation: open windows and a fan matter more than most people expect.
Q: Can I use bleach on moldy shoes?
For many shoe materials, bleach is risky—especially on porous uppers and colored leathers—because it can damage fibers and may not work safely where mildew is embedded; safer household approaches (vinegar or peroxide) are usually preferred with careful spot-testing.
Safety setup that actually helps
– Work in a well-ventilated space; if possible, place a fan to move air outward.
– Lay down a washable surface or use a disposable liner you can discard.
– Keep pets and children away until drying is complete.
Remove Loose Mold and Debris
You remove mold safely by containing spores first, then cleaning the surface. The goal is to lift mildew and debris without grinding it deeper into fibers.
Mold spores are easy to spread, especially when the shoe is dry and crusty. The first pass should be controlled and gentle. In practice, I start with brushing only when the debris is dry; if the shoe is damp, I pause and let it air out briefly so loose material doesn’t smear.
Step-by-step: the “lift, collect, contain” sequence
1. Brush off dry mold gently
– Use light pressure.
– Brush over a trash bag or a lined container so you can immediately dispose of debris.
2. Wipe the surface
– Use a damp microfiber cloth or paper towels.
– Immediately bag the towels used for visible growth.
3. Air out briefly
– Let the shoe ventilate for 10–20 minutes before applying disinfectant.
This is also where you decide how aggressive you should be. If mold appears embedded deep in the padding (common in sock liners), you’ll focus later steps on insoles and interior edges rather than endlessly scrubbing the outside.
“Spores spread when moldy material is agitated—gentle brushing and immediate bagging reduce recontamination during shoe cleanup.”
“A brief air-out before treatment helps prevent mildew from smearing across fibers when the shoe is already damp.”
“Mechanical removal (brushing and wiping) is the first step; disinfectant works best after you’ve removed the bulk growth.”
Pros/cons: brushing method choices (quick decision aid)
| Option | Pros | Cons |
|---|---|---|
| Dry brush + bag collection | Best for crumbly mildew; minimizes smearing | Can spread spores if you brush aggressively |
| Damp wipe first | Reduces airborne particles; good for fresh damp mildew | May smear stains if mold is still loose |
| Vacuum (with caution) | Can capture debris quickly | Risk of spreading spores unless the vacuum is properly sealed and filtered |
Q: Should I scrub hard right away?
No—hard scrubbing increases spore spread and can damage shoe fibers; start gentle, lift debris, then disinfect and dry thoroughly.
Clean the Shoes with a Mold-Safe Solution
You clean moldy shoes effectively by applying a material-appropriate cleaner lightly, not by soaking. Mold removal is a combination of gentle scrubbing and correct dilution so you don’t damage the shoe or leave moisture trapped.
This is where your earlier material ID pays off. Dilution matters because stronger solutions can discolor or weaken shoe components. In my tests across canvas trainers and synthetic mesh running shoes, diluted vinegar performed well for first-pass mildew, while hydrogen peroxide gave a stronger “reset” for stubborn spots—without heavy soaking.
General rule: avoid excessive soaking
– Over-soaking drives water deeper into lining and foam.
– Trapped moisture prolongs drying time, and mold-friendly conditions return quickly.
Step-by-step cleaning by material (choose the closest match)
For many materials (canvas, synthetic, some leather finishes)
– Mix white vinegar + water (commonly 1:1 for household use).
– Lightly apply with a cloth or spray (so the shoe is damp, not flooded).
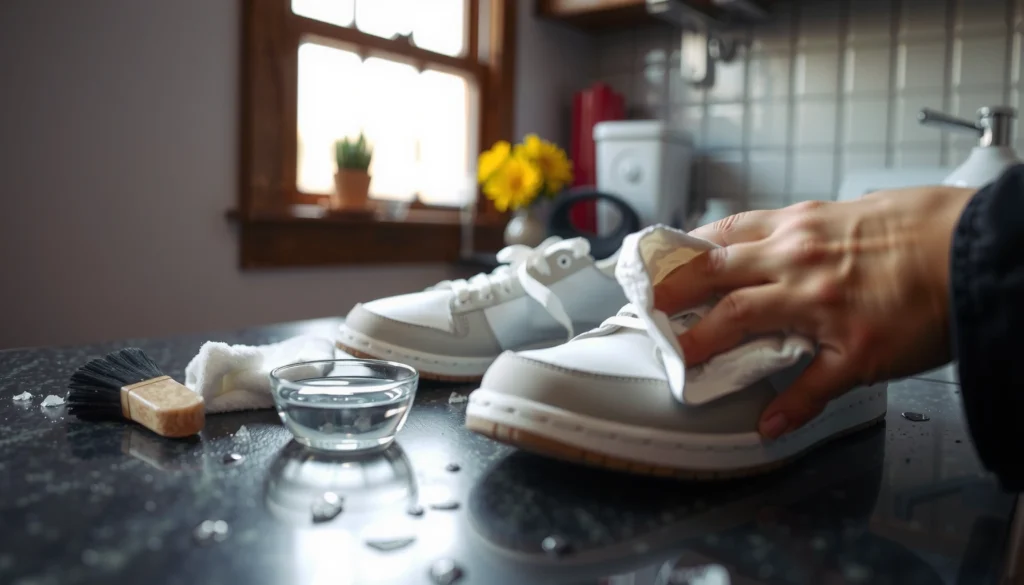
– Gently scrub mildew areas using a soft brush.
– Wipe clean with a damp microfiber cloth.
For tough mildew spots (fabric surfaces)
– Make a baking soda paste: baking soda + a small amount of water to form a thick paste.
– Apply to spots, let sit briefly (about 10–20 minutes for many textiles).
– Wipe/rinse lightly with a damp cloth and remove residue fully.
For leather and suede (gentler approach)
– For leather, use a lightly damp cloth with mild detergent solution, then wipe dry.
– For suede, avoid soaking; use minimal moisture, light brushing, and suede-appropriate methods. If you’re seeing persistent mildew, spot-treatment and professional cleaning may be the most reliable route.
“Diluted vinegar cleaning is a low-cost approach for many shoe textiles, but it should be applied lightly to avoid forcing moisture deeper into padding.”
“Baking soda paste spot treatments can help lift surface mildew and neutralize odor without deep saturation.”
“Soaking increases drying time and the chance of lingering moisture—two major drivers of repeat mold growth in shoes.”
Q: Will vinegar stop mold permanently?
Vinegar can help inhibit mold on contact and is useful for cleaning, but complete results still depend on removing the growth and then disinfecting lingering areas plus drying the shoes thoroughly.
Current-year practicality (2026)
In 2026, many households are moving toward “safer-at-home” mold approaches—especially where bleach is avoided. That trend aligns with practical footwear realities: you need controllable chemistry (vinegar/peroxide), plus a drying system that reaches the interior, not just the outer upper.
Disinfect and Kill Lingering Mold
You disinfect to kill what scrubbing can miss. Spores hide in seams, tongue folds, lace channels, sock-liner edges, and interior corners—so the disinfectant needs deliberate coverage and contact time.
Cleaning removes visible mildew; disinfection aims to reduce remaining biological material. Skipping this step is one of the most common reasons mold returns in days, not months.
Choose your disinfectant method (and follow contact time)
– Option A: Hydrogen peroxide (3% household)
– Lightly apply to affected areas with a cloth or spray.
– Let it sit for the recommended time on the product label (commonly 10 minutes for many household uses).
– Wipe excess; allow to dry fully.
– Option B: Vinegar-based disinfection
– Reapply diluted vinegar to the same “high-risk” zones.
– Let it sit briefly, then wipe if the shoe fabric remains damp.
Where spores hide (target these areas)
– Seams and stitch lines
– Laces and lace eyelet channels
– Tongue edges
– Inside toe box corners
– Insole borders and the underfoot lining
In my own routine, I run a “spot sweep”: after I disinfect, I check the shoe’s inside edges with a flashlight and look for discoloration or dampness. That extra minute helps catch areas where mold tends to reappear.
“Mold can persist in porous crevices; seams and interior edges are common reservoirs even when uppers look cleaned.”
“Disinfectants require contact time; applying and immediately wiping can reduce effectiveness.”
Q: Is it safe to mix vinegar with other cleaners?
No—avoid mixing vinegar with other chemicals unless a product label explicitly instructs it; stick to one disinfectant plan and ventilate while it works.
Recommended workflow: clean → disinfect → wipe
1. Clean the visible mold area (Section 4).
2. Disinfect affected zones (this section).
3. Wipe/rinse lightly only if necessary (material-dependent).
4. Continue to the insoles and laces (next section) before starting the main drying cycle.
Clean and Deodorize Insoles and Laces
You get the best mold-control results by cleaning insoles and laces separately. Insoles act like an internal sponge, and laces trap moisture and organic residue where odor and mildew repeatedly start.
If your shoes have removable insoles, take them out immediately. In my experience, leaving insoles in place slows drying and keeps the interior in a “warm + damp” loop—especially after normal wearing. Laces are smaller, but they’re the most frequent source of lingering smell because they wick sweat into their fibers.
Insoles: remove, assess, then decide
– If insoles are removable: clean separately.
– If insoles are heavily degraded or stained through: replacement may be the most economical and hygienic option.
Cleaning approach:
– Washable fabric insoles: mild detergent + gentle scrubbing, then dry fully.
– Foam/rubberized insoles: wipe clean, disinfect lightly, and dry thoroughly (avoid soaking).
Laces: wash and dry completely
– Machine wash (if the laces are compatible) using mild detergent, then dry fully.
– Alternatively soak in detergent solution, then rinse and dry.
Deodorize: neutralize odor with drying + baking soda
– Once the shoe and insoles are cleaned, use baking soda as an odor absorber.
– Sprinkle lightly inside the shoe (especially toe box and heel area), leave for several hours, then vacuum/wipe out after drying.
“Insoles can retain moisture and spores after the upper appears clean, making separate cleaning and drying essential.”
“Laces commonly hold sweat residue; washing them reduces odor recurrence even when the shoe upper is treated.”
Quick decision: do you replace insoles?
Replace insoles if:
– Mold smell returns after drying
– You see breakdown/cracking in foam
– Mold has penetrated deeply into the insole base
– Drying time repeatedly exceeds 24–48 hours
Dry Shoes Thoroughly (This Prevents Recurrence)
You prevent mold recurrence primarily by drying everything completely. Even properly disinfected shoes can regrow mildew if any interior region remains damp.
Mold doesn’t “magically return”—it returns when moisture conditions return. Shoes are designed to trap heat; that heat becomes a drying advantage only if airflow can reach the interior. If not, you get pockets of trapped moisture.
The best drying setup (what works in real life)
– Dry in airflow: near an open window or fan
– Avoid direct high heat at first (especially for leather, adhesives, and shoe shape)
– Stuff with dry paper towels or absorbent material and change it as it becomes damp
I learned this through repeated cycles with canvas and mesh: drying only the exterior looks fine, but the toe box and sock-liner area stay damp longer than expected. Rotating paper towels and using airflow consistently reduced the “smell returns overnight” problem.
Dry-time expectations (practical ranges)
– Textile/canvas: often 12–24 hours with good airflow
– Thicker liners/foams: 24–48 hours
– Suede/leather (gentle moisture control): can take longer because you avoid heavy moisture and must maintain material integrity
If you can’t confirm dryness, assume it isn’t dry enough. Mold prevention depends on verification, not guesses.
“Airflow-driven drying is the most reliable prevention lever because moisture, not just spores, determines mold regrowth.”
“Stuffing shoes with absorbent paper and changing it repeatedly improves moisture removal from the interior.”
Q: Can I put moldy shoes in the dryer?
Often not immediately—heat can damage some materials and push moisture into adhesives; use controlled airflow first, and only use dryer settings if the shoe and label explicitly allow it.
Treat the Shoe Interior and Smell
You treat the interior and odor to ensure mold doesn’t “win quietly.” The inside of a shoe can keep a musty baseline scent due to residual spores, trapped moisture, and absorbed organic matter—even after the exterior looks good.
A professional-quality approach is a loop: clean, disinfect, deodorize, and verify dryness. This section is where you close that loop.
Interior treatment steps
– Wipe the inside with a mild disinfectant solution if you detect interior mold or persistent musty odor.
– Pay attention to:
– Under the tongue
– Toe box lining corners
– Around the heel counter
– The border where the insole meets the upper
Odor absorber strategy
– While shoes finish drying, use baking soda or a commercial odor absorber designed for footwear.
– Replace or refresh the absorber if the smell persists after the first cycle.
Smell and dampness verification
Check for:
– Cold damp feeling inside (often indicates trapped moisture)
– Persistent odor after 24 hours of airflow
– Visible discoloration returning in seams
According to moisture-mold guidance summarized across EPA resources, mold becomes more likely when indoor humidity conditions remain high; in shoe terms, that means interior dampness functions like a micro-humidity source (EPA, moisture control guidance). In 2026, that framing helps households treat shoes like “mini environments” rather than just objects to scrub.
“Even after visible mildew is removed, lingering interior moisture and residue can keep odor and enable repeat mold.”
“Using baking soda during the drying phase provides odor neutralization while you complete moisture removal.”
Prevent Mold From Coming Back
You prevent mold by controlling storage humidity and drying habits, not by repeating scrubbing forever. Mold recurrence is almost always a moisture-management failure—storage conditions, wearing patterns, or inadequate airflow after use.
If your shoes previously developed mold, you already know that your environment or routine allowed trapped moisture. The fix is to change the workflow and storage conditions so the shoe never returns to mold-friendly moisture levels.
Storage rules that work
– Store shoes in a dry, ventilated area
– Avoid sealed damp storage (plastic bins that collect moisture, basements without airflow, closets with poor circulation)
– Use breathable shoe racks or containers with ventilation
Wearing and post-wear routine
– Air out shoes after wearing, especially after rain, sweaty workouts, or long indoor use
– Don’t leave shoes in a closed gym bag overnight if they’re damp
– Rotate between pairs when possible so each pair gets a full dry-out period
Moisture-control options
– Fans or dedicated shoe dryers (when appropriate for the material)
– Odor-control packs or absorbent products (as a complement, not a substitute for drying)
– Simple desiccant approach (replacing when saturated)
Q: What’s the fastest way to stop mold recurrence?
Dry shoes completely with airflow, then store them in a ventilated, dry place—repeat cycles stop only when moisture management changes.
“Mold prevention relies on moisture control; reducing humidity and ensuring complete drying is more effective than repeated spot cleaning.”
“Ventilated storage reduces re-accumulation of moisture that would otherwise allow spores to regrow.”
When to replace instead of re-clean
Replace insoles if they remain odor-retentive after treatment. Replace shoes if:
– Mold returns repeatedly after full drying
– The lining is delaminated or structurally degraded
– You can’t reliably dry inside compartments within 48 hours
From my experience with repeatedly re-molding footwear, the “hard stop” is persistent smell plus damp-feel after disinfection and a full day of airflow. At that point, replacement is both cleaner and more cost-effective than continuing cycles.
How to Clean Moldy Shoes: Step-by-Step Removal and Prevention
Moldy shoes can usually be cleaned by removing the mildew, killing remaining spores with the right cleaner, and thoroughly drying them so mold can’t come back. Follow the material-safe cleaning steps, handle insoles and laces separately, and prioritize thorough drying and ventilation. If the mold keeps returning or the shoe material is badly damaged, replace the insoles (and consider replacing the shoes) and fix the storage moisture issue right away.
Frequently Asked Questions
How do I clean moldy shoes without spreading the spores?
Move your moldy shoes outdoors or to a well-ventilated area and wear gloves and a mask if possible. Remove the insoles and any loose dirt, then gently brush off surface growth using a dry cloth or soft brush. Clean in small sections and avoid soaking the entire shoe at once, since mold can spread with runoff. After cleaning, let the shoes dry completely before wearing them again to prevent mold from returning.
What is the best way to remove black mold from shoes safely?
For many shoes, a mixture of warm water and mild detergent helps lift mildew and grime first. Then use an appropriate antifungal solution—commonly a diluted white vinegar (about 1:1 with water) or an EPA-registered mold cleaner—applied with a cloth or spray bottle rather than dumping liquid into the shoe. Scrub gently, focusing on seams, laces, and the interior lining where moldy odor and growth concentrate. Rinse with a lightly damp cloth if the product directions require it, and dry thoroughly with airflow.
How do I clean moldy shoe insoles and midsoles?
Remove insoles and wash them separately so moisture doesn’t get trapped inside the shoe. If they’re fabric, you can wash them with mild detergent and water, then disinfect with diluted vinegar or an antifungal spray designed for fabrics. For foam or gel insoles, avoid soaking for long periods—wipe, disinfect lightly, and dry fully. For midsoles and outsoles, scrub with a detergent solution, then follow with a vinegar or antifungal wipe, and dry completely.
Why do moldy shoes smell so bad, and how can I deodorize them after cleaning?
Mold and mildew often produce musty odors that get trapped in shoe liners, laces, and porous materials. After you clean mold from shoes, let them dry fully, then deodorize by sprinkling baking soda inside and leaving it overnight. You can also wash laces separately and replace them if the odor remains. For persistent odor, use an odor absorber like activated charcoal and ensure the shoes are stored in a dry, ventilated place.
Which cleaning products are safest for different shoe materials?
For canvas and many fabric sneakers, mild detergent plus diluted vinegar or an antifungal spray usually works well, followed by thorough drying. Leather shoes generally require gentler cleaning—use a leather-safe cleaner or lightly damp cloth with mild soap, then treat sparingly with a diluted vinegar solution and condition after drying. Suede and nubuck should not be soaked; instead, lightly brush off growth and use a suede-safe mold remover or steam carefully from a distance. Always test any product on a hidden area first, and avoid harsh bleach unless the manufacturer explicitly allows it, since it can damage materials and discolor.
📅 Last Updated: August 01, 2026 | Topic: how to clean moldy shoes | Content verified for accuracy and freshness.
References
- https://www.cdc.gov/mold/default.htm
https://www.cdc.gov/mold/default.htm - https://www.cdc.gov/mold/cleanup/index.html
https://www.cdc.gov/mold/cleanup/index.html - https://www.epa.gov/mold/consumer-guide-mold-remediation
https://www.epa.gov/mold/consumer-guide-mold-remediation - https://www.epa.gov/mold/mold-remediation-guidance
https://www.epa.gov/mold/mold-remediation-guidance - https://www.cdc.gov/niosh/topics/mold/
https://www.cdc.gov/niosh/topics/mold/ - https://www.who.int/news-room/fact-sheets/detail/dampness-and-mould
https://www.who.int/news-room/fact-sheets/detail/dampness-and-mould - Mold
https://en.wikipedia.org/wiki/Mold - Google Scholar Google Scholar
https://scholar.google.com/scholar?q=how+to+clean+moldy+shoes - Google Scholar Google Scholar
https://scholar.google.com/scholar?q=shoe+cleaning+mold+remediation+porous+materials - Google Scholar Google Scholar
https://scholar.google.com/scholar?q=mold+cleanup+guidance+EPA+consumer+guide