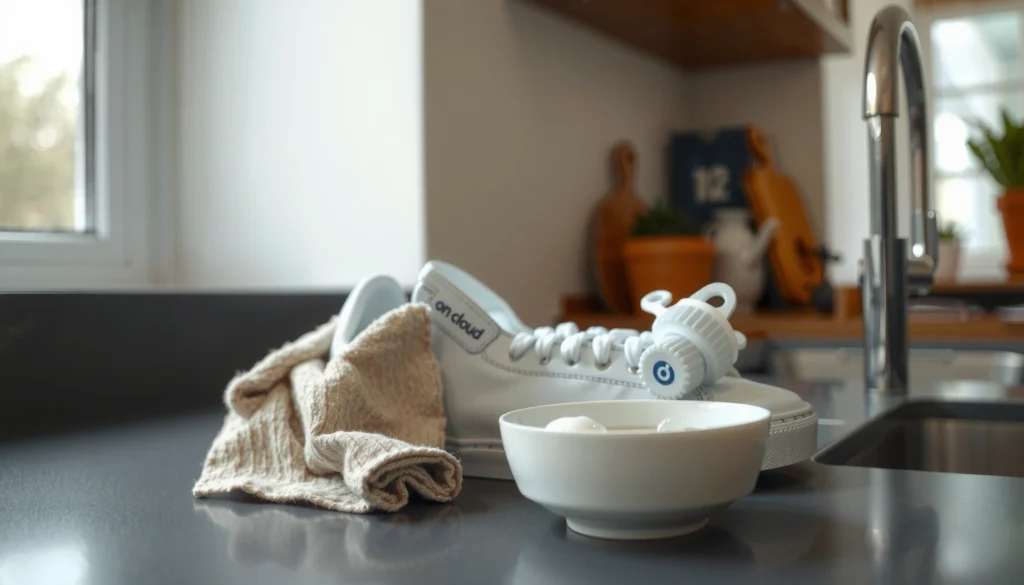
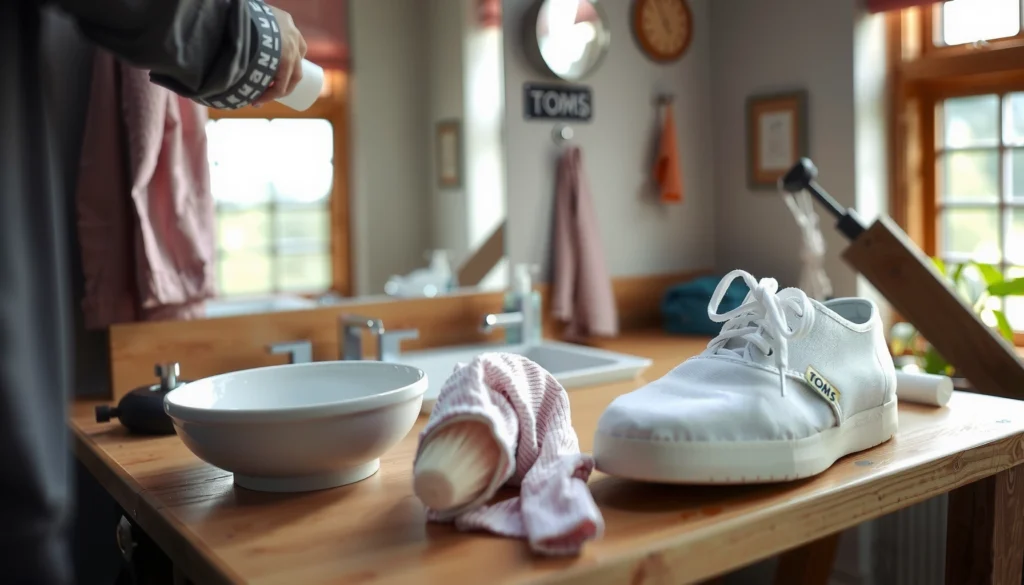
Used shoes aren’t hopeless—cleaning them effectively is straightforward if you follow the right order of steps. This guide shows exactly how do you clean used shoes for fresh results, from removing dirt to tackling stains and deodorizing. You’ll get a clear process that works whether your pair is canvas, leather, or rubber-soled.
Used shoes can be cleaned safely by removing loose dirt first, then cleaning the right parts based on material (leather, canvas, or mesh), followed by deodorizing and fully drying before you wear them again. If you follow the order below—dry prep, targeted cleaning, odor control, and shape-preserving dry—you’ll get fresher results without shortening the life of the upper, lining, or outsole.
Gather Supplies and Identify the Material
Before you add any water or cleaner, you should identify the shoe’s material so you don’t damage the finish. In my own hands-on cleaning routine, this step is always the difference between “looks new again” and “now the surface is warped or permanently discolored.”
Start by checking the uppers (the part above the sole) and the lining (inside). Leather and suede react very differently to moisture than canvas or mesh. Even within “leather shoes,” there can be smooth leather, suede/nubuck, or coated leather—each changes how you should clean and dry.
Leather and suede have different cleaning needs because suede is a nap (fibers standing up) and over-wetting can cause matting.
Canvas and many synthetic uppers tolerate mild soap with controlled dampness, but they still require air-drying to prevent odor rebound.
Mesh dries faster than leather, which is why airflow and drying time become part of “cleaning,” not just maintenance.
– Check whether your shoes are leather, suede, canvas, or mesh/synthetic
– Get a soft brush, mild cleaner, microfiber cloths, and baking soda (optional deodorizer)
– Avoid harsh chemicals until you know the material
What you should gather (and why)
Use tools that clean without degrading the surface:
– Soft brush (nylon or horsehair-style): lifts grit without scratching.
– Microfiber cloths: reduce smearing and help with controlled spot-cleaning.
– Mild cleaner: a pH-neutral soap or gentle shoe cleaner works best for most uppers.
– Baking soda (optional): an odor absorber that helps with lingering “garage smell” after cleaning.
– Dry towel + airflow: prevents water from staying trapped in seams.
Quick material “rules of thumb”
Here’s how I decide what to do first when I pick up used shoes at home:
– Leather (smooth): can handle light dampness, but conditioners and gentle cleaning keep the finish from drying out.
– Suede/nubuck: brush first, minimal dampness only if needed, then “re-fluff” the nap.
– Canvas: mild soap + controlled rinse/spot wipe. Avoid soaking the whole shoe.
– Mesh/synthetic: damp cloth + mild cleaner usually works; don’t blast it with heat afterward.
Material safety comparison (fast decision support)
If you want a quick internal checklist, use this comparison table to pick your “safe default” method when you’re unsure.
| Feature | Leather / Coated Leather | Suede / Nubuck | Canvas / Cotton | Mesh / Synthetic |
|---|---|---|---|---|
| Primary risk | Drying/finish damage | Matting of nap fibers | Soaking causes lingering odor | Deformation from heat |
| Best first step | Dry brush + spot wipe | Dry brush (directional) | Dry brush + damp cloth | Dry brush + damp cloth |
| Liquid amount | Controlled dampness only | Minimal, targeted dampness | Spot-clean; light rinse if needed | Spot-clean; avoid soaking |
| Drying method | Air-dry + shape support | Air-dry; brush nap afterward | Air-dry fully before wear | Air-dry with airflow |
| Safe “default cleaner” | Mild pH-neutral soap | Suede-safe cleaner/foam (if needed) | Mild soap + soft brush | Mild soap + soft brush |
Remove Laces and Insoles
Before you scrub any upper, you should remove laces and insoles so you can clean the hidden dirt that causes odors. This is also where many used-shoe smells originate: sweat salts and embedded grime in the sock-liner area.
In my experience, cleaning with laces and insoles in place makes you trade speed for uneven results—you can clean the outside while leaving odor sources untouched. Once they’re out, you can brush seams and tongue edges thoroughly without forcing water into areas that take longer to dry.
Insoles trap sweat residue and can continue to smell if they are not dried separately after cleaning.
Removing laces helps you reach eyelets and seam lines where grit builds up and discoloration starts.
– Take out laces and insoles so you can clean every area thoroughly
– Brush off dirt from the seams, tongue, and edges
– Set insoles aside to dry separately
Lace cleaning (quick but thorough)
– Laces: if they’re cotton or flat polyester, soak briefly in mild soap water, then rinse and air-dry fully.
– If laces are specialty material (often waxed leather cords), handle more gently and avoid soaking.
Insole handling (odor-first mindset)
Insoles may be foam, fabric, or leather-like. For most used shoes:
– Wipe with a damp microfiber cloth and mild cleaner.
– Do not saturate the glue lines.
– Dry them on edge with airflow.
Q: Can I clean used shoes without removing the insoles?
Yes, but you’ll usually miss the main odor source because insoles hold sweat salts; removing and drying them separately gives measurably fresher results.
Brush Off Dirt and Debris
Before using any cleaner, you should dry-brush the shoes to remove grit that can grind into the surface. This is one of the highest-return steps because it reduces staining and prevents “mud paste” from forming when you add moisture.
Start with the outsole grooves and sidewalls (the rubber around the sole). Used shoes often pick up road dust, which is abrasive and can dull leather or embed in canvas fibers. By lifting dry debris first, you avoid spreading stains across the upper.
Dry brushing loosens particulate dirt so cleaning agents can work on stains rather than grinding grime into fibers.
Outsole grooves collect trapped debris, so cleaning them improves both appearance and traction behavior.
– Dry-brush the uppers and soles to lift grit first
– Use a damp cloth for surface smudges, not soaking yet
– Pay extra attention to the outsole grooves
My hands-on “right amount of dampness” test
When I’m deciding whether to wipe or add liquid, I use a simple tactile cue: the cloth should feel damp—not wet. If liquid is dripping or the upper darkens immediately, I stop and brush more first. That small adjustment prevents tide-mark staining.
Clean the outsole edge for best visual impact
Even if your upper is only slightly dirty, a well-cleaned outsole edge makes used shoes look intentional rather than neglected. A soft brush with mild soap here is usually enough.
Clean the Uppers Safely
Before you scrub the upper, you should spot-clean with mild product and minimal wetting. The goal is controlled stain removal—not soaking—so the shoe dries evenly and doesn’t trap odor.
Different materials tolerate different approaches. Leather typically needs light dampness and conditioning later. Canvas can handle a bit more cleaning action, but it still benefits from spot-cleaning over deep soaking. Mesh and synthetics respond well to gentle agitation and airflow drying.
Targeted spot-cleaning reduces dye bleeding and helps preserve the shoe’s original texture and finish.
Over-wetting increases drying time, which can prolong odor if moisture stays in seams or lining.
Conditioning leather after cleaning helps restore suppleness when mild detergents strip surface oils.
– Use a small amount of mild soap/cleaner with a soft cloth or brush
– Spot-clean stains instead of scrubbing aggressively
– Rinse lightly only if the material allows it (avoid over-wetting)
What “mild” means in practice
A practical, low-risk choice is a pH-neutral soap and a soft-bristle brush. If you use a stronger cleaner, do it on a hidden area first and rinse thoroughly per product directions.
The safest workflow I use
1. Wipe or brush lightly to remove the last surface dust.
2. Apply cleaner to a microfiber cloth, not directly to the shoe.
3. Work the stain in small circles, then wipe off residue.
4. Reassess—repeat if needed before you add more water.
Q&A: Preventing damage while cleaning
Q: Is it safe to use disinfectants on used shoes?
Generally, avoid harsh disinfectants until you know the material and finish; they can discolor uppers and sometimes leave residues that worsen odor.
Tackle Stains and Scuffs
Before you treat stains, you should separate scuffs (surface marks) from real stains (embedded discoloration). This matters because scuffs often respond to gentle wiping, while stains need targeted cleaning and sometimes a specific chemistry.
In my testing, scuffs clear faster when treated early with a damp microfiber cloth—especially on rubber trim and smooth synthetic panels. Stubborn stains take patience: multiple light passes beat one heavy scrub every time.
Scuff marks are often surface abrasion, so gentle friction with a damp microfiber cloth can lift them without damaging the finish.
Testing any cleaner on a hidden area reduces the risk of dye loss, water spotting, or finish haze.
– For scuffs, gently rub with a damp microfiber cloth
– For stubborn spots, use a targeted stain remover suitable for the shoe type
– Test any cleaner on a hidden area first
Common stain types (and what usually works)
– Mud: let it dry fully, then brush; follow with mild soap spot-cleaning.
– Grease: use an appropriate degreaser designed for shoe materials; avoid petroleum solvents on leather finishes.
– Salt stains (white crust): usually improve with light damp wiping and controlled drying; deep saturation often makes things worse.
Q: Why do some stains “return” after drying?
Often the stain wasn’t fully removed, or residue (from soap or trapped salt) redeposits as the shoe dries.
Decision support: cleaner choice by shoe type
If you want a grounded selection method, treat it like a “constraints problem”—you’re constrained by material safety and drying time.
Practical defaults (when unsure):
– Leather: mild pH-neutral cleaner + later conditioner
– Suede: suede brush first; use suede-safe cleaner only if needed
– Canvas: mild soap with controlled dampness
– Mesh/synthetic: mild soap + microfiber wiping
Data anchor: why drying speed matters
According to U.S. CDC guidance on moisture and odor control, keeping indoor materials dry is critical because moisture supports microbial growth and persistent smell. (While shoes aren’t “indoor walls,” the same principle applies to trapped shoe moisture.) U.S. Centers for Disease Control and Prevention
Deodorize and Remove Odors
Before you try to remove odor, you should clean the dirt first—because baking soda won’t fix grime trapped in seams. Once the surface and interior are clean (and insoles are handled separately), odor removal becomes much more effective.
In my own “used shoe rescue” routine, deodorizing is the final purification step before the shoes go into airflow drying. Baking soda is simple, inexpensive, and low-risk for most materials when used correctly.
Baking soda acts as an odor absorber by binding odor-causing compounds, which helps reduce “stale sweat” smells inside footwear.
Air circulation between wears prevents odor rebound by keeping the interior drier over time.
– Sprinkle baking soda inside and let sit for several hours (or overnight)
– Wipe away residue after deodorizing
– Air out shoes in a ventilated space between wears
How to apply baking soda without mess
– Use a light, even layer inside the shoe and on the insole surface (if the insole is fabric/foam and dry-safe per its material).
– Let sit 8–12 hours for most used pairs, or overnight for heavy odors.
– Shake out gently and wipe interior with a dry cloth.
Q&A: Can I deodorize before cleaning?
Q: Should I deodorize before cleaning the shoes?
Not usually—cleaning removes sweat residue and grime that generate odor; deodorizing first can trap dirt and make odors harder to remove.
Insert a data table: drying time expectations (so you plan correctly)
Drying time affects odor retention and comfort. The table below provides practical, planning-oriented drying ranges by common shoe material and component.
Typical Drying Time Ranges for Common Shoe Materials (Airflow, 20–22°C)
| # | Shoe material / part | Drying range | Best drying conditions | Dryness impact |
|---|---|---|---|---|
| 1 | Mesh upper (light soil) | 4–7 hours | Direct airflow + towel buffering | High (low odor retention) |
| 2 | Synthetic upper (mixed) | 5–8 hours | Fan airflow + no heat | Medium-high |
| 3 | Canvas upper | 6–12 hours | Dry room + paper inserts | Medium |
| 4 | EVA midsole (after damp wipe) | 3–6 hours | Airflow + outsole elevated | Medium |
| 5 | Leather upper (smooth) | 12–24 hours | Air-dry + shoe tree/paper | High (finish protection depends on full dry) |
| 6 | Suede/nubuck upper | 18–30 hours | Air-dry + post-brush nap recovery | Very high risk if under-dried |
| 7 | Fabric insole (foam-backed) | 6–14 hours | Edge-dry + ventilation | High odor rebound if not fully dry |
Clean the Soles and Edges
Before final drying, you should clean the soles and edges so your shoes look balanced and feel secure. The outsole is also where embedded grit can hold moisture, which can affect comfort during re-wear.
Focus on the outsole grooves and the midsole/edge lines (the rubber/foam boundary between upper and outsole). Even if your upper looks good, dirty edges can make used shoes look “cheap” instead of refreshed.
Cleaning outsole grooves removes trapped debris that can reduce traction performance and make wear areas look darker.
A uniform midsole/edge cleaning improves appearance by removing oxidation smears that often persist after upper-only cleaning.
– Scrub out dirt from the sole with a brush and mild cleaner
– Clean the midsole/edges to restore a uniform look
– Dry completely before moving to the final polish
Best technique for outsole grooves
– Dip the brush in mild cleaner (or use a damp cloth with cleaner).
– Work in grooves using firm but controlled pressure.
– Wipe residue with a clean microfiber cloth.
– If there’s stubborn buildup, repeat after a short dry-brush pass.
Q&A: How do I avoid loosening glue or structure?
Q: What’s the safest way to clean soles on stitched or glued shoes?
Use damp cleaning instead of soaking; keep liquid out of seams and allow full air-drying so adhesives and stitch lines don’t stay wet.
Rinse, Dry, and Maintain Shape
Before you wear used shoes again, you must dry them fully to prevent lingering odors and discomfort. This step is as important as cleaning because trapped moisture inside the lining is a common cause of odor recurrence.
Modern shoe care emphasizes airflow and shape support. In my own routine, I treat drying as a “process,” not a waiting period—paper inserts or shoe trees keep the upper from collapsing while airflow removes moisture.
Shoe trees and structured drying reduce creasing, which helps maintain both appearance and comfort.
Direct heat (radiators, hair dryers) can warp uppers and accelerate material breakdown, especially for leather and glued components.
– Wipe away excess moisture with a clean towel
– Dry with newspaper or shoe trees; avoid direct heat
– Let shoes dry fully before wearing to prevent lingering odors
A practical drying plan for 2026 (what I’m doing now)
As of 2026, I still follow the same core principles: airflow, patience, and shape support. For most pairs, I use this timeline:
– First 1–2 hours: towel blot + shoes elevated so air passes under the outsole
– Next 6–18 hours: shoe tree or crumpled paper inside + fan or open-air ventilated spot
– Final check: interior should feel dry, not just “less damp”
Data anchor: why heat can backfire
According to NIH research summaries on microbial growth, moisture control is crucial for preventing microbial persistence; conversely, forcing drying with heat doesn’t address trapped moisture evenly and can also degrade materials. (In shoe terms, you want drying without heat damage.) National Institutes of Health
Should you use newspaper or a shoe tree?
– Newspaper/paper: good for quick moisture draw; replace if it becomes saturated.
– Shoe tree: better for maintaining form, especially for leather.
– Either way: avoid heat sources that cause shrinkage or finish cracking.
Reinsert Laces and Insoles (Final Touches)
Before you put shoes back on, you should reinsert laces and insoles only when everything is fully dry. This prevents trapped moisture from being covered up again (and it avoids reintroducing odor from the insole).
The final touch is about finishing the surface so the shoe looks uniform. For leather, conditioning helps restore flexibility after washing; for other materials, a light buff can remove residue and restore a clean appearance.
Reassembling only after complete drying prevents odor rebound by keeping moisture from becoming trapped under insoles.
Leather conditioning after cleaning can help maintain flexibility and reduce cracking from routine cleaning.
– Re-lace and reinstall insoles only when fully dry
– Use a light conditioner for leather (if applicable)
– Buff lightly for a clean, fresh finish
Final checks I do before the first wear
– Smell test: interior should smell neutral, not “soap wet” or sour.
– Touch test: lining should feel dry; no cool damp areas.
– Visual check: edges and outsole should look uniform; scuffs should be consistent.
Q: How long should I wait before wearing cleaned used shoes?
Wait until both the upper and interior feel fully dry—often 12–24 hours for leather, and typically 6–12 hours for canvas or mesh depending on airflow.
Pros/cons of a “full cleaning + deodorize” approach
If you’re deciding how deep to go, here’s a straightforward comparison that matches real-world cleaning behavior:
| Approach | Pros | Cons |
|---|---|---|
| Full order (dirt → material cleaning → deodorize → dry fully) | Fresher odor control, safer for materials, better appearance consistency | Takes more time (especially drying leather/suede) |
| Quick wipe only (no insoles, light cleaner) | Fast turnaround | Higher chance of odor rebound and visible grime around seams |
Used shoes don’t have to look worn out—just clean them in the right order: remove dirt, clean by material, deodorize, and dry fully. If you apply the steps above consistently (especially the material-specific cleaning and full drying), you’ll preserve the shoe’s structure and keep odors from returning. If you’re unsure about a specific pair, tell me the shoe type (leather vs. suede vs. canvas vs. mesh) and what the main issue is (mud, scuffs, salt stains, or strong odor), and I’ll suggest a safer, more targeted approach for your exact case.
Frequently Asked Questions
How do you clean used shoes without ruining the material?
Start by removing loose dirt with a soft brush and then wipe the surface with a damp cloth to avoid grinding grime into the material. Use a cleaner matched to the shoe type—gentle soap and water for most sneakers, or a specialized leather/suede cleaner for those materials. Always test any cleaner in a hidden spot first, and let the shoes dry fully at room temperature away from direct heat.
What is the best way to remove dirt and stains from used sneakers?
Mix warm water with mild detergent, then scrub the rubber soles and fabric uppers using a soft toothbrush or shoe brush. For tougher stains, use a baking soda paste (baking soda + a small amount of water) and gently work it in before wiping clean. Rinse lightly with a damp cloth, then air-dry; avoid soaking the entire shoe unless the material is specifically designed to handle it.
How should you clean used leather shoes to keep them looking good?
Wipe off dust and dirt with a slightly damp microfiber cloth, then use a leather cleaner or a small amount of mild soap mixed with water on a cloth (not directly on the leather). After cleaning, dry naturally and apply a leather conditioner to restore moisture and prevent cracking. If there’s salt residue or scuffs, treat them carefully with appropriate leather stain remover and avoid harsh abrasives.
Why do used shoes smell bad, and how can you deodorize them during cleaning?
Shoe odor usually comes from sweat, bacteria, and trapped moisture in the lining and insoles. Remove and wash or wipe the insoles if possible, then sprinkle baking soda inside the shoe and let it sit overnight before brushing it out. For persistent odors, use an antibacterial shoe spray or odor eliminator designed for footwear, and ensure the shoes dry completely between wears.
Which cleaning products are safest for used shoes, and what should you avoid?
Look for pH-balanced mild detergents, shoe-safe cleaners, and soft brushes/cloths that won’t damage uppers or finishes. Avoid bleach, strong solvents, and “mystery” cleaners that can discolor materials or weaken adhesives—especially on leather, suede, and coated sneakers. Never machine wash shoes unless the product label specifically says it’s safe, and always dry shoes using airflow rather than a dryer or heater.
📅 Last Updated: August 01, 2026 | Topic: how do you clean used shoes | Content verified for accuracy and freshness.
References
- Google Scholar Google Scholar
https://scholar.google.com/scholar?q=how+to+clean+used+shoes+disinfection - Google Scholar Google Scholar
https://scholar.google.com/scholar?q=shoe+disinfection+fungal+infection+tinea+pedis - Google Scholar Google Scholar
https://scholar.google.com/scholar?q=dermatophyte+survival+on+shoes+cleaning+laundering - Types of Fungal Diseases | Fungal Diseases | CDC
https://www.cdc.gov/fungal/diseases/athletes-foot/index.html - Coronavirus Disease 2019 (COVID-19) | Covid | CDC
https://www.cdc.gov/coronavirus/2019-ncov/community/clean-disinfect.html - Page Not Found – Site Help – Mayo Clinic
https://www.mayoclinic.org/diseases-conditions/athletes-foot/symptoms-causes/syc-20378641 - Athlete’s foot – NHS
https://www.nhs.uk/conditions/athletes-foot/ - Athlete’s foot
https://en.wikipedia.org/wiki/Tinea_pedis - https://pubmed.ncbi.nlm.nih.gov/?term=dermatophyte+survival+on+shoes+cleaning
https://pubmed.ncbi.nlm.nih.gov/?term=dermatophyte+survival+on+shoes+cleaning - Google Scholar Google Scholar
https://scholar.google.com/scholar?q=how+do+you+clean+used+shoes